简介
欢迎使用godot-rust文档!这是一本关于gdext(Godot 4的Rust绑定)的用户指南,目前仍在更新中。
如果你是Rust的新手,强烈建议在开始之前先了解一下Rust的官方文档。
你可能感兴趣的其他资源:
📘 最新的API文档
⚗️ Demo项目
📄 英文文档
📔 gdnative手册 (Godot3绑定)
godot-rust的目的
Godot 是一个功能齐全的游戏引擎,能够促进高效且有趣的游戏开发工作流程。它内置了GDScript作为脚本语言,并且官方也支持C++和C#绑定。其GDExtension机制允许集成更多语言,Rust就是其中之一。
Rust为游戏开发带来了现代化、健壮且高效的体验。如果你对可扩展性、强类型系统感兴趣,或者只是喜欢Rust这门语言,你可以考虑将其与Godot结合使用,享受两者的最佳特性。
另请参阅 理念以了解更多关于 godot-rust 背后的核心理念。
关于本项目
godot-rust是一个由社区开发的开源项目。它独立于Godot本身进行维护,但我们与引擎开发人员保持密切联系,促进思想的持续交流。这使我们能够在上游解决许多Rust的需求,同时也在多个方面改善了引擎本身。
当前支持的功能
有关实现状态的最新概况,请参考issue #24。
术语
为了避免混淆,以下是你在本书中可能遇到的一些名称和技术的解释:
- godot-rust: 包含Godot 3和4的Rust绑定以及相关工作的整个项目(书籍、社区等)。
- gdext (小写): GDExtension(Godot 4)的Rust绑定——本书的重点。
- gdnative (小写): :GDNative(Godot 3)的Rust绑定。
- GDExtension: Godot 4提供的C API。
- GDNative: Godot 3提供的C API。
- Extension: 扩展是一个动态的C库,由任何语言绑定(Rust、C++、Swift等)开发。它使用
GDExtensionAPI,并可以被Godot 4加载。
以下为错误术语:GDRust、gdrust、godot-rs。
入门
本章将引导你完成设置gdext并开发第一个应用程序。
除了本书,你还可以通过以下资源来了解更多关于该项目的信息:
- 官方API文档.
- 一个小型演示游戏 Dodge the Creeps.
设置
在开始编写 Rust 代码之前,我们需要安装一些工具。
Godot 引擎
虽然可以在没有 Godot 引擎的情况下编写 Rust 代码,但我们强烈推荐安装 Godot,以便快速获得反馈。 在本教程的其余部分,我们假设您已经安装了 Godot 4,并且可以通过以下方式之一访问它:
- 在您的
PATH设置godot4, - 或者设置一个名为
GODOT4_BIN的环境变量,包含 Godot 可执行文件的路径。
从预构建的二进制文件安装 Godot
您可以从官方网站下载 Godot 4 的二进制文件。 对于 Beta 版本和旧版本,您也可以查看 下载归档。
通过命令行安装 Godot
# --- Linux ---
# 对于 Fedora/RHEL.
dnf install godot

# Arch Linux.
pacman -Syu godot
paru -Syu godot

# 通过 Flatpak 安装,适用于所有发行版
flatpak install flathub org.godotengine.Godot


# --- Windows ---
# 可以通过 WinGet 安装 Windows 版本
winget install -e --id GodotEngine.GodotEngine
choco install godot
scoop bucket add extras && scoop install godot


# --- macOS ---
brew install godot
如果您打算使用不同于最新稳定版本的 Godot 版本,请阅读 选择 Godot 版本。
Rust
rustup 是安装 Rust 工具链的首选方式。它包含了编译器、标准库、Cargo(包管理器),以及如 rustfmt 或 clippy 等工具。请访问官网以下载适合您平台的二进制文件或安装程序。或者,您也可以通过命令行安装。
通过命令行安装 rustup
# Linux (distro-independent)
curl --proto '=https' --tlsv1.2 -sSf https://sh.rustup.rs | sh

# Windows
winget install -e --id Rustlang.Rustup

# macOS
brew install rustup
安装 rustup 和 stable 工具链后,您可以通过以下命令验证它们是否工作正常:
$ rustc --version
rustc 1.88.0 (6b00bc388 2025-06-23)
LLVM
过去,由于 bindgen 依赖于 LLVM,因此需要安装它。
不过,现在我们提供了预构建的构件,因此大多数用户只需添加 Cargo 依赖项并立即开始使用,这样做显著减少了初始的编译时间,因为 bindgen以前依赖了许多传递性的依赖项,导致体积较大。
如果您计划使用 api-custom 功能,例如拥有一个分叉的 Godot 版本或自定义模块,则仍然需要 LLVM。
但如果您只打算使用不同版本的 Godot API,则 无 需安装 LLVM;详情请见 选择 Godot 版本。
LLVM 的二进制文件可以从 llvm.org 下载。安装后,您可以检查 LLVM 的 clang 编译器是否可用:
clang -v
Hello World
本页面将向您展示如何开发自己的小型扩展库并从 Godot 加载它。 本教程深受官方 Godot 文档中 创建第一个脚本 的启发。 如果您对某些 GDScript 概念如何映射到 Rust 感兴趣,我们建议您跟随该教程。
目录
目录结构设置
我们假设项目使用以下的文件结构,其中 Godot 和 Rust 存放在不同的文件夹:
📂 project_dir
│
├── 📂 .git
│
├── 📂 godot
│   ├── 📂 .godot
│   ├── 📄 HelloWorld.gdextension
│   └── 📄 project.godot
│
└── 📂 rust
    ├── 📄 Cargo.toml
    ├── 📂 src
    │   └── 📄 lib.rs
    └── 📂 target
        └── 📂 debug
创建 Godot 项目
要使用 godot-rust,您需要安装 4.1 或更高版本的 Godot。您可以随时下载最新稳定版。您也可以下载开发中的版本, 但我们对开发中的版本 不提供官方支持,因此推荐使用稳定版。
打开 Godot 项目管理器,在 godot/ 子文件夹中创建一个新的 Godot 4 项目,并向新场景(scene)的中心添加一个 Sprite2D。
我们建议您跟随 官方教程,并在它要求您创建脚本时停下。
运行您的场景以确保一切正常。保存更改,并考虑使用 Git 版本控制来管理本教程中的每一步。
创建Rust crate
要使用 Cargo 创建一个新的 crate,打开终端,导航到目标文件夹,然后输入:
cargo new "{YourCrate}" --lib
其中 {YourCrate} 将作为您选择的 crate 名称的占位符。为了与文件结构保持一致,我们选择 rust 作为 crate 名称。使用 --lib 创建一个库(而非可执行文件),但是这个 crate 还需要一些额外的配置。
打开Cargo.toml文件并按以下方式修改:
[package]
name = "rust_project" # 动态库名称的一部分; 我们使用 {YourCrate} 作为占位符
version = "0.1.0"     # 你目前可以保持版本和版次不变
edition = "2021"

[lib]
crate-type = ["cdylib"]  # 将此crate编译为动态C库 (dynamic C library).
cdylib是 Rust 中不常见的 crate 类型。与构建应用程序(bin)或供其他 Rust 代码使用的库(lib)不同,我们创建了一个 动态 库,暴露 C 语言接口。
这个动态库将在运行时通过 GDExtension 接口加载到 Godot 中。
现在,使用以下命令将 gdext 添加到您的项目中:
cargo add godot
每次编写代码时,您可以像其他 Rust 项目一样使用 cargo 进行编译:
cargo build
根据您的设置,这应该至少输出一个编译后的库变体到 {YourCrate}/target/debug/目录
如果您希望跟进最新的开发(并承担相关风险),您可以直接在 Cargo.toml 的 [dependencies] 部分链接到 GitHub 仓库。
为此,请将:
godot = "0.x.y"
替换为:
godot = { git = "https://github.com/godot-rust/gdext", branch = "master" }
将 Godot 与 Rust 连接
.gdextension 文件
此文件告诉 Godot 如何加载您的编译后的 Rust 扩展。它包含动态库的路径以及初始化它的入口点(函数)。
首先,在 godot 子文件夹中的任何位置添加一个空的 .gdextension 文件。如果您熟悉 Godot 3,它相当于 .gdnlib。
在本例中,我们在 godot 子文件夹中创建了 res://HelloWorld.gdextension,并按以下方式填充:
[configuration]
entry_symbol = "gdext_rust_init"
compatibility_minimum = 4.1
reloadable = true

[libraries]
linux.debug.x86_64 =     "res://../rust/target/debug/lib{YourCrate}.so"
linux.release.x86_64 =   "res://../rust/target/release/lib{YourCrate}.so"
windows.debug.x86_64 =   "res://../rust/target/debug/{YourCrate}.dll"
windows.release.x86_64 = "res://../rust/target/release/{YourCrate}.dll"
macos.debug =            "res://../rust/target/debug/lib{YourCrate}.dylib"
macos.release =          "res://../rust/target/release/lib{YourCrate}.dylib"
macos.debug.arm64 =      "res://../rust/target/debug/lib{YourCrate}.dylib"
macos.release.arm64 =    "res://../rust/target/release/lib{YourCrate}.dylib"
[configuration]部分应照原样复制。
entry_symbol是指 gdext 暴露的入口点函数。我们选择"gdext_rust_init",这是 gdext 的默认值(但如果需要,可以配置)。compatibility_minimum指定了扩展所需的最低 Godot 版本。使用低于该版本的 Godot 打开项目将导致扩展无法运行。- 如果您要构建一个供他人使用的插件,请尽量将此版本设置得尽可能低,以实现更广泛的生态系统兼容性,但这可能会限制您使用的功能。
reloadable指定当编辑器窗口失去焦点后再恢复时,应重新加载扩展。有关更多详情,请参阅 Godot issue #80284。- 如果 Godot 崩溃,您可能需要尝试关闭或移除此设置。
[libraries] 部分应根据您的动态 Rust 库的路径进行更新。
- 左侧的键是 Godot 项目的构建目标平台。
- 请参考 GDExtension 文档 以了解更多可能的值。
- 右侧的值是你的动态库的文件路径。
res://前缀表示文件路径是相对于 Godot 目录 的,无论您的HelloWorld.gdextension文件位于何处。您可以在 Godot 资源路径 中了解更多。- 如果您记得文件结构,
godot和rust文件夹是兄弟关系,因此我们需要回到上一级目录才能访问rust。
- 如果您计划将项目导出到其他平台,您可以为多个平台添加配置。
至少,您需要为当前操作系统的
debug模式配置路径。
如果您通过 --target 标志或 .cargo/config.toml 文件指定了 Cargo 编译目标,Rust 库将被放置在包含目标架构的路径下,
而 .gdextension 文件中的库路径需要匹配。例如,对于 M1 Mac(macos.debug.arm64 和 macos.release.arm64),路径应为
"res://../rust/target/aarch64-apple-darwin/debug/lib{YourCrate}.dylib"。
extension_list.cfg
在您第一次打开 Godot 编辑器时,会自动生成一个名为 res://.godot/extension_list.cfg 的文件。
此文件列出了项目中注册的所有扩展。如果该文件不存在,您也可以手动创建它,仅包含到你的.gdextension 文件的 Godot 路径:
res://HelloWorld.gdextension
您的第一个 Rust 扩展
如果您没有遵循 推荐的 gdext 项目目录结构设置,将 rust/ 和 godot/ 目录分开,
而是将 Rust 源代码直接放入 Godot 项目中,那么请考虑在 Rust 代码根目录添加 .gdignore 文件。
这可以避免 Rust 编译器在 Rust 文件夹中生成扩展名模糊的文件(如 .obj),而 Godot 编辑器可能错误地尝试导入它们,从而导致错误并阻止您构建项目。
Rust入口点
如前所述,我们编译的 C 库需要暴露一个 入口点 给 Godot:一个可以通过 GDExtension 调用的 C 函数。 设置此项需要一些底层的 FFI 代码,gdext 为您抽象了这些细节。
在你的 lib.rs 文件中,将模板替换为以下内容:
#![allow(unused)]
fn main() {
use godot::prelude::*;

struct MyExtension;

#[gdextension]
unsafe impl ExtensionLibrary for MyExtension {}
}
这里有几个要点:
- 将
prelude模块从godotcrate 引入作用域。 该模块包含了 gdext API 中最常用的符号。 - 定义一个名为
MyExtension的结构体。它只是一个类型标记,没有数据或方法,您可以根据需要命名它。 - 为该类型实现
ExtensionLibrarytrait,并用#[gdextension]属性标记。
最后这一点声明了实际的 GDExtension 入口点,proc-macro 属性会处理底层的细节。
故障排除
首次设置时常会遇到一些问题。特别是与库无法找到或 gdext_rust_init 入口点符号缺失或无法解析相关的错误,通常是由于初始设置不正确。
以下是一些故障排除步骤,应该能解决大部分常见问题。
- 您是否运行了
cargo build? - 在
Cargo.toml, ,是否设置了crate-type = ["cdylib"]? - Godot 在打开你的项目时立即崩溃?** 在终端中运行
godot4 path/to/project.godot来查看错误输出。 - 在
my-extension.gdextension中,是否设置了entry_symbol = "gdext_rust_init"? 没有其他符号可以正常运行。 my-extension.gdextension中的路径设置是否正确?- 您确定吗?请仔细检查
/rust/target/debug/目录,确保.so/.dll/.dylib文件的名称是否拼写正确。 - 路径也必须相对于
project.godot所在的目录。通常情况下,应该是res://../rust/...。
- 您确定吗?请仔细检查
- 您是否编写了生成入口点符号所需的 Rust 代码?
- 请参阅上面的Rust入口点 部分了解如何操作
- 您的 gdext 和 Godot 版本是否兼容?请查看 此页面 以了解如何选择正确的版本。
- 如果您使用
api-custom,请确认您是否: - 将 Godot 设置在您的
PATH中为godot4, - 或者设置了名为
GODOT4_BIN,包含 Godot 可执行文件的路径? - 您的目录结构是否如下所示?如果是这样,寻求帮助时会更容易。
my-cool-project
├── godot
│   ├── project.godot
│   └── my-extension.gdextension
└── rust
    ├── Cargo.toml
    ├── src
    └── target
        └── debug
            └── (lib)?my_extension.(so|dll|dylib)
创建一个 Rust 类
现在,让我们编写 Rust 代码来定义一个可以在 Godot 中使用的 类。
每个类都继承一个现有的 Godot 提供的类(它的 基类 或简称 base)。 Rust 本身不支持继承,但 gdext API 在某种程度上模拟了它。
类的声明
在本例中,我们声明一个名为 Player 的类,它继承自 Sprite2D(一个node类型)。
这可以在 lib.rs 中定义,也可以在单独的 player.rs 文件中定义。
如果选择后者,请不要忘记在 lib.rs 文件中声明 mod player; 。
#![allow(unused)]
fn main() {
use godot::prelude::*;
use godot::classes::Sprite2D;

#[derive(GodotClass)]
#[class(base=Sprite2D)]
struct Player {
    speed: f64,
    angular_speed: f64,

    base: Base<Sprite2D>
}
}
我们来逐步解释。
godotprelude包含了最常用的符号。较少使用的类位于 engine 模块中。#[derive]属性将Player注册为 Godot 引擎中的类。 详细信息请参考 API 文档 中关于#[derive(GodotClass)]的说明。- 可选的
#[class]属性配置类的注册方式。在本例中,我们指定Player继承 Godot 的Sprite2D类。 如果不指定base键,则基类将隐式为RefCounted,就像在 GDScript 中省略extends关键字一样。 - 我们为逻辑定义了两个字段
speed和angular_speed。这些是普通的 Rust 字段,没有特别的地方。稍后会介绍它们的用途。 Base<T>类型用于base字段,它允许通过组合访问基类实例(因为 Rust 不支持继承)。这使得可以通过扩展 trait 访问两个方法self.base()和self.base_mut()T必须与声明的基类匹配。例如,#[class(base=Sprite2D)]与Base<Sprite2D>.- 名称可以自由选择,但
base是常见的习惯。 - 你 可以不 声明此字段。如果缺少此字段,则无法在
self内部访问基类对象。 例如,继承自RefCounted的数据包通常不需要此字段。
将 Player 类实例添加到场景时,请确保选择节点类型为 Player 而不是它的基类 Sprite2D。
否则,您的 Rust 逻辑将无法运行。稍后当您准备好进行测试时,我们将指导您进行更改你的场景。
如果 Godot 无法加载 Rust 类(例如,由于扩展中的错误),它可能会默默地将其替换为基类。 使用版本控制(git)检查 .tscn 文件中是否有你不想要的更改发生。
方法声明
现在,让我们添加一些逻辑。我们首先重写 init 方法,也就是构造函数。
这对应于 GDScript 的 _init() 函数。
#![allow(unused)]
fn main() {
use godot::classes::ISprite2D;

#[godot_api]
impl ISprite2D for Player {
    fn init(base: Base<Sprite2D>) -> Self {
        godot_print!("Hello, world!"); // 输出到 Godot 控制台

        Self {
            speed: 400.0,
            angular_speed: std::f64::consts::PI,
            base,
        }
    }
}
}
同样,我们逐一说明这里协同工作的部分:
#[godot_api]- 这告知 gdext 接下来的impl块是 Rust API,供 Godot 使用。 这里是必需的;忘记添加会导致编译错误。impl ISprite2D- 每个引擎类都有一个I{ClassName}trait,包含该类的虚函数以及一般用途的功能,例如init(构造函数)或to_string(字符串转换)。 此 trait 没有必需的方法。init构造函数是一个关联函数(其他语言中的“静态方法”),它以基类实例为参数并返回构造好的Self实例。 通常,基类实例只是传递给构造函数,构造函数是初始化其他字段的地方。在此示例中,我们为speed和angular_speed字段赋予初始值400.0和PI。
现在初始化完成后,我们可以继续添加实际的逻辑。我们希望持续旋转sprite,因此重写 process() 方法。
这对应于 GDScript 的 _process()。如果您需要固定的帧率,请使用 physics_process()。
#![allow(unused)]
fn main() {
use godot::classes::ISprite2D;

#[godot_api]
impl ISprite2D for Player {
    fn init(base: Base<Sprite2D>) -> Self { /* 如前所述 */ }

    fn physics_process(&mut self, delta: f64) {
        // 在 GDScript中,这将是:
        // rotation += angular_speed * delta

        let radians = (self.angular_speed * delta) as f32;
        self.base_mut().rotate(radians);
        // 'rotate' 方法需要一个 f32,
        // 因此我们将 'self.angular_speed * delta' 的f64 转换为 f32
    }
}
}
GDScript 使用属性语法;而 Rust 需要显式的方法调用。另外,访问基类方法 —— 例如本例中的 rotate(),
需要通过 base() 和 base_mut() 方法来实现。
在这一点上,您应该可以看到结果。编译代码并启动 Godot 编辑器。
右键单击场景树中的 Sprite2D,选择 “更改类型”
在弹出的 “更改类型” 对话框中找到并选择 Player 节点类型,它将作为 Sprite2D 的子节点出现。
现在保存更改,并运行场景。sprite应当以恒定的速度旋转。

启动 Godot 应用程序
不幸的是,在 Godot 4.2 之前,存在 GDExtension 限制,该限制阻止在编辑器打开时重新编译。
自 Godot 4.2 起,已支持热重载扩展。这意味着您可以重新编译 Rust 代码,
Godot 会自动更新变更,而无需重新启动编辑器。
但是,如果您不需要修改编辑器本身,您可以从命令行或您的 IDE 启动 Godot。
请查看 命令行教程 了解更多信息。
我们现在将为sprite添加一个translation组件,参照 Godot教程。
#![allow(unused)]
fn main() {
use godot::classes::ISprite2D;

#[godot_api]
impl ISprite2D for Player {
    fn init(base: Base<Sprite2D>) -> Self { /* as before */ }

    fn physics_process(&mut self, delta: f64) {
        // GDScript 代码:
        //
        // rotation += angular_speed * delta
        // var velocity = Vector2.UP.rotated(rotation) * speed
        // position += velocity * delta

        let radians = (self.angular_speed * delta) as f32;
        self.base_mut().rotate(radians);

        let rotation = self.base().get_rotation();
        let velocity = Vector2::UP.rotated(rotation) * self.speed as f32;
        self.base_mut().translate(velocity * delta as f32);

        // 或更详细的写法:
        // let this = self.base_mut();
        // this.set_position(
        //     this.position() + velocity * delta as f32
        // );
    }
}
}
结果应该是一个带有偏移的旋转sprite。

自定义Rust APIs
假设您想为 Player 类添加一些可以从 GDScript 调用的功能。为此,您需要一个单独的 impl 块,同样标注 #[godot_api]。
然而,这次我们使用的是 固有的 impl(即没有 trait 名称)。
具体来说,我们添加一个函数来增加速度,并添加一个信号,当速度发生变化时通知其他对象。
#![allow(unused)]
fn main() {
#[godot_api]
impl Player {
    #[func]
    fn increase_speed(&mut self, amount: f64) {
        self.speed += amount;
        self.base_mut().emit_signal("speed_increased", &[]);
    }

    #[signal]
    fn speed_increased();
}
}
#[godot_api]再次起到将 API 暴露给 Godot 引擎的作用。但这里有两个新属性:
API 属性通常遵循 GDScript 关键字的命名:class, func, signal, export, var等。
这就是 Hello World 教程的全部内容!接下来的章节将更详细地介绍 gdext 提供的各种功能。 我们建议按时间顺序学习,因为重要概念会在过程中逐步引入。
使用 Godot API
在这一章中,您将学习如何使用 Rust 代码与 Godot 引擎进行交互。我们将首先介绍内置类型和对象,然后深入探讨引擎 API 调用,并讨论与之相关的 gdext 特定惯例。
如果您有兴趣将自己的 Rust 符号暴露给引擎和 GDScript 代码,请查阅注册 Rust 符号这一章。不过强烈建议您先阅读本章,因为它介绍了重要的概念。
内置类型(Built-in types)
所谓的“内置类型”或简称“内置”(builtins)是 Godot 提供的基本类型。值得注意的是,这些并不是 类(classes)。 另请参见 Godot 中的基本内置类型。
目录
类列清单
以下是按类别列出的所有内置类型的完整清单。我们使用 GDScript 中的名称;在下面,我们将解释它们如何映射到 Rust。
简单类型
- 布尔:
bool - 数值:
int,float
复合类型
- Variant (能够容纳任何东西):
Variant - String 类型:
String,StringName,NodePath - 引用计数容器:
Array(Array[T]),Dictionary - Packed arrays:
Packed*Array对于以下元素类型:
Byte,Int32,Int64,Float32,Float64,Vector2,Vector3,Vector41,Color,String - Functional:
Callable,Signal
几何类型
- Vectors:
Vector2,Vector2i,Vector3,Vector3i,Vector4,Vector4i - Bounding boxes:
Rect2,Rect2i,AABB - Matrices:
Transform2D,Transform3D,Basis,Projection - Rotation:
Quaternion - 几何对象:
Plane
杂项
- 颜色:
Color - Resource ID:
RID
Rust 映射
gdext API 中的 Rust 类型尽可能以最接近的方式表示相应的 Godot 类型。例如,它们被用作 API 函数的参数和返回类型。它们可以通过 godot::builtin 访问,且大多数符号也包含在 prelude 中。
大多数内置类型都有 1:1 的对应关系(例如:Vector2f、Color 等)。以下列表显示了一些值得注意的映射:
| GDScript 类型 | Rust 类型 | Rust 示例表达 |
|---|---|---|
int | i642 | -12345 |
float | f642 | 3.14159 |
real | real (either f32 or f64) | real!(3.14159) |
String | GString | "Some string" 3 |
StringName | StringName | "MyClass" 3 |
NodePath | NodePath | "Nodes/MyNode" 3 |
Array[T] | Array<T> | array![1, 2, 3] |
Array | VariantArray或 Array<Variant> | varray![1, "two", true] |
Dictionary | Dictionary | dict!{"key": "value"} |
AABB | Aabb | Aabb::new(pos, size) |
Object | Gd<Object> | Object::new_alloc() |
SomeClass | Gd<SomeClass> | Resource::new_gd() |
SomeClass (nullable) | Option<Gd<SomeClass>> | None |
Variant (also implicit) | Variant | Variant::nil() |
请注意,Godot 的类 API 目前尚未提供空值信息。这意味着我们必须保守地假设对象可能为 null,因此在对象返回类型上使用 Option<Gd<T>> 而不是 Gd<T>。这通常会导致不必要的解包操作。
可空类型(nullable types)正在 Godot 方面进行研究 关于 Godot 端的空值问题。如果上游暂时没有解决方案,我们可能会考虑自己的变通方法,但这可能需要对许多 API 进行手动注解。
String 类型
Godot 提供 三种 string 类型: String (在 Rust 中是GString), StringName, 和 NodePath。
GString 用作通用字符串,而 StringName 通常用于标识符,例如类名或动作名称。StringName 的特点是构造和比较非常高效。4
在使用 Godot API 时,你可以将参数类型的引用传递给函数(例如 &GString),以及 Rust 字符串 &str 和 &String。
要在参数上下文中转换不同的字符串类型(例如 StringName -> GString),你可以调用 arg()。
#![allow(unused)]
fn main() {
// Label::set_text() takes impl AsArg<GString>.
label.set_text("my text");
label.set_text(&string);           // Rust String
label.set_text(&gstring);          // GString
label.set_text(string_name.arg()); // StringName
}
在参数上下文之外,From trait 用于字符串转换:GString::From("my string"),或者使用 "my_string".into()。
特别是,StringName提供了从C字符串字面量(如c"string")的直接转换,该特性在Rust 1.77中引入。
这可以用于 静态 C字符串,即那些在整个程序生命周期内保持分配的字符串。不要将其用于短生命周期的字符串。
数组和字典
Godot的线性集合类型是 Array<T>. 它是对元素类型T的泛型,可以是任何支持的Godot类型(通常是可以由Variant表示的任何类型)。
提供了一个特殊类型VariantArray,作为Array<Variant>的别名,当元素类型是动态类型时使用。
Dictionary 是一个键值对存储,其中键和值都是Variant。Godot目前不支持泛型字典,尽管这个特性正在讨论中.
数组和字典可以使用三个宏来构建:
#![allow(unused)]
fn main() {
let a = array![1, 2, 3];          // Array<i64>
let b = varray![1, "two", true];  // Array<Variant>
let c = dict!{"key": "value"};    // Dictionary
}
它们的API类似,但与Rust的标准类型Vec和HashMap并不完全相同。一个重要的区别是,Array和Dictionary是引用计数的,这意味着clone()不会创建一个独立的副本,而是另一个对同一实例的引用。
此外,由于内部元素以variant存储,它们不能通过引用访问。这就是为什么缺少[]操作符(Index/IndexMuttraits,而是提供了at()方法,它返回的是值。
#![allow(unused)]
fn main() {
let a = array![0, 11, 22];

assert_eq!(a.len(), 3);
assert_eq!(a.at(1), 11);         // 超出边界会panic。
assert_eq!(a.get(1), Some(11));  // 也返回值,而不是Some(&11)。

let mut b = a.clone();   // 增加 reference-count.
b.set(2, 33);            // 修改新引用。
assert_eq!(a.at(2), 33); // 原始 array 已经改变。

b.clear();
assert!(b.is_empty());
assert_eq!(b, Array::new()); // new() 创建一个空 array.
}
#![allow(unused)]
fn main() {
let c = dict! {
    "str": "hello",
    "int": 42,
    "bool": true,
};

assert_eq!(c.len(), 3);
assert_eq!(c.at("str"), "hello".to_variant());    // 没找到键会panic。
assert_eq!(c.get("int"), Some(42.to_variant()));  // Option<Variant>,同样是值。

let mut d = c.clone();            // 增加 reference-count.
d.insert("float", 3.14);          // 修改新引用。
assert!(c.contains_key("float")); // 原始字典已经改变。
}
要进行迭代,可以使用iter_shared()。这个方法的工作方式几乎与Rust集合的iter()相似,但其名称强调了在迭代期间你并没有对集合的唯一访问权,因为可能存在对集合的其他引用。
这也意味着你有责任确保在迭代过程中,数组或字典没有被不必要地修改(虽然应该是安全的,但可能会导致数据不一致)。
#![allow(unused)]
fn main() {
let a = array!["one", "two", "three"];
let d = dict!{"one": 1, "two": 2.0, "three": Vector3::ZERO};

for elem in a.iter_shared() {
    // elem 的类型是 GString.
    println!("Element: {elem}");
}

for (key, value) in d.iter_shared() {
    // key 和 value 的类型都是 Variant.
    println!("Key: {key}, value: {value}");
}
}
Packed arrays
Packed*Array 类型用于在连续的内存中高效地存储元素(“打包”)。
* 代表元素类型,例如 PackedByteArray 或 PackedVector3Array.
#![allow(unused)]
fn main() {
// 从切片创建
let bytes = PackedByteArray::from(&[0x0A, 0x0B, 0x0C]);
let ints = PackedInt32Array::from(&[1, 2, 3]);

// 使用Index和IndexMut操作符来获取/设置单个元素。
ints[1] = 5;
assert_eq!(ints[1], 5);

//  作为Rust shared/mutable slices访问。
let bytes_slice: &[u8] = b.as_slice();
let ints_slice: &mut [i32] = i.as_mut_slice();

// 使用相同类型访问数组的子范围。
let part: PackedByteArray = bytes.subarray(1, 3); // 1..3, 或 1..=2
assert_eq!(part.as_slice(), &[0x0B, 0x0C]);
}
与Array不同,Packed*Array使用写时复制(copy-on-write),而不是引用计数。当你克隆一个Packed*Array时,你会得到一个新的独立实例。只要不修改任何实例,克隆是便宜的。
一旦使用写操作(任何带有&mut self的操作),Packed*Array会分配自己的内存并复制数据。
脚注
PackedVector4Array 仅在Godot 4.3版本中可用;在 PR #85474中添加。.
Godot的int和float类型在Rust中通常映射为i64和f64。然而,某些Godot API更加具体地指定了这些类型的域,因此可能会遇到i8、u64、f32等类型。
字符串类型GString、StringName和NodePath可以作为字符串字面量传递给Godot API,因此在这个示例中使用了"string"语法。要为自己的值赋值,例如类型为GString,可以使用GString::from("string") 或 "string".
当从&str或String构造StringName时,转换相当昂贵,因为UTF-8会被重新编码为UTF-32。由于Rust最近引入了C字符串字面量(c"hello"),如果是ASCII字符串,现在我们可以直接从它们构造StringName。这种方式会更高效,但是会使内存在程序关闭之前一直保持分配,因此不要将其用于生命周期短暂的临时字符串。有关更多信息,请参阅API文档 和 issue #531。
对象
这章介绍了 Rust 绑定中最核心的机制 —— 从 Hello-World 示例到复杂的 Rust 游戏开发过程中,都会伴随你的一项机制。
我们说的是 对象 以及它们如何与 Godot 引擎进行集成。
目录
术语
为了避免混淆,每当我们提到对象时,我们指的是 Godot类的实例。这包括 Object(层级结构的根类)以及所有直接或间接继承自它的类:Node、Resource、RefCounted 等。
特别地,“类” 这个术语也包括那些通过 #[derive(GodotClass)] 声明的用户自定义类型,即使 Rust 从技术上讲称它们为结构体。同样,继承 指的是概念上的关系(如 “Player 继承自 Sprite2D”),而不是任何技术语言实现上的继承。
对象不包括像 Vector2, Color, Transform3D, Array, Dictionary等内置类型。尽管这些类型有时被称为“内置类”,它们并不是真正的类,我们通常不会将它们的实例称作 对象。
继承
继承是 Godot 中的一个核心概念。你可能已经通过节点层级结构了解过它,派生类在其中添加了特定的功能。这个概念同样扩展到了 Rust 类,在 Rust 中,继承通过组合来模拟。
每个 Rust 类都有一个 Godot 基类。
- 通常,基类是节点类型,即它(间接地)继承自
Node类。这使得可以将该类的实例附加到场景树中。节点是手动管理的,因此你需要将它们添加到场景树中或手动释放它们。 - 如果没有明确指定,基类是
RefCounted。这对于在不与场景树交互的情况下移动数据非常有用。一般来说,“数据集合”(多个字段组成,但没有太多逻辑)应使用 RefCounted。 Object是继承树的根类。它很少被直接使用,但它是Node和RefCounted的基类。仅当你真的需要时才使用它,因为它需要手动内存管理,而且更难处理。
你不能继承其他 Rust 类或 GDScript 中声明的用户定义类。
要在 Rust 类之间创建关系,请使用组合和特征。这个库在这方面仍在一些探索中, 因此抽象 Rust 类的最佳实践可能在未来会有所变化。
Gd 智能指针
Gd<T> 是你在使用 gdext 时最常遇到的类型。
它也是库提供的最强大和最灵活的类型。
具体来说,它的职责包括:
- 持有对 所有 Godot 对象的引用,无论它们是像
Node2D这样的引擎类型,还是你自己在 Rust 中定义的#[derive(GodotClass)]结构体。 - 追踪引用计数(reference-counted)类型的内存管理。
- 通过内部可变性安全地访问用户定义的 Rust 对象。
- 检测销毁的对象并防止未定义行为(如双重释放、悬空指针等)。
- 提供 Rust 和引擎代表之间的 FFI 转换,适用于引擎提供和用户暴露的 API。
以下是一些实际示例(即使你还没有完全理解它们,也不要担心,稍后会详细解释):
-
获取当前节点的子节点——类型推导为
Gd<Node3D>:#![allow(unused)] fn main() { // 获取 Gd<Node3D>. let child = self.base().get_node_as::<Node3D>("Child"); } -
加载场景并将其实例化为
RigidBody2D:#![allow(unused)] fn main() { // mob_scene 声明为类型 Gd<PackedScene> 的字段。 self.mob_scene = load("res://Mob.tscn"); // instanced 的类型为 Gd<RigidBody2D>。 let mut instanced = self.mob_scene.instantiate_as::<RigidBody2D>(); } -
自定义类中 传递了
Node3D的信号body_entered的信号处理函数:#![allow(unused)] fn main() { #[godot_api] impl Player { #[func] fn on_body_entered(&mut self, body: Gd<Node3D>) { // body 保存触发信号的 Node3D 对象的引用。 } } }
对象管理和生命周期
在处理 Godot 对象时,了解它们的生命周期以及它们何时被销毁是非常重要的。
构造
并非所有 Godot 类都能构造;例如,单例(singletons)并没有提供构造函数。
对于其他类,构造函数的名称取决于该类的内存管理方式:
- 对于引用计数的类,构造函数名为
new_gd(例如TcpServer::new_gd())。 - 对于手动管理的类,构造函数名为
new_alloc(例如Node2D::new_alloc())。
new_gd() 和 new_alloc() 函数分别通过扩展traits NewGd 和 NewAlloc 导入。
它们总是返回类型 Gd<Self>。如果你在类名后输入 ::,IDE 应该会建议正确的构造函数。
实例 API
一旦 Godot 对象被创建,你就可以访问它们与引擎交互。
查询和管理对象生命周期的功能直接可用在 Gd<T> 类型上。示例如下:
instance_id()获取 Godot 的对象 ID。clone()创建对同一对象的新引用。free()手动销毁对象。==和!=用于比较对象的身份。
类型转换
如果对象存在继承关系,你可以进行向上或向下转换。gdext 会静态确保转换是合理的。
向下转换使用 cast::<U>(),如果转换失败,方法会 panic。你也可以使用 try_cast::<U>() 返回一个 Result。
#![allow(unused)]
fn main() {
let node: Gd<Node> = ...;

// 我知道这个向下转换一定成功" -> 使用 cast()。
let node2d = node.cast::<Node2D>();
// 替代语法:
let node2d: Gd<Node2D> = node.cast();

// 可失败的向下转换 -> 使用 try_cast()。
let sprite = node.try_cast::<Sprite2D>();
match sprite {
    Ok(sprite) => { /* 访问转换后的 Gd<Sprite2D> */ },
    Err(node) => { /* 访问之前的 Gd<Node> */ },
}
}
向上转换总是无误的。你可以使用 upcast::<U>() 消耗值。
#![allow(unused)]
fn main() {
let node2d: Gd<Node2D> = ...;
let node = node2d.upcast::<Node>();
// or, equivalent:
let node: Gd<Node> = node2d.upcast();
}
如果你只需要引用,可以使用 upcast_ref() 或 upcast_mut().
#![allow(unused)]
fn main() {
let node2d: Gd<Node2D> = ...;
let node: &Node = node2d.upcast_ref();

let mut refc: Gd<RefCounted> = ...;
let obj: &mut Object = refc.upcast_mut();
}
销毁
通过 new_gd() 实例化的引用计数类会在最后一个引用超出作用域时自动销毁。
这包括已与 Godot 引擎共享的引用(例如,由 GDScript 代码持有)。
通过 new_alloc() 实例化的类需要手动内存管理。这意味着你必须显式调用
Gd::free() 或使用像 Node::queue_free() 这样的 Godot 方法来处理销毁。
访问销毁的对象是 Godot 中常见的 bug 来源,有时可能会导致未定义行为(UB)。
但在 godot-rust 中并非如此!我们设计了 Gd<T> 类型,即使在出现错误时也能保持安全。
如果你尝试访问已销毁的对象,Rust 代码将会 panic。虽然也有 API 可以查询对象是否有效,但我们 通常推荐修复 bug,而不是依赖防御性编程。
结论
对象是 Rust 绑定中的核心概念。它们表示 Godot 类的实例,无论是引擎类还是用户定义类。 我们已经看到如何构造、管理和销毁这些对象。
但是我们仍然需要 使用 对象,即访问它们类暴露的功能。下一章将深入探讨如何调用 Godot 函数。
调用函数
一般来说,gdext 库以尽可能符合 Rust 风格的方式映射 Godot 函数。有时,函数签名(signatures)会与 GDScript 略有不同,本文将详细介绍这些差异。
目录
Godot 类
Godot 类位于 godot::classes 模块中。一些常用的类,如 Node、RefCounted、Node3D 等,还会在 godot::prelude 中重新导出。
Godot 的大部分功能是通过类内部的函数暴露的。请随时查看 API 文档 以获取更多信息。
Godot 函数
像 Rust 中通常一样,函数分为 方法(带有 &self/mut self接收者)和 关联函数(在 Godot 中称为“静态函数”)。
要访问 Gd<T> 指针上的 Godot API,只需直接在 Gd对象上调用方法即可。这是因为 Deref 和 DerefMut trait,它们通过 Gd 为你提供对象引用。
在 后续章节 中,我们还将看到如何调用在 Rust 中定义的函数。
#![allow(unused)]
fn main() {
// Call with &self receiver.
let node = Node::new_alloc();
let path = node.get_path();

// Call with &mut self receiver.
let mut node = Node::new_alloc();
let other: Gd<Node> = ...;
node.add_child(&other);
}
方法是否需要共享引用(&T)或可变引用(&mut T)取决于该方法在GDExtension API中的声明方式(是否为const)。请注意,这种区分仅为信息性的,不涉及安全性问题,但在实践中,它有助于检测意外的修改。技术上,你总是可以通过Gd::clone()创建另一个指针。
关联函数(在GDScript中称为“静态函数”)是直接在类型本身上调用的。
#![allow(unused)]
fn main() {
Node::print_orphan_nodes();
}
单例(Singletons)
单例类(不要与有时也被称为单例的 自动加载 混淆)提供了一个singleton()函数来访问唯一的实例。方法在该实例上调用:
#![allow(unused)]
fn main() {
let input = Input::singleton();
let jump = input.is_action_pressed("jump");
let mouse_pos = input.get_mouse_position();

// 可变操作需要使用mut:
let mut input = input;
input.set_mouse_mode(MouseMode::CAPTURED);
}
关于是否直接在单例类型上提供方法,而不需要调用singleton(),有讨论。然而,这样做会丢失可变性信息,并且还有一些其他问题。
默认参数
GDScript支持参数的默认值。如果没有传递参数,则使用默认值。作为例子,我们可以使用AcceptDialog.add_button()。GDScript签名如下:
Button add_button(String text, bool right=false, String action="")
因此,你可以在GDScript中以以下方式调用:
var dialog = AcceptDialog.new()
var button0 = dialog.add_button("Yes")
var button1 = dialog.add_button("Yes", true)
var button2 = dialog.add_button("Yes", true, "confirm")
在Rust中,我们仍然有一个基本方法AcceptDialog::add_button(),它没有默认参数。
它可以像平常一样调用:
#![allow(unused)]
fn main() {
let dialog = AcceptDialog::new_alloc();
let button = dialog.add_button("Yes");
}
因为Rust不支持默认参数,我们必须通过不同的方式模拟其他调用。我们决定使用构建者模式。
在gdext中,构建器方法以 _ex后缀 命名。这样的一个方法接收所有必需的参数,就像基本方法一样。它返回一个构建器对象,提供按名称设置可选参数的方法。最终,done()方法结束构建并返回Godot函数调用的结果。
例如,方法AcceptDialog::add_button_ex()。以下这两种调用完全等效:
#![allow(unused)]
fn main() {
let button = dialog.add_button("Yes");
let button = dialog.add_button_ex("Yes").done();
}
你还可以通过构建器对象的方法传递可选参数。只需指定所需的参数。 这里的优点是,你可以使用任意顺序,并且跳过任何参数——不同于GDScript,在GDScript中只能跳过最后的参数。
#![allow(unused)]
fn main() {
// GDScript: dialog.add_button("Yes", true, "")
let button = dialog.add_button_ex("Yes")
    .right(true)
    .done();

// GDScript: dialog.add_button("Yes", false, "confirm")
let button = dialog.add_button_ex("Yes")
    .action("confirm")
    .done();

// GDScript: dialog.add_button("Yes", true, "confirm")
let button = dialog.add_button_ex("Yes")
    .right(true)
    .action("confirm")
    .done();
}
动态调用
有时你可能想调用那些在Rust API中没有暴露的函数。这些可能是你在自定义GDScript代码中编写的函数,或来自其他GDExtensions的方法。
当你没有静态信息时,你可以使用Godot的反射API。Godot提供了Object.call()等方法,在Rust中通过两种方式暴露。
如果你期望调用成功(因为你知道你编写的GDScript代码),可以使用Object::call()。如果调用失败,这个方法会panic并提供详细的消息。
#![allow(unused)]
fn main() {
let node = get_node_as::<Node2D>("path/to/MyScript");

// Declare arguments as a slice of variants.
let args = &["string".to_variant(), 42.to_variant()];

// Call the method dynamically.
let val: Variant = node.call("my_method", args);

// Convert to a known type (may panic; try_to() doensn't).
let vec2 = val.to::<Vector2>();
}
如果你想处理调用失败的情况,可以使用 Object::try_call()。这个方法返回一个 Result ,其中包含结果或CallError错误。
#![allow(unused)]
fn main() {
let result: Result<Variant, CallError> = node.try_call("my_method", args);

match result {
    Ok(val) => {
        let vec2 = val.to::<Vector2>();
        // ...
    }
    Err(err) => {
        godot_print!("Error calling method: {}", err);
    }
}
}
注册 Rust 符号
本章节介绍如何将自己的 Rust 代码暴露给 Godot。你通过在引擎中 注册 单独的符号(类、函数等)来实现这一点。
从类注册开始,章节接着详细介绍如何注册函数、属性、信号和常量。
过程宏 API
目前,过程宏 API 是注册 Rust 符号的唯一方式。提供了多种过程宏(派生和属性宏)来修饰你的 Rust 项,如 struct 或 impl 块。在底层,这些宏会生成必要的胶水代码,将每个项目注册到 Godot 中。
该库的设计方式是,你可以利用现有的所有知识,并通过宏语法扩展它,而不需要学习完全不同的做事方式。我们尽量避免使用外部的 DSL(领域特定语言),而是基于 Rust 的现有语法进行构建。
这种方法有效地减少了你需要编写的样板代码,从而让你更容易专注于重要部分。例如,你很少需要重复自己的工作或在多个地方注册同一个内容(例如,声明一个方法、在另一个 register 方法中提到它,并且再次以字符串字面量的形式重复其名称)。
“导出” ("exporting")
“导出”这个术语有时会被误用。如果你指的是“注册”,请避免谈论“导出类”或“导出方法”。这种说法往往会引起混淆,尤其是对于初学者来说。
在 Godot 的情景中,导出 已经有两个明确的定义:
- 导出属性。这并不将属性 注册 到 Godot,而是让它在编辑器中可见。
- GDScript 使用
@export注解来实现这一点,而我们使用#[export]。 - 另请参见 GDScript 导出属性。
- GDScript 使用
- 导出项目,即将项目打包为发布版本。
- 编辑器提供了一个 UI,用于构建游戏或应用程序的发布版本,以便它们作为独立的可执行文件运行。 构建可执行文件的过程称为“导出”。
- 另请参见 导出项目。
类的注册
类是 Godot 数据建模的核心。如果你想以类型安全的方式构建复杂的用户定义类型,就无法避免使用类。数组、字典和简单类型只能满足基本需求,过度使用它们会使得使用静态类型语言的意义大打折扣。
Rust 使得类注册变得简单。如前所述,Rust 语法作为基础,并加入了特定于 gdext 的扩展。
另请参见 GDScript 类参考。
目录
定义一个 Rust 结构体
在 Rust 中,Godot 类由结构体表示。结构体的定义方式与平常一样,可以包含任意数量的字段。为了将它们注册到 Godot 中,你需要派生 GodotClass trait。
GodotClass trait标记了所有在 Godot 中已知的类。例如,Node 或 Resource 类已经实现了该trait。
如果你想注册自己的类,也需要实现 GodotClass trait。
#[derive(GodotClass)] 简化了这个过程,并处理了所有的样板代码。
有关详细信息,请参见 API 文档。
让我们定义一个简单的类,命名为 Monster:
#![allow(unused)]
fn main() {
#[derive(GodotClass)]
#[class(init)] // 稍后会详细说明这个
struct Monster {
    name: String,
    hitpoints: i32,
}
}
就这样。在编译后,这个类通过热重载(在 Godot 4.2 之前是重启后)会立即在 Godot 中可用。
虽然它还不太有用,但上述定义足以将 Monster 类注册到引擎中。
#[derive(GodotClass)] 会 自动 注册该类 —— 你无需显式调用 add_class() 注册或维护一个包含所有类的中央列表。
该过程宏会在启动时自动将类注册到一个这样的列表中。
选择基类
默认情况下,Rust 类的基类是 RefCounted。这和 GDScript 在省略 extends 关键字时的行为一致。
RefCounted 对于数据包非常有用。顾名思义,它允许通过引用计数器来共享实例,因此你不需要担心内存管理。Resource 是 RefCounted 的子类,适用于需要序列化到文件系统的数据。
然而,如果你希望你的类成为场景树的一部分,则需要使用 Node(或其派生类)作为基类。
这里,我们使用一个更具体的节点类型 Node3D。这可以通过在结构体定义上指定 #[class(base=Node3D)] 来实现:
#![allow(unused)]
fn main() {
#[derive(GodotClass)]
#[class(base=Node3D)]
struct Monster {
    name: String,
    hitpoints: i32,
}
}
基类字段
由于 Rust 没有继承机制,我们需要使用组合来实现相同的效果。gdext 提供了一个 Base<T>类型,它允许我们将 Godot 超类(基类)的实例作为字段存储在我们的 Monster 类中。
#![allow(unused)]
fn main() {
#[derive(GodotClass)]
#[class(base=Node3D)]
struct Monster {
    name: String,
    hitpoints: i32,
    base: Base<Node3D>,
}
}
关键部分是 Base<T> 类型。T 必须与你在 #[class(base=...)] 属性中指定的基类相匹配。你也可以使用关联类型 Self::Base 来代替 T。
当你在结构体中声明基类字段时,#[derive] 过程宏会自动检测到 Base<T> 类型。1
这使得你可以通过提供的方法 self.base() 和 self.base_mut() 访问 Node API,稍后我们会详细介绍。
结论
你已经学会了如何定义一个 Rust 类并将其注册到 Godot 中。你现在知道了不同的基类存在,并且了解如何选择一个基类。
接下来的章节将介绍函数和构造函数。
您可以使用 #[hint] 属性调整类型检测,详见相关文档。
注册函数
函数是任何编程语言中执行逻辑的基本组成部分。gdext 库允许你注册函数,这样就可以从 Godot 引擎和 GDScript 中调用它们。
函数的注册始终发生在标注了 #[godot_api] 的 impl 块内。
另请参见 GDScript 函数参考。
目录
Godot 特殊函数
每个引擎类都有一个相关的trait,它的名称与类相同,但前面加上了字母 I,表示“接口”。
该特征没有必需的函数,但你可以重写任何函数来定制对象对 Godot 的行为。
对于这个tra的任何 impl 块都必须使用 #[godot_api] 属性宏进行标注。
由接口trait(以 I 开头)提供的函数称为 Godot 特殊函数。这些函数可以被重写,并允许你影响对象的行为。最常见的是对象的 生命周期 钩子,定义一些在特定事件(如创建、进入场景树或每帧更新)时执行的逻辑。
在我们的例子中,Node3D 提供了 INode3D trait。
以下是其生命周期方法的一小部分示例。完整列表请参见 INode3D 文档。
#![allow(unused)]
fn main() {
#[godot_api]
impl INode3D for Monster {
    // 实例化对象。
    fn init(base: Base<Node3D>) -> Self { ... }

    // 节点在场景树准备好时调用。
    fn ready(&mut self) { ... }

    // 每帧调用。
    fn process(&mut self, delta: f64) { ... }

    // 每物理帧调用。
    fn physics_process(&mut self, delta: f64) { ... }

    // 对象的字符串表示。
    fn to_string(&self) -> GString { ... }

    // 处理用户输入。
    fn input(&mut self, event: Gd<InputEvent>) { ... }

    // 处理生命周期通知。
    fn on_notification(&mut self, what: Node3DNotification) { ... }
}
}
如你所见,一些方法使用 &mut self,而一些方法使用 &self,这取决于它们是否通常会修改对象。某些方法还有返回值,这些值会被传回引擎。例如,to_string() 返回的 GString 会在 GDScript 中打印对象时使用。
让我们实现 to_string(),再次展示类定义以供快速参考。
#![allow(unused)]
fn main() {
#[derive(GodotClass)]
#[class(base=Node3D)]
struct Monster {
    name: String,
    hitpoints: i32,

    base: Base<Node3D>,
}

#[godot_api]
impl INode3D for Monster {
    fn to_string(&self) -> GString {
        let Self { name, hitpoints, .. } = &self;
        format!("Monster(name={name}, hp={hitpoints})").into()
    }
}
}
用户定义的函数
方法
除了 Godot 特殊函数外,你还可以注册自己的函数。你需要在一个固有的 impl 块中声明它们,并同样用 #[godot_api] 注解。
每个函数需要一个 #[func] 属性来将其注册到 Godot。如果省略 #[func],该函数只能在 Rust 代码中可见。
让我们给 Monster 类添加两个方法:一个对其造成伤害,另一个返回其名称。
#![allow(unused)]
fn main() {
#[godot_api]
impl Monster {
    #[func]
    fn damage(&mut self, amount: i32) {
        self.hitpoints -= amount;
    }

    #[func]
    fn get_name(&self) -> GString {
        self.name.clone()
    }
}
}
上面这些方法现在可以在 GDScript 中使用。你可以这样调用它们:
var monster = Monster.new()
# ...
monster.damage(10)
print("A monster called ", monster.get_name())
如你所见,Rust 类型会自动映射到它们在 GDScript 中的对应类型。在这个例子中,i32 会变成 int,GString 会变成 String。有时会有多个映射方式,例如 Rust 的 u16 也会映射为 GDScript 中的 int。
关联函数
除了 方法(有y &self 或 &mut self),你还可以注册 关联函数(没有接收者)。在 GDScript 中,后者称为 “静态函数”。
例如,我们可以添加一个关联函数,用来生成一个随机的怪物名称:
#![allow(unused)]
fn main() {
#[godot_api]
impl Monster {
    #[func]
    fn random_name() -> GString {
        // ...
    }
}
}
然后可以在 GDScript 中这样调用它:
var name: String = Monster.random_name()
当然,也可以声明参数。
关联函数有时对用户定义的构造函数非常有用,正如我们将在下一章中看到的。
方法与对象访问
当你定义自己的 Rust 函数时,有两种使用场景非常常见:
- 你想通过
Gd指针从外部调用你的 Rust 方法。 - 你想访问基类的方法(例如
Node3D)。
本节将解释如何做到这两点。
调用 Rust 方法(binds)
如果你现在有一个 monster: Gd<Monster>,它存储的是上面定义的 Monster 对象,你不能直接调用 monster.damage(123)。
Rust 比 C++ 更严格,要求在任何时刻只能有一个 &mut Monster引用。由于 Gd 指针可以自由克隆,直接通过 DerefMut 访问不足以保证不产生别名(non-aliasing)。
为了解决这个问题,godot-rust 使用了内部可变性模式,类似于 RefCell 的工作方式。
简而言之,当你需要共享(不可变)访问一个 Rust 对象时,从 Gd 指针中使用 Gd::bind()。
当你需要独占(可变)访问时,使用 Gd::bind_mut()。
#![allow(unused)]
fn main() {
let monster: Gd<Monster> = ...;

// 使用 bind() 进行不可变访问:
let name: GString = monster.bind().get_name();

// 使用 bind_mut() 进行可变访问 — 我们首先重新绑定对象:
let mut monster = monster;
monster.bind_mut().damage(123);
}
Rust 的常规可见性规则适用:如果你的函数应该在另一个模块中可见,请声明为 pub 或 pub(crate)。
#[func] 属性 仅 使函数在 Godot 引擎中可用。它与 Rust 的可见性(pub、pub(crate) 等)是独立的,不会影响是否可以通过 Gd::bind() 和 Gd::bind_mut() 访问方法。
如果你只需要在 Rust 中调用一个函数,可以不加 #[func] 注解。你可以稍后再添加它。
bind() 和 bind_mut() 返回 guard 对象。在运行时,库会验证借用规则是否得到遵守,否则会 panic。
通过多个语句重用 guards 是有好处的,但要确保保持其作用域的限制,以免不必要地限制对对象的访问(尤其是使用 bind_mut() 时)。
#![allow(unused)]
fn main() {
fn apply_monster_damage(mut monster: Gd<Monster>, raw_damage: i32) {
    // Artificial scope:
    {
        let guard = monster.bind_mut(); // locks object -->
        let armor = guard.get_armor_multiplier();

        let damage = (raw_damage as f32 * armor) as i32;

        guard.damage(damage)
    } // <-- until here, where guard lifetime ends.

    // Now you can pass the pointer on to other routines again.
    check_if_dead(monster);
}
}
从 self 访问基类
在一个类中,你没有直接指向当前实例的 Gd<T> 指针来访问基类的方法。所以你不能像在 调用函数 章节 中那样,直接使用 gd.set_position(...) 等方法。
但是,你可以通过 base() 和 base_mut() 访问基类 API。这要求你的类定义一个 Base<T> 字段。假设我们添加了一个 velocity字段和两个新方法:
#![allow(unused)]
fn main() {
#[derive(GodotClass)]
#[class(base=Node3D)]
struct Monster {
    // ...
    velocity: Vector2,
    base: Base<Node3D>,
}

#[godot_api]
impl Monster {
    pub fn apply_movement(&mut self, delta: f32) {
        // 只读访问:
        let pos = self.base().get_position();

        // 写入访问 (mutating 方法):
        self.base_mut().set_position(pos + self.velocity * delta)
    }

    // 此方法仅具有只读访问(&self)。
    pub fn is_inside_area(&self, rect: Rect2) -> String
    {
         // 这里只能调用 base(),不能调用 base_mut()。
        let node_name = self.base().get_name();

        format!("Monster(name={}, velocity={})", node_name, self.velocity)
    }
}
}
base() 和 base_mut() 都在扩展 trait WithBaseField 中定义。它们返回 guard 对象,这些对象会根据 Rust 的借用规则防止对 self 的其他访问。
你可以在多个语句之间重用 guard,但需要确保将其作用域限制在最小范围,以避免不必要地限制对 self 的访问:
#![allow(unused)]
fn main() {
    pub fn apply_movement(&mut self, delta: f32) {
        // 作用域:
        {
            let guard = self.base_mut(); // locks `self` -->
            let pos = guard.get_position();

            guard.set_position(pos + self.velocity * delta)
        } // <-- 到这里,guard 生命周期结束。

        // 现在可以再次调用其他 `self` 方法。
        self.on_position_updated();
    }
}
当然,你也可以不使用额外的作用域,直接调用 drop(guard) 来结束guard的生命周期。
代码像 object.bind().base().some_method() 不必要地冗长且低效。
如果你有一个 Gd<T> 指针,直接使用 object.some_method() 即可。
将 bind()/bind_mut() 立即与 base()/base_mut()组合使用是错误的。后者应该只在类的 impl 中调用。
从内部获取 Gd<Self>
在某些情况下,你可能需要获取指向当前实例的 Gd<T> 指针。这种情况发生在你想将它传递给其他方法,或者需要将 self 的指针存储在数据结构中时。
WithBaseField 提供了一个 to_gd() 方法,它返回一个具有正确类型的 Gd<Self>。
下面是一个例子。monster 被传入一个hash map,它可以根据怪物是否存活来注册或注销自己。
#![allow(unused)]
fn main() {
#[godot_api]
impl Monster {
    // 函数根据怪物的状态(是否活着)注册或注销每个怪物。
    fn update_registry(&self, registry: &mut HashMap<String, Gd<Monster>>) {
        if self.is_alive() {
            let self_as_gd: Gd<Self> = self.to_gd();
            registry.insert(self.name.clone(), self_as_gd);
        } else {
            registry.remove(&self.name);
        }
    }
}
}
base() 和 base_mut() 使用一种巧妙的机制,通过“重新借用”当前对象的引用。
这允许重新进入式调用,例如 self.base().notify(...),可能会调用 ready(&mut self)。这里的 &mut self 是对调用站点 self 的重新借用。
当你使用 to_gd() 时,借用检查器会将其视为一个独立的对象。如果你在类的 impl 中对它调用 bind_mut(),你会立即遇到双重借用 panic。相反,使用 to_gd() 获取指针后,直到当前方法结束时再访问。
结论
本页向你介绍了如何在 Godot 中注册函数:
- 特殊方法,钩入对象的生命周期。
- 用户定义的方法和关联函数,将 Rust API 暴露给 Godot。
它还展示了方法与对象如何交互:通过 Gd<T> 调用 Rust 方法,并与基类 API 一起工作。
这些只是一些用例,你在设计 Rust 和 GDScript 之间的接口时非常灵活。在下一页中,我们将探讨一种特殊的函数类型:构造函数。
构造函数(Constructors)
虽然Rust没有像C++或C#那样的构造函数作为语言特性,但返回新对象的关联函数通常被称为“构造函数”。我们扩展了这个术语,涵盖了一些稍有变化的签名,但从概念上讲,构造函数 始终用于构造新对象。
Godot有一个特殊的构造函数,我们称之为 Godot默认构造函数,或者简称为init。这与GDScript中的_init方法类似。
目录
默认构造函数
在 godot-rust 中,任何 GodotClass 对象的构造函数被称为 init。这个构造函数是用来在 Godot 中实例化对象的。当场景树需要实例化对象,或者当你在 GDScript 中调用 Monster.new() 时,它会被调用。
定义构造函数有两种选择:可以让 godot-rust 自动生成,也可以手动定义。如果你不需要 Godot 默认构造你的对象,还可以选择不使用 init。
库生成的 init
你可以使用 #[class(init)] 来为你生成一个构造函数。这仅限于简单的情况,它会对每个字段调用 Default::default() (除了 Base<T> , 后者会正确地与基类对象连接)。
#![allow(unused)]
fn main() {
#[derive(GodotClass)]
#[class(init, base=Node3D)]
struct Monster {
    name: String,          // initialized to ""
    hitpoints: i32,        // initialized to 0
    base: Base<Node3D>,    // wired up
}
}
如果需要为字段提供其他默认值,可以使用 #[init(val = value)]。此方法仅适用于简单场景,因为它可能会导致代码难以阅读和难以理解的错误信息。此外,此 API 仍可能发生变更。
#![allow(unused)]
fn main() {
#[derive(GodotClass)]
#[class(init, base=Node3D)]
struct Monster {
    name: String,          // initialized to ""

    #[init(val = 100)]
    hitpoints: i32,        // initialized to 100

    base: Base<Node3D>,    // wired up
}
}
手动定义 init
我们可以通过复写trait的关联函数 init 来提供手动定义的构造函数:
#![allow(unused)]
fn main() {
#[derive(GodotClass)]
#[class(base=Node3D)] // No init here, since we define it ourselves.
struct Monster {
    name: String,
    hitpoints: i32,
    base: Base<Node3D>,
}

#[godot_api]
impl INode3D for Monster {
    fn init(base: Base<Node3D>) -> Self {
        Self {
            name: "Nomster".to_string(),
            hitpoints: 100,
            base,
        }
    }
}
}
如你所见,init 函数接受一个 Base<Node3D> 作为唯一参数。这个是基类实例,通常只是被转发到结构体中的相应字段(这里是 base)。
init 方法总是返回 Self。你可能注意到,目前这是构造 Monster 实例的唯一方式。一旦你的结构体包含了一个基类字段,你就不能再提供自己的构造函数了,因为你不能为这个字段提供一个值。这是设计上的原因,并且确保了 如果 你需要访问基类,这个基类是直接来自 Godot 的。
不过,不用担心:你仍然可以提供各种构造函数,只是它们需要通过专门的函数来实现,这些函数内部调用 init。
更多内容将在下一节讨论。
禁用 init
你并不总是需要为 Godot 提供默认构造函数。没有构造函数的原因包括:
- 你的类不是一个应该作为场景文件一部分添加到树中的节点。
- 你需要为对象的不可变状态提供自定义参数 —— 默认值没有意义。
- 你只需要从 Rust 代码中构造对象,而不是从 GDScript 或 Godot 编辑器中构造。
要禁用 init 构造函数,可以使用 #[class(no_init)]:
#![allow(unused)]
fn main() {
#[derive(GodotClass)]
#[class(no_init, base=Node3D)]
struct Monster {
    name: String,
    hitpoints: i32,
    base: Base<Node3D>,
}
}
如果不提供/生成 init 方法并且忘记使用 #[class(no_init)],将导致编译时错误。
自定义构造函数
默认的构造函数 init 并不总是有用,因为它可能会让对象处于不正确的状态。
例如, Monster 在构造时总会有相同的 name 和 hitpoints 这可能不是我们希望的。让我们提供一个更合适的构造函数,它将这些属性作为参数。
#![allow(unused)]
fn main() {
// 之前默认的 constructor。
#[godot_api]
impl INode3D for Monster {
    fn init(base: Base<Node3D>) -> Self { ... }
}

// 新的自定义 constructor.
#[godot_api]
impl Monster {
    #[func] // 注意: 下面代码是错误的
    fn from_name_hp(name: GString, hitpoints: i32) -> Self {
        ...
    }
}
}
但现在,如何填补空白呢?Self需要一个基类对象,我们该如何获取它呢?实际上,我们不能在这里返回 Self。
在 Rust 与 Godot 交互时,所有对象(类实例)都需要通过 Gd 智能指针传递——无论它们是作为参数还是返回类型。
init 和一些其他 gdext 提供的函数的返回类型是一个例外,因为库在此时要求你拥有一个原始对象的 值 。你在自己定义的 #[func] 函数中不需要返回 Self。
详细信息请参见 关于对象的章节 或 Gd<T> API 文档。
所以我们需要返回 Gd<Self> 而不是 Self.
带有基类字段的对象
如果你的类 T 包含一个 Base<...> 字段,你不能创建一个独立的实例——你必须将其封装在Gd<T>。
你也不能再从 Gd<T> 智能指针中提取 T;因为它可能已经与 Godot 引擎共享,这样做将不是一个安全的操作。
为了构造 Gd<Self>, 我们可以使用 Gd::from_init_fn(), 它接受一个闭包。这个闭包接受一个 Base 对象并返回 Self 的实例。
换句话说,它的签名与 init 相同——这提供了一种替代的构造 Godot 对象的方法,同时允许额外的上下文传递。
Gd::from_init_fn() 的结果是一个 Gd<Self> 对象,它可以直接由 Monster::from_name_hp() 返回。
#![allow(unused)]
fn main() {
#[godot_api]
impl Monster {
    #[func]
    fn from_name_hp(name: GString, hitpoints: i32) -> Gd<Self> {
        // Function contains a single statement, the `Gd::from_init_fn()` call.

        Gd::from_init_fn(|base| {
            // Accept a base of type Base<Node3D> and directly forward it.
            Self {
                name: name.into(), // 转换 GString -> String.
                hitpoints,
                base,
            }
        })
    }
}
}
就是这样!刚刚添加的关联函数现在已在 GDScript 中注册,并有效地作为构造函数使用:
var monster = Monster.from_name_hp("Nomster", 100)
没有基类字段的对象
对于没有基类字段的类,你可以简单地使用 Gd::from_object(),而不是 Gd::from_init_fn()。
这通常对于 数据包 很有用,数据包不定义太多逻辑,但它是一种面向对象的方式,将相关数据打包在单一类型中。这些类通常是 RefCounted 或 Resource 的子类。
#![allow(unused)]
fn main() {
#[derive(GodotClass)]
#[class(no_init)] // We only provide a custom constructor.
// Since there is no #[class(base)] key, the base class will default to RefCounted.
struct MonsterConfig {
    color: Color,
    max_hp: i32,
    tex_coords: Vector2i,
}

#[godot_api]
impl MonsterConfig {
    // Not named 'new' since MonsterConfig.new() in GDScript refers to default.
    #[func]
    fn create(color: Color, max_hp: i32, tex_coords: Vector2i) -> Gd<Self> {
        Gd::from_object(Self {
            color,
            max_hp,
            tex_coords,
        })
    }
}
}
析构函数
如果你通过 RAII 管理内存,通常你不需要声明自己的析构函数。但是如果你确实需要自定义的清理逻辑,只需为你的类型声明 Drop trait:
#![allow(unused)]
fn main() {
impl Drop for Monster {
    fn drop(&mut self) {
        godot_print!("Monster '{}' is being destroyed!", self.name);
    }
}
}
当 Godot 命令销毁你的 Gd<T> 智能指针时——无论是手动释放,还是最后一个引用超出作用域,都会调用Drop::drop()。
结论
构造函数允许以各种方式初始化 Rust 类。你可以生成、实现或禁用默认构造函数 init,并且可以提供任意多的具有不同签名的自定义构造函数。
注册属性
到目前为止,你已经学会了如何注册类和函数。这样就足以用 godot-rust 创建简单的应用程序了,但你可能希望让 Godot 能更直接地访问你对象的状态。
这时,属性就派上用场了。在 Rust 中,属性通常定义为结构体的字段。
另请参考 GDScript属性参考.
目录
注册变量
之前,我们定义了一个函数 Monster::get_name(),它可以用来获取名称,但在 GDScript 中使用时仍然需要写 obj.get_name()。有时候,你不需要额外的封装,而是希望直接访问字段。
godot-rust库提供了 #[var] 属性来标记应当暴露为变量的字段。它的功能类似于 GDScript 中的 var 关键字。
从之前的结构体声明开始,我们现在将 #[var] 属性添加到 name 字段上。同时,我们将类型从 String 改为 GString,因为该字段现在直接与 Godot 交互。
#![allow(unused)]
fn main() {
#[derive(GodotClass)]
#[class(init, base=Node3D)]
struct Monster {
    #[var]
    name: GString,
    hitpoints: i32,
}
}
这样做的效果是,name 现在作为 属性 在 Godot 中注册:
var monster = Monster.new()

# Write the property.
monster.name = "Orc"

# Read the property.
print(monster.name) # prints "Orc"
在 GDScript 中,属性是对 getter 和 setter 函数调用的语法糖。你也可以显式调用这些函数:
var monster = Monster.new()

# Write the property.
monster.set_name("Orc")

# Read the property.
print(monster.get_name()) # prints "Orc"
#[var]属性还可以接受参数,用来定制是否同时提供 getter 和 setter,以及它们的名称。如果你需要更复杂的逻辑,也可以编写 Rust 方法作为 getter 和 setter。详情请参阅API 文档 。
与 #[func] 函数一样,#[var] 字段不需要是 pub。这将 Godot 与 Rust 的可见性隔离开来。
在实践中,你仍然可以通过间接方法(例如 Godot 的反射 API)访问 #[var] 字段。但这时是经过刻意选择的;私有字段主要是防止 意外 错误或封装泄漏。
导出变量
#[var] 属性将字段暴露给 GDScript,但不会在 Godot 编辑器 UI 中显示它。
将属性暴露到编辑器 UI 中被称为 导出。与 GDScript 中的 @export 注解类似,godot-rust通过 #[export] 属性提供导出功能。你可能会注意到命名上的一致性。
下面的代码不仅将 name 字段暴露给 GDScript,还会在编辑器中添加一个属性 UI。这样,你就可以为每个 Monster 实例单独命名,而无需编写任何代码!
#![allow(unused)]
fn main() {
#[derive(GodotClass)]
#[class(init, base=Node3D)]
struct Monster {
    #[export]
    name: GString,
    hitpoints: i32,
}
}
你可能注意到,#[var] 属性不见了。这是因为 #[export] 自动隐含了 #[var],所以 name 仍然可以像以前一样从 GDScript 中访问。
你还可以将这两个属性声明在同一个字段上。如果你提供了参数来定制它们,这是必须的。
枚举类型
你可以将 Rust 枚举导出为属性,前提是它们是 C 风格枚举(每个变体没有关联数据)。导出的枚举在编辑器中显示为下拉字段,其中包含所有可用选项。
GodotConvert用于定义如何在 Godot 中转换该类型。Var允许将它用作#[var]属性,这样它就可以从 Godot 访问。Export允许将它用作#[export]属性,这样它就会出现在编辑器 UI 中。
此外,派生以下标准 trait 是有意义的:
Clone:不派生也可以,但那样你需要手动实现Var。原因是当与#[var(pub)]一起使用时,Var还会提供 Rust 的 getter 方法,而这些方法需要克隆值。Default:如果有意义的默认值存在时。如果没有,可以使用#[init(val = ...)]在字段声明上提供初始值。
由于 Godot 本身没有专门的枚举类型,你可以将其映射为整数(例如: i64)或字符串(GString)。这可以通过 #[Godot] 属性的 via 键进行配置。
以下是导出枚举的示例:
#![allow(unused)]
fn main() {
#[derive(GodotConvert, Var, Export, Default, Clone)]
#[godot(via = GString)]
pub enum Planet {
    #[default] // Rust standard attribute, not godot-rust.
    Earth,
    Mars,
    Venus,
}

#[derive(GodotClass)]
#[class(base=Node)]
pub struct SpaceFarer {
    #[export]
    favorite_planet: Planet,
}
}
上面的代码将在编辑器 UI 中显示如下:

重构 Rust 枚举可能会影响已经序列化的场景,因此,如果你选择整数或字符串作为底层表示,请谨慎处理:
- 整数可以在不破坏现有场景的情况下重命名枚举变体,但新的变体必须严格添加到末尾,现有的变体不能删除或重排序。
- 字符串允许自由的重排序和删除(如果未使用),并且调试更加容易。但你不能重命名它们,并且它们占用的空间略多(只有在你有数万个枚举值时才需要考虑)。
当然,你始终可以调整现有的场景文件,但这涉及到手动查找和替换,通常容易出错。
枚举在 Godot 中并不是头等对象(First-class citizen)。即使你在 GDScript 中定义了它们,它们主要是常量的语法糖。 这段声明:
enum Planet {
    EARTH,
    VENUS,
    MARS,
}

@export var favorite_planet: Planet
大致等同于:
const Planet: Dictionary = {
    EARTH = 0,
    VENUS = 1,
    MARS = 2,
}

@export_enum("EARTH", "VENUS", "MARS") var favorite_planet = Planet.EARTH
然而,枚举不是类型安全的,你可以这样做:
var p: Planet = 5
此外,你也无法轻松地从表达式 Planet.EARTH 中获取名称 "EARTH"。1
更多详细信息请参阅 GDScript 枚举。
高级用法
#[var] 和 #[export] 属性都接受参数,允许进一步定制属性在 Godot 中的注册方式。有关详细信息,请查阅 API 文档。
Packed*Array 类型使用写时复制语义,意味着每个新实例都可以看作是一个独立的副本。当 Rust 端的packed
array作为属性注册时,GDScript 在你修改它时会创建一个新实例,从而使修改对 Rust 代码不可见。
有一个 GitHub issue 讨论了更多细节。
因此,最好使用 Array<T> 或注册指定的 #[func] 方法,在 Rust 端执行变更操作。
自定义类型的 #[var] 和 #[export]
如果你希望注册用户自定义类型的属性,以便它们能从 GDScript 代码(#[var])或编辑器(#[export])中访问,那么你可以分别实现 Var 和 Export 特性。
这些trait也提供了派生宏,分别是 #[derive(Var)] 和 #[derive(Export)]。
启用各种类型的 Var 和 Export 看起来很方便,但请记住,每次引擎访问属性时,你的转换函数都会被调用,有时可能是在后台。特别是对于 #[export] 字段,编辑器 UI 的交互或从场景文件的序列化和反序列化可能会产生大量的流量。
作为一般规则,尽量使用 Godot 自身的类型,例如 Array、Dictionary 或 Gd。这些类型是引用计数或简单的指针。
脚注
You can obtain "EARTH" if you iterate the Planet dictionary and compare each value (assuming there are no duplicates).
That however requires that you know the type (Planet); the value itself does not hold this information.
注册信号
信号是Godot中实现观察者模式的一种机制。你可以发射事件,这些事件会被所有订阅(“连接”)该信号的对象接收,从而解耦发送者和接收者。如果你之前没有使用过Godot的信号,强烈建议先阅读GDScript教程。
目录
GDScript信号的问题
在GDScript中,你可以如下定义信号,参数名称和类型是可选的:
signal damage_taken
signal damage_taken(amount)
signal damage_taken(amount: int)
然而,上述声明之间的区别仅是信息性的(例如显示在类的文档中)。 来看一个例子:
signal damage_taken(amount: int)

func log_damage():
    print("damaged!")

func _ready():
    damage_taken.connect(log_damage)
注意log_damage()没有参数,但你连接它时既不会在解析时也不会在运行时收到警告。
不止connect有这个问题,再看一个向emit()传递错误类型参数的例子:
signal damage_taken(amount: int)

func log_damage(amount): # 现在带参数
    print("damaged: ", amount)

func _ready():
    damage_taken.connect(log_damage)
    damage_taken.emit(true) # 不是int,不用担心 -> print "damaged: true"
GDScript会愉快地传递bool,尽管信号声明为int。
在GDScript中,信号参数列表不会进行类型检查。
不匹配的connect()或emit()调用可能会也可能不会在运行时被捕获,具体取决于handler函数自身的类型声明。
它们永远不会在解析时被捕获。
虽然在上面的例子中这似乎是小问题,但在具有许多类似信号的大型项目中,尤其是在重构时,这会变得难以追踪。信号的设计目的是作为发送者和接收者之间的API接口——但除了高度的手动规范和测试外,无法验证这一接口契约。
Rust信号
godot-rust提供了类型安全且直观的API来连接和发射信号,尽管它们在GDScript中没有类型。
你可以依赖签名,无需担心重构,因为Rust会在编译时捕获所有不匹配。
在Rust中,信号可以通过#[signal]属性在#[godot_api]块中定义。
以之前的类为例,声明一个damage_taken信号:
#![allow(unused)]
fn main() {
#[derive(GodotClass)]
#[class(init, base=Node3D)]
struct Monster {
    hitpoints: i32,
    base: Base<Node3D>, // 声明信号时需要。
}

#[godot_api]
impl Monster {
    #[signal]
    fn damage_taken(amount: i32);
}
}
信号的语法类似于#[func],但需要用分号代替函数体。不支持接收者(&self、&mut self)和返回类型。
生成的代码
一旦注册了至少一个信号,godot-rust会为你的类实现WithUserSignals trait。
这提供了signals()方法,现在可以在类方法中访问。
signals()返回一个 信号集合 ,即一个结构体,将所有信号作为命名方法暴露:
#![allow(unused)]
fn main() {
// 生成的代码($为占位符,实际名称取决于实现):
impl $SignalCollection {
    fn damage_taken(&mut self) -> $Signal {...}
}

#[godot_api]
impl INode3D for Monster {
    fn ready(&mut self) {
        let sig = self.signals().damage_taken();
    }
}
}
damage_taken()方法返回一个自定义生成的 信号类型 (代码片段中称为$Signal),其API针对fn damage_taken(amount: i32)的签名定制。每个#[signal]属性都会生成一个独特的信号类型。
信号类型由实现定义。除了#[signal]特定的自定义API外,它还通过Deref/DerefMut以TypedSignal为目标,这意味着你可以在每种信号类型上使用所有 这些 方法。
要让类型信号可用,你需要:
- 一个
#[godot_api] impl MyClass {}块。- 这必须是一个固有 impl,
I*trait 的impl并不足够。 - 有必要,可以让该 impl 保持为空。
- 这必须是一个固有 impl,
- 一个
Base<T>字段。
信号(无论是否类型化)不能在次级 impl 块中声明(那些带有 #[godot_api(secondary)] 属性的 impl 块)。
连接信号
godot-rust提供了多种连接信号的方式,具体取决于handler函数的位置。
信号与handler函数在同一对象(self)
将信号连接到同一类的方法很常见。可以通过connect_self()方法实现,只需将方法指针作为参数传递:
#![allow(unused)]
fn main() {
impl Monster {
    fn on_damage_taken(&mut self, amount: i32) {
        ... // 更新血条、播放音效等。
    }
}

#[godot_api]
impl INode3D for Monster {
    fn ready(&mut self) {
        self.signals()
            .damage_taken()
            .connect_self(Self::on_damage_taken);
    }
}
}
注意on_damage_taken没有#[func]属性,其所在的impl块也没有#[godot_api]过程宏。信号接收者是普通的Rust函数!你可以将它们完全隐藏于Godot,仅通过信号访问。
由于connect_self()的参数本质上是impl FnMut(&mut Self, i32),你也可以传递闭包:
#![allow(unused)]
fn main() {
#[godot_api]
impl INode3D for Monster {
    fn ready(&mut self) {
        self.signals()
            .damage_taken()
            .connect_self(|this, amount| {
                //         ^^^^  ^^^^^^
                //               类型可推断&mut Self, i32。

                this.update_healthbar(amount);
                this.play_sound(Sfx::MonsterAttacked);
            });
    }
}
}
handler函数在其他对象
如果handler函数需要在self以外的对象上运行,可以使用connect_other(),它以&Gd<T>作为第一个参数:
#![allow(unused)]
fn main() {
#[godot_api]
impl INode3D for Monster {
    fn ready(&mut self) {
        // 假设伤害被转移到护盾对象。
        // 该对象存储为字段 `shield: OnReady<Gd<Shield>>`。
        // &*self.shield 即我们需要的 `&Gd<Shield>`。

        self.signals()
            .damage_taken()
            .connect_other(&*self.shield, Shield::on_damage_taken);
    }
}
}
无对象的handler(关联/静态函数)
如果handler函数不需要访问self,只需使用connect():
#![allow(unused)]
fn main() {
impl Monster {
    // 现在是关联函数,不再是方法。
    fn on_damage_taken(amount: i32) {
        // 不修改对象本身,但更新某些全局统计。
    }
}

#[godot_api]
impl INode3D for Monster {
    fn ready(&mut self) {
        self.signals()
            .damage_taken()
            .connect(Self::on_damage_taken);

        // 或使用闭包:
        self.signals()
            .damage_taken()
            .connect(|amount| {
                // 更新全局数据。
            });
    }
}
}
断开连接
通过前述任何方式连接信号都会返回一个 ConnectHandle,可用于断开连接。
#![allow(unused)]
fn main() {
#[derive(GodotClass)]
#[class(init, base=Node3D)]
struct Monster {
    handle: Option<ConnectHandle>,
    base: Base<Node3D>,
}

#[godot_api]
impl INode3D for Monster {
    fn ready(&mut self) {
        self.handle = Some(self.signals()
            .damage_taken()
            .connect(Self::on_damage_taken));
    }
}

impl Monster {
    fn make_invulnerable(&mut self) {
        if let Some(connection) = self.handle.take()
        {
            connection.disconnect();
        }
    }
}
}
如果给定的连接不存在,断开信号会导致 panic。
当信号没有明确的所有权或连接的对象预计会被释放时,请使用 is_connected()。
#![allow(unused)]
fn main() {
#[derive(GodotClass)]
#[class(init, base=Node3D)]
struct Commentator {
    handle: Option<ConnectHandle>,
    base: Base<Node3D>,
}

impl Commentator {
    fn watch_monster(&mut self, monster: Gd<Monster>) {
        if let Some(connection) = self.handle.take()
            && connection.is_connected()
        {
            connection.disconnect();
        }

        monster
            .signals()
            .damage_taken()
            .connect_other(&self.to_gd(), Self::comment);
    }

    fn comment(&mut self, damage_taken: i32) {
        match damage_taken {
            ..0 => {
                return;
            }
            0..3 => {
                godot_print!("Oh!");
            }
            3..10 => {
                godot_print!("That must hurt!");
            }
            10.. => {
                self.handle
                    .take()
                    .expect("Signal mustn't be connected without the handle!")
                    .disconnect();
            }
        }
    }
}
}
发射信号
我们已经看到#[signal]属性生成的信号类型提供了多个方法:connect()、connect_self()和connect_other()。同样的信号类型也提供了emit()方法,用于触发信号:
#![allow(unused)]
fn main() {
impl Monster {
    // 可以被其他游戏系统调用。
    pub fn deal_damage(&mut self, amount: i32) {
        self.hitpoints -= amount;
        self.signals().damage_taken().emit(amount);
    }
}
}
与connect*()方法一样,emit()是完全类型安全的。你只能传递一个i32。如果更新信号定义(例如改为接受bool或enum表示伤害类型),编译器会捕获所有connect*和emit调用。重构后你可以安心睡觉。
emit()的另一个优点是它带有参数名称(如#[signal]属性中提供的)。这让IDE能提供更多上下文,例如在emit()调用中显示参数内联提示。参数类型使用 AsArg<T> trait,它遵循引擎 API,并在参数类型上提供灵活性。
例如,"string" 可以作为 impl AsArg<GString> 传入。
除了特定的emit()方法外,TypedSignal(自定义信号类型的deref目标)还提供了一个通用方法emit_tuple(),它接受所有参数的元组(按值传递)。这很少需要,但在你想将多个参数作为“捆绑包”传递时很有用。为了完整起见,上述调用等价于:
#![allow(unused)]
fn main() {
self.signals().damage_taken().emit_tuple((amount,));
}
在类外部访问信号
随着游戏交互的增多,你可能不仅想在impl Monster块中配置或发射信号,还想在代码库的其他部分操作。
trait方法 WithUserSignals::signals()允许通过&mut self直接访问,但在外部你通常只有Gd<Monster>。技术上你可以bind_mut()该对象,但有更好的方式无需借用检查。
因此,Gd本身也 提供了signals()方法,返回完全相同的 信号集合 API:
#![allow(unused)]
fn main() {
let monster: Gd<Monster> = ...;
let sig = monster.signals().damage_taken();
}
Godot 内置信号
Godot 提供了许多内置信号,用于挂接到生命周期和事件中。所有引擎提供的类都实现了
WithSignals trait,它是 WithUserSignals 的super trait。
每个类 T 都有其自己的信号集合,可以通过 Gd<T>::signals() 访问。和类方法一样,信号是可继承的,因此你可以这样做:
#![allow(unused)]
fn main() {
// tree_entered 是 Node 上声明的信号。
let node: Gd<Node> = ...;
let sig = node.signals().tree_entered();

// 你也可以从派生类访问它。
let node: Gd<Node3D> = ...;
let sig = node.signals().tree_entered();
}
这在用户自定义类中同样有效。这意味着我们可以扩展之前的 ready() 实现来连接 Godot 信号:
#![allow(unused)]
fn main() {
#[godot_api]
impl INode3D for Monster {
    fn ready(&mut self) {
        // 之前的代码。
        self.signals()
            .damage_taken()
            .connect_other(&*self.shield, Shield::on_damage_taken);

        // 连接到 `Node::renamed` 信号,该信号在节点名称变化时触发。
        self.signals()
            .renamed()
            .connect_self(|this| {
                let new_name = this.base().get_name();
                println!("Monster node renamed to {new_name}.");
            });
    }
}
}
为类型信号生成的 API 即使不使用通常也不会造成问题。
然而,可以通过以下方式禁用代码生成:
#![allow(unused)]
fn main() {
#[godot_api(no_typed_signals)]
impl MyClass { ... }
}
这样依然可以使用 #[signal],并会注册每一个这样声明的信号,
但不会生成一个 signals() 集合。
信号可见性
与Rust中的所有项一样,信号默认是私有的(即仅在其模块和子模块中可见)。
你可以通过向#[signal]属性添加pub来公开它们:
#![allow(unused)]
fn main() {
#[godot_api]
impl Monster {
    #[signal]
    pub fn damage_taken(amount: i32);
}
}
当然,pub(crate)、pub(super)或pub(in path)也可以用于更精细的控制。
因此,如果你的类声明为struct Monster(私有),则不能将信号声明为pub或pub(crate)。这是由于信号是单独的类型,其API中引用了类型。将它们“比类更公开”会绕过Rust的隐私规则。
从语义上讲,这是合理的:唯一需要外部访问的情况是通过Gd<SomeClass>::signals(),而这意味着SomeClass在该点是可见的。但与fn等其他Rust项不同,更宽的可见性不会自动限制为“最多结构体可见性”,而是会导致编译错误。
注意,你无法分离connect和emit API的可见性。如果想确保外部只能发射,请将信号保持私有,并在类中提供一个公共包装函数,将调用转发给信号。
从外部连接
假设你有一个音效系统,应在怪物受到伤害时播放音效。你可以从那里连接到信号:
#![allow(unused)]
fn main() {
impl SoundSystem {
    fn connect_sound_system(&self, monster: &Gd<Monster>) {
        monster.signals()
            .damage_taken()
            .connect_other(self, |this, _amount| {
                this.play_sound(Sfx::MonsterAttacked);
            });
    }
}
}
从外部发射
与连接一样,发射也可以通过Gd::signals()进行。其余部分保持不变。
#![allow(unused)]
fn main() {
fn load_map() {
    // 所有加载操作。
    ...

    // 通知玩家周围世界已加载。
    let player: Gd<Player> = ...;
    player.signals().on_world_loaded().emit();
}
}
高级信号配置
TypedSignal::connect*()方法设计为直观且覆盖常见用例。如果需要更高级的设置,TypedSignal::builder()提供了高度定制化。
返回的ConnectBuilder提供了多个维度的配置:
- 接收者:
function(args)、method(&mut T, args)、method(Gd<T>, args) - 提供的对象:无、
self或其他实例 - 连接标志:
DEFERRED、ONESHOT、PERSIST - 单线程(默认)或跨线程 ("sync")
一些示例配置:
#![allow(unused)]
fn main() {
// Connect -> Self::log_event(&mut self, event: String)
signal.builder()
    .flags(ConnectFlags::DEFERRED | ConnectFlags::ONESHOT)
    .connect_self_mut(Self::log_event); // receive &mut self

// Connect -> Logger::log_event(&mut self, event: String)
signal.builder()
    .connect_other_mut(some_gd, Logger::log_event);

// Connect -> Logger::log_event(this: Gd<Self>, event: String)
signal.builder()
    .connect_other_gd(some_gd, Logger::log_event);

// Connect -> Logger::log_thread_safe(event: String)
signal.builder()
    .connect_sync(Logger::log_thread_safe); // associated fn, no receiver
}
构建器方法需要按正确顺序(“阶段”)调用。详见API文档 。
无类型信号
Godot 处理无类型信号的低级API仍然可用:
新的类型化信号 API 应该能够覆盖全部功能,但在某些情况下,信息只会在运行时才可用,这时无类型的反射 API 就很适合。未来我们也可能将两者结合使用。
连接信号的一种传统方式是传入信号名称和 Callable:
#![allow(unused)]
fn main() {
let monster: Gd<Monster> = ...;
let damage_taken: Callable = monster.callable("damage_taken");
monster.connect("damage_taken", &damage_taken);
}
要发射没有类型的信号,可以通过(可变)访问基类来调用 Object::emit_signal() 方法。
沿用之前示例中的 Monster 结构体,您可以通过以下方式发射其信号:
#![allow(unused)]
fn main() {
self.base_mut().emit_signal(
    "damage_taken",
   vslice![amount_damage_taken],
);
}
查看 vslice! 文档了解如何通过切片传递多个变体参数。
一些没有类型的信号的功能可能会移植到有类型的信号,但其他功能(如 Callable::bind())可能不会提供。
直接使用闭包替代即可。总的来说,TypedSignal 和 ConnectBuilder API 的设计允许您根据自己的工作流程进行扩展。
编辑器中的信号 – 热重载交互
有类型信号使用自定义的callables进行连接,这些callables包含一个虚表(vtable) —— 一组指向 Godot FFI 函数的函数指针。热重载后,所有这些函数指针都会失效,调用其中任何一个都会导致未定义行为,通常会引起崩溃。
为防止不安全行为,godot-rust 会在热重载前自动断开所有有类型信号的连接(即使用无类型信号 API 以外的任何方式创建的连接)。
这些连接可以在之后重新创建,通常使用 EXTENSION_RELOADED 通知来实现。
#[derive(GodotClass)]
#[class(init, base = Node)]
struct InEditorMonster {
    // 属性会被热重载保留,
    // 允许我们之后重新创建信号。
    #[var]
    managed_editor_objects: Array<Gd<Object>>,

    base: Base<Node>
}

#[godot_api]
impl INode for InEditorMonster {
    fn on_notification(&mut self, what: NodeNotification) {
        if what == NodeNotification::EXTENSION_RELOADED {
            // 克隆数组指针以避免部分借用问题 – `signals()` 需要 &mut 引用。
            // 仅在确保迭代期间没有东西会修改数组时才这样做。
            for obj in self.managed_editor_objects.clone().iter_shared() {
                self.signals().my_signal().builder().connect_other_gd(&obj, some_fn);
            }
        }
    }
}
另一种方法是使用在热重载期间保留的无类型信号,配合标准(非自定义)callables。
目前,可以使用 Callable::from_object_method 或 Gd::callable() 来创建标准callables。
let monster: Gd<InEditorMonster> = ...;
let non_custom_callable: Callable = monster.callable("damage_taken");

// 热重载后不会引起任何问题。
monster.connect("damage_taken", &non_custom_callable);

let custom_callable: Callable = Callable::from_fn(
    "my custom callable",
    |_| godot_print!("hello world!")
);

// 热重载后调用此信号将导致未定义行为!
monster.connect("damage_taken", &custom_callable);
结论
本章中,我们看到了godot-rust的类型安全信号如何提供直观且健壮的方式处理Godot的观察者模式,并避免GDScript的某些陷阱。
Rust函数引用或闭包可以直接连接到信号,发射信号通过常规函数调用实现。
注册常量
常量可以用来将不可变值从 Rust 代码传递到 Godot 引擎中。
另请参见 GDScript 常量参考。
常量声明
在 Rust 中,常量通过 const 项声明,并位于类的固有 impl 块中。
不能使用 static 声明。
#[constant] 属性使其在 Godot 中可用。
#![allow(unused)]
fn main() {
#[godot_api]
impl Monster {
    #[constant]
    const DEFAULT_HP: i32 = 100;

    #[func]
    fn from_name_hp(name: GString, hitpoints: i32) -> Gd<Self> { ... }
}
}
在 GDScript 中的使用方式如下:
var nom = Monster.from_name_hp("Nomster", Monster.DEFAULT_HP)
var orc = Monster.from_name_hp("Orc", 200)
(这个例子在默认参数实现后可能更适用于默认参数,但它阐明了重点。)
限制
Godot 仅支持通过 GDExtension API 注册 整数常量。
你可以通过注册一个静态函数来绕过这个限制,在 GDScript 中调用时为 Monster.DEFAULT_NAME()。
#![allow(unused)]
fn main() {
#[godot_api]
impl Monster {
    #[func(rename = "DEFAULT_NAME")]
    fn default_name() -> GString {
        "Monster_001".into()
    }
}
}
虽然从技术上讲,你可以使用只读属性,但这会带来问题:
- 你需要已有的类实例。
- 每个对象都会为这个常量占用空间。¹
额外的 () 并不会破坏你的游戏。如果你有不想重复计算的值(例如数组),总是可以在 Rust 中用 thread_local! 存储。
脚注
将来我们可能会有不占用空间的属性,参见 #1151.
脚本复写Rust定义的虚函数(script-virtual)
GDExtension API 允许您在 Rust 中定义虚函数,这些函数可以在附加到您的对象上的脚本中被复写。
请注意,这些函数在概念上与如 ready() 这样的虚函数不同,ready() 是 由Godot 定义并 由您(在 Rust 中)重写的。
因此,特别强调“script-virtual”。
目录
一个很好的例子
以我们的 Monster为例,假设我们有不同类型的怪物,并且希望自定义它们的行为。我们可以在 Rust 中编写所有怪物共有的逻辑,并使用 GDScript 快速原型化特定部分。
例如,我们可以尝试两个怪物:Orc 和 Goblin。每个怪物都有不同的行为,这些行为被编码在各自的 GDScript 文件中。项目结构可能如下所示:
project_dir/
│
├── godot/
│   ├── .godot/
│   ├── project.godot
│   ├── MonsterGame.gdextension
│   └── Scenes
│       ├── Monster.tscn
│       ├── Orc.gd
│       └── Goblin.gd
│
└── rust/
    ├── Cargo.toml
    └── src/
        ├── lib.rs
        └── monster.rs
Monster.tscn编码了一个简单的场景,根节点是 Monster(我们的 Rust 类,继承自 Node3D)。此节点将是附加脚本的对象。
步骤说明
Rust 默认行为
让我们从这个类的定义开始:
#![allow(unused)]
fn main() {
use godot::prelude::*;

#[derive(GodotClass)]
#[class(init, base=Node3D)]
struct Monster {
    base: Base<Node3D>
}
}
现在,我们可以实现一个 Rust 函数来计算怪物每次攻击造成的伤害。传统上,我们会这样编写:
#![allow(unused)]
fn main() {
#[godot_api]
impl Monster {
    #[func]
    fn damage(&self) -> i32 {
        10
    }
}
}
该方法无论如何,始终返回 10。为了在附加到 Monster 节点的脚本中自定义此行为,我们可以在 Rust 中定义一个 虚方法,该方法可以在 GDScript 中 复写。这里的Rust 代码被称为 默认 实现。
虚(virtual)(也称为 后期绑定)意味着涉及动态分发:实际调用的方法是在运行时确定的,具体取决于是否有脚本附加到 Monster 节点 — 如果有,具体是哪个脚本。
这与 前期绑定 相对,前期绑定是在编译时通过静态分发解决的。
虽然传统 Rust 可能使用 trait 对象(dyn Trait)来实现后期绑定,但 godot-rust 提供了更直接的方法。
使方法成为虚方法非常简单:只需在 #[func] 属性中添加 virtual 关键字。
#![allow(unused)]
fn main() {
#[godot_api]
impl Monster {
    #[func(virtual)]
    fn damage(&self) -> i32 {
        10
    }
}
}
就是这么简单。现在,您的怪物可以在脚本中自定义。
在 GDScript 中复写
在 GDScript 文件中,您现在可以复写 Rust 的 damage 方法为 _damage。方法前缀加上下划线,这是 Godot 中虚方法(如 _ready 或 _process)的命名约定。
以下是 Orc 和 Goblin 脚本的示例:
# Orc.gd
extends Monster

func _damage():
    return 20
# Goblin.gd
extends Monster

# 随机伤害,范围为 5 到 15。
# 类型注解是可选的。
func _damage() -> int:
    return randi() % 11 + 5
如果您的 GDScript 中的签名与 Rust 签名不匹配,Godot 会产生错误。
动态行为
现在,让我们在 Rust 代码中调用 damage():
#![allow(unused)]
fn main() {
fn monster_attacks_player(monster: Gd<Monster>, player: Gd<Player>) {
    // 计算伤害。
    let damage_points: i32 = monster.bind().damage();

    // 将伤害应用到玩家。
    player.bind_mut().take_damage(damage_points);
}
}
在上述示例中,damage_points 的值是多少?
答案取决于具体情况:
- 如果
Monster节点没有附加脚本,damage_points将是10(Rust 中的默认实现)。 - 如果
Monster节点附加了Orc.gd脚本,damage_points将是20。 - 如果
Monster节点附加了Goblin.gd脚本,damage_points将是一个在5到15之间的随机数。
权衡取舍
你可能会问:如果只需要计算一个简单的伤害数值,为什么不使用一个简单的 match 语句?
你说得对,如果只需要Rust 中 match 就能满足你的需求,那么直接使用它即可。然而,基于脚本的方法有一些优势,尤其是在处理比单一伤害值计算更复杂的场景时:
- 你可以准备多种脚本,来处理不同的行为,例如不同的关卡或敌人 AI 行为。在 Godot 编辑器中,你可以根据需要轻松地切换脚本,或者让不同的
Monster实例使用不同的脚本进行对比。 - 切换行为不需要重新编译 Rust 代码。如果你与不太熟悉 Rust 的游戏设计师、模组制作者或艺术家合作,但他们仍然希望进行实验,这会非常有用。
也就是说,如果你的编译时间较短(godot-rust 本身非常轻量),并且更喜欢将逻辑放在 Rust 中,这也是一个有效的选择。为了保留快速切换行为的选项,你可以使用 #[export] 导出的枚举来选择行为,然后在 Rust 中进行调度。
最终,#[func(virtual)] 只是 godot-rust 提供的多种抽象机制中的一个额外工具。由于 Godot 的范式主要围绕将脚本附加到节点上展开,因此该功能与引擎非常契合。
局限性
与面向对象语言中的虚方法(如 C++、C#、Java、Kotlin、PHP 等)相比,有一些重要的区别需要注意。
-
默认实现无法从 Godot 访问
在 Rust 中,调用
monster.bind().damage()会自动查找脚本复写,并在没有脚本附加时回退到 Rust 默认实现。然而,在 GDScript 中,您无法调用默认实现。 调用monster._damage()在没有脚本的情况下会失败。Rust 的反射调用(例如Object::call())也是如此。下划线
_前缀的意义在于:理想情况下,您不应直接从脚本调用虚函数。为了解决这个问题,您可以在 Rust 中声明一个单独的
#[func] fn default_damage(),该函数将作为常规方法注册,因此可以从脚本中调用。 为了保留 Rust 的便捷回退行为,您可以在 Rust 的damage()方法中调用default_damage()。 -
无法访问
super方法。在面向对象语言中,您可以从复写的方法中调用基类方法,通常使用
super或base关键字。由于第 1 点的原因,这个默认方法在脚本中无法访问。然而,可以使用相同的解决方法。
-
有限的重入性。
如果您从 Rust 调用虚方法,它可能会调度到脚本实现。Rust 端持有对象的共享引用(
&self)或独占引用(&mut self)——即隐式的Gd::bind()或Gd::bind_mut()guard。 如果脚本实现随后访问相同的对象(例如通过设置#[var]属性),由于双重借用错误可能会发生panic。目前,您可以通过在方法上使用
#[func(gd_self, virtual)]来绕过此问题。gd_self要求第一个参数为Gd<Self>类型,这避免了调用bind,因此避免了借用问题。
我们正在观察社区如何使用虚函数,并计划在可能的情况下缓解这些限制。如果您有任何建议,欢迎与我们分享!
脚本类型
虽然本页重点讨论 GDScript,Godot 还提供了其他脚本功能。值得注意的是,您可以使用 C# 脚本,如果您使用 Mono 运行时来运行 Godot。
该库还提供了一个专用的 trait ScriptInstance,允许用户提供基于 Rust 的“脚本”。有关详细信息,请查阅其文档。
您还可以使用 classes::Script API 及其继承类(如 classes::GDScript)完全以编程方式配置脚本。这通常会违背脚本的初衷,但在这里提及以供参考。
结论
在本章中,我们展示了如何在 Rust 中定义虚函数,并如何在 GDScript 中复写它们。这为两种语言之间提供了一个额外的集成层,并允许在编辑器中轻松实验可交换的行为。
Toolchain
除了 Rust 之外,在使用 Godot 时,还有一些非常实用的知识。这一章节将详细介绍这些内容,涵盖版本控制、兼容性、调试等主题。
请查看子章节以获取更多信息。
兼容性和稳定性
godot-rust 库同时支持多个 Godot 稳定版本。
与 Godot 的兼容性
在开发扩展库(或简称“扩展”)时,你需要考虑目标的引擎版本。 这里有两个概念上不同的版本:
- API 版本:你的扩展编译时所针对的 GDExtension 版本。
- 运行时版本:指的是用 godot-rust 构建的库运行的 Godot 版本。
这两个版本可以不同,但需要满足下面详细说明的一些约束条件。
当前保证
最新的 godot-rust 至少需要 Godot 4.2。
从该版本正式发布起,只要 运行时版本 >= API 版本 ,扩展可以在任何 Godot 版本中加载,。
- 你可以在 Godot
4.2.1或4.3中运行4.2的扩展。 - 你不能在 Godot
4.2.1中运行4.3的扩展。
只要 GDExtension API 以向后兼容的方式演进——自 Godot 4.1 以来它已显著实现了这一点——我们将尽力维持此保证。 如果你发现任何不一致之处,请向我们报告。
兼容性矩阵
我们通常会在 Godot 版本发布后提供 1-2 年的支持,具体取决于功能集和维护工作量。 例如,Godot 4.0 扩展与较新版本二进制不兼容,因此价值非常有限。 Godot 4.1 也缺乏 Rust 可调用对象、类型化信号、热重载等必要的基础功能。
如果你需要支持较旧的 Godot 版本,可以回退到旧的 godot-rust 版本。 但这些版本将不再接收任何更新,即使是关键错误修复。
请确保使用适当的 api-4-* 功能标志,参见 选择 Godot 版本。
开发理念
我们非常重视与引擎的兼容性,力求构建一个与多个 Godot 版本兼容的扩展生态系统。 没有什么比更新引擎后需要重新编译 10 个插件/扩展更让人头疼了。
但这有时会很困难,因为:
- Godot 可能会引入一些我们没有意识到的微小的破坏性变更。
- 一些在 C++ 和 GDScript 中不破坏兼容性的变更,在 Rust 中可能会导致破坏性变化(例如,给以前必需的参数提供默认值)。
- 使用新特性时,需要为旧版 Godot 提供回退或填充方案。
我们会在多个 Godot 版本上运行持续集成(CI)任务,以确保更新不会破坏兼容性。然而,可能的版本组合非常多,而且还在不断增加,所以我们可能会漏掉某些问题。 如果你发现不兼容或违反以下规则的情况,请告知我们。
不在支持范围内
我们不会投入精力维护以下内容的兼容性:
- Godot 的开发版本,除非是最新的
master分支。- 请注意,我们可能需要一些时间来跟进最新的变更,因此请不要在上游更改合并后的几天内报告问题。
- 非稳定版本(alpha、beta、RC)。
- 第三方绑定或 GDExtension API(如 C#、C++、Python 等)。
- 这些可能有自己的版本保证和发布周期,也可能有特定的集成问题。如果你在 gdext 和其他绑定中发现问题,请先在 GDScript 中重现问题,以确保问题与我们相关。
- 不过,我们会保持与 Godot 的兼容性,因此如果集成通过引擎进行(例如,Rust 调用一个 C# 实现的方法),应该是可以正常工作的。
- 使用非标准构建标志的 Godot(例如,禁用某些模块)。
- Godot分支或使用第三方模块的 Godot 引擎。
Rust API的稳定性
godot-rust 的许多基础已经构建完成并处于生产就绪状态。然而,我们仍然定期添加新功能,有时会优化现有 API。 因此,可以预期偶尔会有破坏性变化。 这些变更通常是微小的,并会在更新日志和迁移指南中宣布。 我们还会在 API 中使用弃用机制,以实现平滑过渡。
需要注意的是,许多破坏性变化是由外部因素引起的,比如:
- GDExtension 发生了无法从用户角度抽象的变化。
- 类型系统或运行时保证中的一些细微差别,可以通过更好、更安全的方式被构建(例如类型化数组、RIDs)。
- 我们收到了来自游戏开发者和其他用户的反馈,认为某些工作流程非常繁琐。
我们在 crates.io releases上的发布遵循 SemVer,但可能落后于 master 分支。
脚注
See Release history on Wikipedia.
Every extension developed with API version 4.0.x MUST be run with the same runtime version.
In particular, it is not possible to run an extension compiled with API version 4.0.x in Godot 4.1 or later.
This is due to breaking changes in Godot's GDExtension API.
See Release history on Wikipedia.
选择一个 Godot 版本
Supporting multiple Godot versions is a key feature of godot-rust. Especially if you plan to share your extension with others (as a library or an editor plugin), this page elaborates your choices and their trade-offs in detail. The previous chapter about compatibility is expected as a prerequisite.
目录
Motivation
To refresh, you have two Godot versions to consider:
-
API version, against which godot-rust compiles.
- Affects Rust symbols (classes, methods, etc.) you have available at compile time.
- This sets a lower bound on the Godot binary you can run your extension in.
-
Runtime version, the Godot engine version, in which you run the Rust extension.
- Affects the runtime behavior, e.g. newer versions may fix some bugs.
- It is advised to stay up-to-date with Godot releases, to benefit from new improvements.
GDExtension is designed to be backward-compatible, so an extension built with a certain API version can be run in all Godot binaries greater than that version.1 Therefore, the lower your API version, the more Godot versions you support.
Why support multiple versions?
The choice you have in the context of godot-rust is the API version. If you just make a game on your own, the defaults are typically good enough.
Explicitly selecting an API version can be helpful in the following scenarios:
- You run/test your application on different Godot minor versions.
- You are collaborating in a team, or you want to give your Godot project to friends to experiment with.
- You work on a library or plugin to share with the community, either open-source (distributed as code) or closed-source (distributed as compiled dynamic library).
Especially in the last case, you may want your extension to be compatible with as many Godot versions as possible, to reach a broader audience.
At first glance, it may not seem obvious why a plugin would support anything but the latest Godot version. After all, users can just update, right?
However, sometimes users cannot update their Godot version due to regressions, incompatibilities or project/company constraints.
Furthermore, imagine you want to use two GDExtension plugins: X (API level 4.3) and Y (4.2). Unfortunately, Y contains a bug that causes some issues with Godot 4.3. This means you cannot use both together, and you are left with some suboptimal choices:
- Only use X on 4.3.
- Only use Y on 4.2.
- Help the author of Y to patch the bug. But they may just sail the Caribbean and not respond on their repo. Or worse, Y might even be a closed-source plugin that you paid for.
Not only are you now left with a less-than-ideal situation, but you cannot build your own tool Z which uses both X and Y, either. Had X declared API 4.2, people could stick to that version until Y is fixed, and you too could release Z with API 4.2.
A longer compatibility range gives users more flexibility regarding when they update what. It accounts for the fact that developers iterate at varying pace, and enables projects to depend on each other. At scale, this enables a vibrant ecosystem of extensions around Godot.
Cutting edge vs. compatibility
Lower API versions allow supporting a wider range of Godot versions. For example, if you set the API version to 4.2, you can run it in Godot 4.2, 4.2.2 or 4.3, but not Godot 4.1.
On the flip side, lower API versions reduce the API surface that you can statically2 use in your Rust extension. If you select 4.2, you will not see classes and functions introduced in 4.3.
This is the core trade-off, and you need to decide based on your use case. If you are unsure, you can always start with a conservatively low API version, and bump it when you find yourself needing more recent features.
Selecting the API version in godot-rust
Now that the why part is clarified, let's get into how you can choose the Godot API version.
Default version
By default, godot-rust uses the current minor release of Godot 4, with patch 0. This ensures that it can be run with all Godot patch versions for that minor release.
Example: if the current release is Godot 4.3.5, then godot-rust will use API version 4.3.0.
Lower minor version
To change the API level to a lower version, simply turn on the Cargo feature api-4-x, where x is the minor version you want to target.
Example in Cargo.toml:
[dependencies]
# API level 4.2
godot = { ..., features = ["api-4-2"] }
You can also explicitly set the current minor version (the same as the default). This has the advantage that you keep that compatibility, even once godot-rust starts targeting a newer version by default.
Lower or higher patch version
godot-rust supports API version granularity on a patch level, if absolutely needed. This is rarely necessary and can cause confusion to users, so only select a patch-level API if you have a very good reasons. Also note that GDExtension itself is only updated in minor releases.
Reasons to want this might be:
- Godot ships a bugfix in a patch version that is vital for your extension to function properly.
- A new API is introduced in a patch version, and you would like its class/function definitions. This happens quite rarely.
To require a minimum patch level, use a api-4-x-y feature:
[dependencies]
# API level 4.2.1
godot = { ..., features = ["api-4-2-1"] }
Custom Godot versions
If you want to freely choose a Godot binary on your local machine from which the GDExtension API is generated, you can use the Cargo feature
api-custom. If enabled, this will look for a Godot binary in two locations, in this order:
- The environment variable
GODOT4_BIN. - The binary
godot4in yourPATH.
Generated code inside the godot::builtin, godot::classes and godot::global modules may now look different from stable releases.
Note that we do not give any support or compatibility guarantees for custom-built GDExtension APIs.
Working with the api-custom feature requires the bindgen crate, as such you may need to install the LLVM toolchain.
Consult the setup page for more information.
Setting GODOT4_BIN to a relative path
If you have multiple Godot workspaces on a machine, you may want a workspace-independent method of setting the GODOT4_BIN environment variable.
This way, the matching Godot editor binary for that workspace is always used in the build process, without having to set GODOT4_BIN differently
for each location.
You can do this by configuring Cargo to set GODOT4_BIN to a relative path for you, in .cargo/config.toml.
In the root of your Rust project, create .cargo/config.toml with the example content shown below, modifying the editor path as needed to find
your binary. The path you set will be resolved relatively to the location of the .cargo directory.
[env]
GODOT4_BIN = { value = "../godot/bin/godot.linuxbsd.editor.x86_64", relative = true, force = true }
(If you want to override config.toml by setting GODOT4_BIN in your environment, remove force = true.)
Test your change by running cargo build.
See The Cargo Book for more information on customizing your build environment with
config.toml.
Footnotes
Godot 4.0 has been released before the GDExtension API committed to stability, so no single 4.0.x release is compatible with any other release (not even patch versions among each other). We provide 4.0 API levels, but due to their limited utility, we will phase out support very soon.
Even if your API level is 4.2, it is possible to access 4.3 features, but you need to do so dynamically. This can be
achieved using reflection APIs like Object::call(), but you lose the type safety and convenience of the statically generated API.
To obtain version information, check out the GdextBuild API.
调试(Debugging)
用 godot-rust 编写的扩展可以像调试其他 Rust 程序一样使用 LLDB 进行调试。 主要的区别在于,LLDB 会启动或附加到 Godot 的 C++ 可执行文件:无论是 Godot 编辑器,还是你的自定义 Godot 应用程序。 随后,Godot 会加载你的扩展(它本身是一个动态库),并通过它加载你的 Rust 代码。
启动或附加 LLDB 的过程会根据你的 IDE 和平台有所不同。除非你使用的是 Godot 的调试版本,否则你只会看到 Rust 代码中的栈帧(stack frames)符号。
使用 VS Code 启动调试
以下是一个适用于 Visual Studio Code 的调试器配置示例。启动配置和任务应分别放置在项目根目录下的 ./.vscode/launch.json 和 ./.vscode/tasks.json 文件中。
此示例假设你已安装 CodeLLDB 扩展,这是 Rust 开发中常用的扩展。
有关 -w(窗口模式)或 -e(编辑器)等命令,请参考 Godot 的命令行教程。
// ./.vscode/launch.json
{
    "configurations": [
        {
            "name": "Debug Project (Godot 4)",
            "type": "lldb", // CodeLLDB 扩展提供的类型
            "request": "launch",
            "cwd": "${workspaceFolder}/godot",
            "preLaunchTask": "build-rust",
            "args": [
                "-w" // windowed mode
                // "-e": editor does not keep breakpoints; thus not listed here.
            ],
            "program": "PATH/TO/GODOT"
        }
    ]
}
// ./.vscode/tasks.json
{
    "version": "2.0.0",
    "tasks": [
        {
            "label": "build-rust",
            "command": "cargo",
            "args": [
                "build"
            ],
            "options": {
                "cwd": "${workspaceFolder}/rust"
            }
        }
    ]
}
在 macOS 上调试
在 macOS 上,将调试器附加到一个未本地编译的可执行文件(例如 Godot 编辑器)时,必须考虑到 系统完整性保护(SIP)安全特性。 即使你的扩展是本地编译的,LLDB 也无法在没有手动重新签名的情况下附加到 Godot 主进程。
为了重新签名,只需创建一个名为 editor.entitlements 的文件,并将以下内容添加进去。
确保使用下面的 editor.entitlements 文件,而不是 Godot 文档 中的版本,
因为它包含了当前 Godot 指令中未包含的 com.apple.security.get-task-allow 键。
<?xml version="1.0" encoding="UTF-8"?>
<!DOCTYPE plist
  PUBLIC "-//Apple//DTD PLIST 1.0//EN" "http://www.apple.com/DTDs/PropertyList-1.0.dtd">
<plist version="1.0">
    <dict>
        <key>com.apple.security.cs.allow-dyld-environment-variables</key>
        <true/>
        <key>com.apple.security.cs.allow-jit</key>
        <true/>
        <key>com.apple.security.cs.allow-unsigned-executable-memory</key>
        <true/>
        <key>com.apple.security.cs.disable-executable-page-protection</key>
        <true/>
        <key>com.apple.security.cs.disable-library-validation</key>
        <true/>
        <key>com.apple.security.device.audio-input</key>
        <true/>
        <key>com.apple.security.device.camera</key>
        <true/>
        <key>com.apple.security.get-task-allow</key>
        <true/>
    </dict>
</plist>
创建此文件后,你可以在终端中运行以下命令以完成重新签名过程:
codesign -s - --deep --force --options=runtime \
    --entitlements ./editor.entitlements /Applications/Godot.app
建议将此文件提交到版本控制中,因为如果你有团队,每个开发者都需要重新签名他们本地的安装。不过,这个过程只需每次安装Godot时执行一次。
Export to Android
Exporting with godot-rust for Godot requires some of the same pieces that are required for building Godot from source. Specifically, the Android SDK Command Line Tools and JDK 17 as mentioned in Godot's documentation here.
Once you have those installed, you then need to follow Godot's instructions for setting up the build system here.
To find the JDK and NDK versions that are needed, reference the Godot configuration that your version of Godot is using. For example:
Compiling
The environment variable CLANG_PATH is used by bindgen's clang-sys dependency. See also
clang-sys documentation
Set the environment variable CLANG_PATH to point to Android's build of clang. Example:
export CLANG_PATH=\
"{androidCliDirectory}/{androidCliVersion}/ndk/{ndkVersion}/toolchains/llvm/prebuilt/{hostMachineOs}/bin/clang"
Then set the CARGO_TARGET_{shoutTargetTriple}_LINKER to point to the Android linker for the Android triple you are targeting.
The {shoutTargetTriple} should be in SHOUT_CASE so that a triple such as aarch64-linux-android becomes AARCH64_LINUX_ANDROID.
You need to compile your Rust extension library for each Android triple individually. Possible targets can be found by running:
rustup target list
You can find the linkers in the Android CLI directory at:
{androidCliDirectory}/{androidCliVersion}/ndk/{ndkVersion}/toolchains/llvm/prebuilt/
{hostMachineOs}/bin/{targetTriple}{androidVersion}
As of writing this, the tested triples are:
| Triple | Environment Variable | Godot Arch | GDExtension Config |
|---|---|---|---|
aarch64-linux-android | CARGO_TARGET_AARCH64_LINUX_ANDROID_LINKER | arm64 | android.debug.arm64 |
x86_64-linux-android | CARGO_TARGET_X86_64_LINUX_ANDROID_LINKER | x86_64 | android.debug.x86_64 |
armv7-linux-androideabi | CARGO_TARGET_ARMV7_LINUX_ANDROID_LINKER | arm32 | android.debug.armeabi-v7a |
i686-linux-android | CARGO_TARGET_I686_LINUX_ANDROID_LINKER | x86_32 | android.debug.x86 |
Notice how the environment variables are in all-caps and the triple's "-" is replaced with "_".
Make sure to add all of the triples you want to support to rustup via:
rustup target add {targetTriple}
Example:
rustup target add aarch64-linux-android
A complete example
Putting it all together, here is an example compiling for aarch64-linux-android. This is also probably the most common
Android target, as of the writing of this.
Assuming the following things:
- Android CLI is installed in the
$HOMEfolder. - Godot is still relying on Android NDK version 23.2.8568313. Check here.
- The downloaded Android CLI version is: 11076708_latest (update this to be the version you downloaded).
- This is being run on Linux. Change the
linux-x86_64folder inCLANG_PATHandCARGO_TARGET_AARCH64_LINUX_ANDROID_LINKERto be your host machine's operating system. - You are targeting Android version 34.
And here is what the commands look like running from a bash shell:
rustup target add aarch64-linux-android

export CLANG_PATH="$HOME/android-cli/11076708_latest/ndk/23.2.8568313/toolchains/llvm/prebuilt/linux-x86_64/bin/clang"
export CARGO_TARGET_AARCH64_LINUX_ANDROID_LINKER=\
"$HOME/android-cli/11076708_latest/ndk/23.2.8568313/toolchains/llvm/prebuilt/linux-x86_64/bin/aarch64-linux-android34-clang"

cargo build --target=aarch64-linux-android
And then you should find a built version of your GDExtension library in:
target/aarch64-linux-android/debug/{YourCrate}.so
Make sure to update your .gdextension file to point to the compiled lib. Example:
android.debug.arm64="res://path/to/rust/lib/target/aarch64-linux-android/debug/{YourCrate}.so
Export to Web
Web builds are a fair bit more difficult to get started with compared to native builds. This will be a complete guide on how to get things compiled. However, setting up a web server to host and share your game is considered out of scope of this guide, and is best explained elsewhere.
Web support in godot-rust is experimental and should be understood as such before proceeding.
Installation
Install a nightly build of rustc, the wasm32-unknown-emscripten target for rustc, and rust-src.
The reason why nightly rustc is required is the unstable flag to build std (-Zbuild-std).
Assuming that Rust was installed with rustup, this is quite simple.
rustup toolchain install nightly
rustup component add rust-src --toolchain nightly
rustup target add wasm32-unknown-emscripten --toolchain nightly
Next, install Emscripten. The simplest way to achieve this is to install emsdk from the git repo.
We recommend version 3.1.74 when targeting Godot 4.3 or later.1
git clone https://github.com/emscripten-core/emsdk.git
cd emsdk
./emsdk install 3.1.74
./emsdk activate 3.1.74

source ./emsdk_env.sh  # on Linux
run ./emsdk_env.bat    # on Windows
It would also be highly recommended to follow the instructions in the terminal to add emcc2 to your PATH.
If not, it is necessary to manually source the emsdk_env.sh file in every new terminal prior to compilation.
This is platform-specific.
Project Configuration
At the moment, you'll need to use api-custom to export to the web. In the future, we will provide a "prebuilt"
target (like Linux, macOS and Windows) directly for Wasm32. For now, see Custom Godot versions.
Enable the experimental-wasm feature on godot-rust in the Cargo.toml file.
It is also recommended to enable the lazy-function-tables feature to avoid long compile times with release builds
(this might be a bug and not necessary in the future). Edit the line to something like the following:
[dependencies.godot]
git = "https://github.com/godot-rust/gdext"
branch = "master"
features = ["api-custom", "experimental-wasm", "lazy-function-tables"]
Next, begin configuring the emcc flags and export targets as below. These initial settings will assume that your extension needs multi-threading
support, but that's usually not the case, so make sure to check the "Thread support" section below if you're
exporting to Godot 4.3 or later.
If you do not already have a .cargo/config.toml file, do the following:
- Create a
.cargodirectory at the same level as yourCargo.toml. - Inside that directory, create a
config.tomlfile.
Start by adding the following contents to that file:
[target.wasm32-unknown-emscripten]
rustflags = [
    "-C", "link-args=-pthread", # /!\ Read 'Thread support' below regarding this flag
    "-C", "target-feature=+atomics", # /!\ Read 'Thread support' below regarding this flag
    "-C", "link-args=-sSIDE_MODULE=2",
    "-C", "llvm-args=-enable-emscripten-cxx-exceptions=0",
    "-Z", "default-visibility=hidden",
    "-Z", "link-native-libraries=no",
    "-Z", "emscripten-wasm-eh=false",
]
A bit of background: The compiled Wasm binary is a side module which is dynamically loaded by Godot's main module at runtime. This is very similar to how dynamic libraries and executables work.
The default-visibility=hidden flag ensures that symbols of each side module are private to that module.
Without it, it's possible that global variables of multiple extensions are merged together, causing very confusing bugs.
This flag is essential when you have multiple Rust extensions loaded in the same Godot game.
If you need to selectively disable this flag (not recommended), you can remove it from the rustflags list in .cargo/config.toml or RUSTFLAGS.
See also this GitHub discussion for more information.
Edit the project's .gdextension file to include support for web exports.
This file will probably be at godot/{YourCrate}.gdextension.
The format will be similar to the following:
[libraries]
...
web.debug.wasm32 = "res://../rust/target/wasm32-unknown-emscripten/debug/{YourCrate}.wasm"
web.release.wasm32 = "res://../rust/target/wasm32-unknown-emscripten/release/{YourCrate}.wasm"
Compile the Project
Verify emcc is in the PATH. This can be as simple as doing the following:
emcc --version
Now, try to compile your code. It is necessary to both use the nightly compiler and specify to build std3, along with specifying the Emscripten target.
cargo +nightly build -Zbuild-std --target wasm32-unknown-emscripten
Note that you may have to use a different build command in order to let the extension work in single-threaded web export in Godot 4.3+ (see the "Thread support" section below for more information).
Thread support (Godot 4.3 or later)
The following section assumes your extension targets Godot 4.3 or later. If your extension will only target Godot 4.2 or 4.1, you may keep the initial configuration from Project Configuration without any changes.
In addition, this section's instructions require godot-rust 0.3 or later.
The above settings assume that multi-threading support is always needed for your extension. However, starting with Godot 4.3, when the end user exports a game to the web, Godot includes an option to disable Thread Support in the web export menu (see the image in the "Godot editor setup" section), with the goal of having the exported game run in more environments, including older browsers, as well as webservers without Cross-Origin Isolation support.
With the proposed initial configuration from "Project configuration", if the end user disabled Thread Support, your extension would break. If you'd like your extension to support builds without multi-threading as well to avoid this problem, you will need to update your build setup in one of the two following ways.
Ensure you're using recommended versions of Emscripten and nightly Rust (at least Rust 1.85 is recommended).
This is because earlier versions of Emscripten expected link-args=-sUSE_PTHREADS=1 instead of link-args=-pthread, but this flag has
been deprecated.
In addition, earlier Rust versions required additional +bulk-memory,+mutable-globals target features, but they appear to not be needed anymore.
Building without multi-threading support
In this scenario, you'd like to build your extension without any multi-threading support, that is, to have your extension only work when Thread Support is disabled.
To do that, you must remove the lines with the -pthread and target-feature=+atomics flags from .cargo/config.toml,
as well as enable the experimental-wasm-nothreads feature in Cargo.toml.
The remaining configuration and build command do not require further changes.
This setup, by itself, isn't very common. We recommend following the instructions below to accept both multi-threaded and single-threaded exports for your extension.
Building both with and without multi-threading support
This is the recommended approach and allows your extension to work in both multi-threaded and single-threaded exports.
For that to happen, your extension will need to have two separate builds, one for each mode (with and without multi-threading).
Afterwards, Godot will automatically pick the correct build depending on whether the user chooses to enable or disable Thread Support when exporting to the web.
Here's how this can be done:
-
Remove
"-C", "link-args=-pthread"and"-C", "target-feature=+atomics"from.cargo/config.tomlso that you may conditionally enable them afterwards, resulting in the following updated.cargo/config.tomlfile:[target.wasm32-unknown-emscripten] rustflags = [ "-C", "link-args=-sSIDE_MODULE=2", "-C", "llvm-args=-enable-emscripten-cxx-exceptions=0", "-Z", "default-visibility=hidden", "-Z", "link-native-libraries=no", "-Z", "emscripten-wasm-eh=false", ] -
Create a feature for your main crate which enables
experimental-wasm-nothreadswhen used. You can do this by creating a[features]section in your crate'sCargo.tomlas follows:[features] nothreads = ["godot/experimental-wasm-nothreads"]This feature should be enabled on any crates depending on the
godotcrate, so if you have more than one crate in your workspace, you should add the same[features]section above to each other crate, and then enable each crate'snothreadsfeature from the main crate (which provides the extension's entrypoint).For example, if you have a workspace with one main crate called
extensionand two other crates calledlib1andlib2, each depending ongodot, then you may add the[features]section above tocrates/lib1/Cargo.tomlandcrates/lib2/Cargo.toml, and then add the following tocrates/extension/Cargo.toml:[features] # Ensure that enabling `nothreads` for the main crate also enables # that feature for other crates. nothreads = [ "lib1/nothreads", "lib2/nothreads", "godot/experimental-wasm-nothreads" ] -
Edit your
.gdextensionfile to list two separate Wasm binary paths - one for the threaded build with the.threads.wasmsuffix and one for thenothreadsbuild without a different suffix, as follows:[libraries] ... web.debug.threads.wasm32 = "res://../rust/target/wasm32-unknown-emscripten/debug/{YourCrate}.threads.wasm" web.release.threads.wasm32 = "res://../rust/target/wasm32-unknown-emscripten/release/{YourCrate}.threads.wasm" web.debug.wasm32 = "res://../rust/target/wasm32-unknown-emscripten/debug/{YourCrate}.wasm" web.release.wasm32 = "res://../rust/target/wasm32-unknown-emscripten/release/{YourCrate}.wasm" -
Have two separate build commands, executed in the following order:
-
Building with multi-threading support: you must add the
-pthreadandtarget-feature=+atomicsflags back manually through theRUSTFLAGSenvironment variable, but NOT enable thenothreadsfeature yet.Specifying `RUSTFLAGS` will cause flags in `.cargo/config.toml` to be ignored, so all flags in it must be specified again.Afterwards, you should rename the generated Wasm binary, such that it can be picked up by the modified
.gdextensionfile as a threaded build:RUSTFLAGS="-C link-args=-pthread \ -C target-feature=+atomics \ -C link-args=-sSIDE_MODULE=2 \ -C llvm-args=-enable-emscripten-cxx-exceptions=0 \ -Z default-visibility=hidden \ -Z link-native-libraries=no \ -Z emscripten-wasm-eh=false" cargo +nightly build -Zbuild-std --target wasm32-unknown-emscripten mv target/wasm32-unknown-emscripten/debug/{YourCrate}.wasm target/wasm32-unknown-emscripten/debug/{YourCrate}.threads.wasm # On Batch (Windows), use instead: REN target\wasm32-unknown-emscripten\debug\{YourCrate}.wasm {YourCrate}.threads.wasmFor a release mode build, you'd replace
debugwithreleasein the last command. -
Building without multi-threading support: build without the
-pthreadortarget-feature=+atomicsflags, but this time enabling yournothreadsfeature created in the second step.No further renaming is needed, but make sure the previous build's resulting binary was renamed to avoid accidentally overwriting it.
The build command for this step will then look as follows:
cargo +nightly build --features nothreads -Zbuild-std --target wasm32-unknown-emscripten
-
-
Optionally, if you'd like to disable certain functionality in your extension for
nothreadsbuilds (e.g. disable a certain multi-threaded function call), you can use#[cfg(feature = "nothreads")]and its variants to conditionally compile certain code under single-threaded builds, thanks to thenothreadsfeature created in step 2. For example:fn maybe_threaded_function() { #[cfg(feature = "nothreads")] { /* single-threaded code */ } #[cfg(not(feature = "nothreads"))] { std::thread::spawn(|| { /* multi-threaded code */ }).join().unwrap(); } }
If your extension is meant to be distributed to other users beside you, the developer, don't forget to ship BOTH binaries (with and without multi-threading support) to your end users.
With those steps, you may successfully compile your extension with and without multi-threading support, and let you and your end users choose either option when exporting games to the web.
To not have to remember the multiple build commands, it is advised to add them to a single shell script file
called build.sh which invokes both builds in order (including the binary file renaming before the second build and any other steps), or store them
in a Justfile (useful if you need to build from Windows), Makefile or similar.
Godot editor setup
To export your godot-rust game to the web, add a web export in the Godot Editor. It can be configured at Project > Export... in the top menu bar.
Make sure to turn on the Extensions Support checkbox.
In Godot 4.3 or above, you should also make sure to turn on the Thread Support checkbox, unless your extension has a nothreads build,
which can be made by following the steps in the "Thread Support" section.

If the error below appears in red at the bottom of the export popup instead:
No export template found at expected path:
Then click on Manage Export Templates next to the error message, and then on the next screen select Download and Install. See Godot tutorial for further information.
Running the webserver
Back at the main editor screen, there is an option to run the web debug build (not a release build) locally without needing to run an export or manually set up a web server.
At the top right, choose Remote Debug > Run in Browser. Afterwards, Godot will automatically open up a web browser running your game.
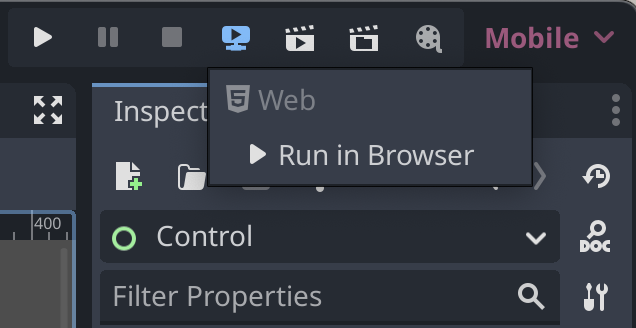
- Godot 4.1.3+ or 4.2+ is necessary.
- GDExtension support for Firefox requires Godot 4.3+, and can be more limited compared to Chromium-based browsers (such as Google Chrome, Microsoft Edge or Brave).
If you face problems when testing with Firefox, you may need to copy the URL of the server created by the editor, which is usually
http://localhost:8060/tmp_js_export.html, and open it in a Chromium-based browser such as Google Chrome, Microsoft Edge or Brave to verify
whether it's a problem with your game or with Firefox.
Troubleshooting
-
Make sure Extensions Support is turned on when exporting.
-
Make sure you are using the recommended compiler flags.
-
When using Godot 4.3+, Thread Support has to be turned on during export unless your extension supports a
nothreadsbuild, as described in the "Thread Support" section. -
If the game was exported with Thread Support enabled (or targeting Godot 4.1 or 4.2), make sure the webserver you use to host your game supports Cross-Origin Isolation. Web games hosted on itch.io, for example, should already support this out of the box.
To test it locally, you can either use the Godot editor's built-in web game runner (shown in "Running the webserver"), or a third-party HTTP server program. For example, if you have
npmandnpxinstalled, you may usenpx serve --corsto quickly host your web game locally with Cross-Origin Isolation support, enabling multi-threading.- Note that Godot 4.3 games exported to the web without Thread Support are not subject to this restriction, making them compatible with more environments, which is the main advantage of disabling that option. You may even have success in running those games by simply double-clicking the generated HTML file. The main caveat is that they may only run single-threaded.
-
Make sure your Rust library and Godot project are named differently (for example,
cool-game-extensionandcool-game), as otherwise your extension's.wasmfile may be overwritten, leading to confusing runtime errors. -
Try using exactly the recommended
emccversion in the guide.
Understanding common errors
-
RuntimeError: Aborted(undefined). Build with -sASSERTIONS for more info.The game aborted unexpectedly. This likely means some Rust code called
panic!()or unsuccessfulassert!(condition).Unfortunately, godot-rust cannot catch panics in Wasm yet due to limitations in the Rust compiler, so your game will abort.
Please fix any panics indicated in the browser console, perhaps using debugging tools. The suggested
-sASSERTIONSflag will likely not help at all.Some common panic causes include:
- Attempting to call certain multi-threaded code in a
nothreadsbuild, such asstd::thread::spawn(...); - Using panicking variants of methods, such as
Array::atinstead ofArray::get; - Calling
.unwrap()onOption::NoneorResult::Err.
- Attempting to call certain multi-threaded code in a
-
TypeError: resolved is not a functionThis likely indicates you specified the
-sASSERTIONSemscripten flag, which is not entirely supported at the moment. Try removing it. -
Wasm module '{YourCrate}.wasm' not found. Check the console for more information.This indicates the extension's Wasm binary filename is using a name that godot-rust doesn't expect.
By default, on game startup (only on the Wasm target), godot-rust will look for binaries named
{YourCrate}.wasmor{YourCrate}.threads.wasm. If your GDExtension is using a different Wasm filename, please either rename it to one of those names, or tell godot-rust the name of the Wasm binary you are using as below. Don't forget to update the binary name in your.gdextensionfile to match.// lib.rs of your main crate: struct MyExtension; #[gdextension] unsafe impl ExtensionLibrary for MyExtension { fn override_wasm_binary() -> Option<&'static str> { // Explicitly use a custom name for our Wasm binary. Some("some-different-name.wasm") } }In addition, please note that godot-rust 0.3 or later is required to fix this error.
-
LinkError: WebAssembly.instantiate(): Import #6 "env" "__cpp_exception": tag import requires a WebAssembly.TagThis is caused by Rust's WASM exception handling system, used for panics, which was enabled by default for Emscripten targets in
rustcv1.93.0 (see the relevant PR). It unfortunately seems to be incompatible with Godot.To fix, disable the feature by adding
-Z emscripten-wasm-eh=falsetoRUSTFLAGSor to.cargo/config.tomlas suggested in the previous steps (copying the suggested list of flags should be enough). This requires using a nightly compiler.Further discussion can be found at godot-rust issue #1119.
Customizing emcc flags
If you keep running into unknown errors and none of the solutions above worked, first and foremost consider letting us know by opening an issue, especially if you're using a newer Godot version, as it's possible some new information is missing from this documentation.
Make sure to also check or comment on the WebAssembly thread on GitHub, as new information is continually added to that thread over time.
Besides that, it's possible that you may have to enable additional emcc flags during compilation for your extension to work properly,
which are specified at build time as -C link-args=-FLAG_HERE either in the RUSTFLAGS environment variable
or in the .cargo/config.toml file (note that using RUSTFLAGS causes all flags in .cargo/config.toml to be ignored).
If that's the case, you may check out the Emscripten documentation
for a list of some of the accepted flags. For example, -C link-args=-g enables linking back to Rust code while debugging.
This additional list also contains useful emcc flags which may be specified
only with the -s prefix.
If you found a set of flags that worked for your case, please share it in the WebAssembly GitHub thread to help others in a similar situation.
Debugging
Currently, the only option for Wasm debugging is the "C/C++ DevTools Support" extension for Chrome. It adds support for breakpoints and a memory viewer into the F12 menu.
If Rust source code doesn't appear in the browser's debug panel, you should compile your extension in debug mode and add -g to linker flags.
For example, in a multi-threaded build:
RUSTFLAGS="-C link-args=-g \
-C link-args=-pthread \
-C target-feature=+atomics \
-C link-args=-sSIDE_MODULE=2 \
-C llvm-args=-enable-emscripten-cxx-exceptions=0 \
-Z default-visibility=hidden \
-Z link-native-libraries=no \
-Z emscripten-wasm-eh=false" cargo +nightly build -Zbuild-std --target wasm32-unknown-emscripten
Footnotes
Note: Due to a bug with emscripten, web export templates for Godot 4.2 and earlier versions could only be compiled with
emcc versions up to 3.1.39. If you're targeting those older Godot versions, it could be safer to use emcc version 3.1.39
to compile your extension as well, but newer emcc versions might still work regardless
(just make sure to test your extension in all targeted Godot versions).
emcc is the name of Emscripten's compiler.
The primary reason for this is it is necessary to compile with -pthread and -Ctarget-feature=+atomics enabled for multi-threaded builds.
The shipped std does not, and may also build with other flags we don't use, so building std is a requirement.
Related info on about WASM support can be found here.
Export to macOS and iOS
Mac libraries that are intended to be shared with other people require Code Signing and Notarization. This page will introduce you to the process of building a macOS universal library and an iOS library, which you can distribute to other people.
Building a redistributable library
For this tutorial, you will need:
- a Mac Computer
- an Apple ID enrolled in Apple Developer Program (99 USD per year).
Without Code Signing and Notarization, the other person can still use the built library, but either needs to:
- rebuild the whole thing locally
- re-sign it
- accept that it may contain malicious code.
Prerequisites:
- Download and install Xcode on your Mac computer.
Building a macOS universal lib
Add both x64 and arm64 targets. This is needed in order to create a universal build.
rustup target add x86_64-apple-darwin
rustup target add aarch64-apple-darwin
Build the library for both target architectures:
cargo build --target=x86_64-apple-darwin --release
cargo build --target=aarch64-apple-darwin --release
Run the lipo tool to merge the two in one universal library.
lipo -create -output target/release/lib{YourCrate}.macos.dylib \
    target/aarch64-apple-darwin/release/lib{YourCrate}.dylib \
    target/x86_64-apple-darwin/release/lib{YourCrate}.dylib
The result of this will be the file target/release/lib{YourCrate}.macos.dylib that will now have support for both x64 and arm64 platforms.
The user would need to replace {YourCrate} with the crate name.
The name of your library will be the one you provided in Cargo.toml file, prefixed with lib and followed by .dylib:
[package]
name = "{YourCrate}"
Next, you will need to create the .framework folder.
mkdir target/release/lib{YourCrate}.macos.framework
cp target/release/lib{YourCrate}.macos.dylib \
    target/release/lib{YourCrate}.macos.framework/lib{YourCrate}.macos.dylib
Next, create the Info.plist file inside the Resources folder:
mkdir target/release/lib{YourCrate}.macos.framework/Resources
File contents:
<?xml version="1.0" encoding="UTF-8"?>
<!DOCTYPE plist PUBLIC "-//Apple//DTD PLIST 1.0//EN" "http://www.apple.com/DTDs/PropertyList-1.0.dtd">
<plist version="1.0">
<dict>
    <key>CFBundleExecutable</key>
    <string>lib{YourCrate}.macos.dylib</string>
    <key>CFBundleIdentifier</key>
    <string>org.mywebsite.myapp</string>
    <key>CFBundleInfoDictionaryVersion</key>
    <string>6.0</string>
    <key>CFBundleName</key>
    <string>My App Name</string>
    <key>CFBundlePackageType</key>
    <string>FMWK</string>
    <key>CFBundleShortVersionString</key>
    <string>1.0.0</string>
    <key>CFBundleSupportedPlatforms</key>
    <array>
        <string>MacOSX</string>
    </array>
    <key>NSHumanReadableCopyright</key>
    <string>Copyright (c)...</string>
    <key>CFBundleVersion</key>
    <string>1.0.0</string>
    <key>LSMinimumSystemVersion</key>
    <string>10.12</string>
</dict>
</plist>
The CFBundleExecutable name must match the dylib file name. Some of the contents in the XML file must not contain some characters.
Generally avoid using anything other than letters and numbers.
Related StackOverflow issue.
Edit the project's .gdextension file to include support for macOS.
This file will probably be at godot/{YourCrate}.gdextension.
The format will be similar to the following:
[libraries]
...
macos.release = "res://../rust/target/release/lib{YourCrate}.macos.framework"
Building an iOS library
Add as target arm64 iOS.
rustup target add aarch64-apple-ios
Build the library:
cargo build --target=aarch64-apple-ios --release
The result of this will be the file target/aarch64-apple-ios/release/lib{YourCrate}.dylib.
Next, you will need to create the .framework folder.
mkdir target/release/lib{YourCrate}.ios.framework
cp target/release/lib{YourCrate}.ios.dylib \
    target/release/lib{YourCrate}.ios.framework/lib{YourCrate}.ios.dylib
Next, create the Info.plist file inside the .framework folder, with the following contents:
<?xml version="1.0" encoding="UTF-8"?>
<!DOCTYPE plist PUBLIC "-//Apple Computer//DTD PLIST 1.0//EN" "http://www.apple.com/DTDs/PropertyList-1.0.dtd">
<plist version="1.0">
<dict>
    <key>CFBundleInfoDictionaryVersion</key>
    <string>6.0</string>
    <key>CFBundleDevelopmentRegion</key>
    <string>en</string>
    <key>CFBundleExecutable</key>
    <string>lib{YourCrate}.ios.dylib</string>
    <key>CFBundleName</key>
    <string>My App Name</string>
    <key>CFBundleDisplayName</key>
    <string>My App Name</string>
    <key>CFBundleIdentifier</key>
    <string>org.my-website.my-app</string>
    <key>NSHumanReadableCopyright</key>
    <string>Copyright (c) ...</string>
    <key>CFBundleVersion</key>
    <string>0.12.0</string>
    <key>CFBundleShortVersionString</key>
    <string>0.12.0</string>
    <key>CFBundlePackageType</key>
    <string>FMWK</string>
    <key>CSResourcesFileMapped</key>
    <true/>
    <key>DTPlatformName</key>
    <string>iphoneos</string>
    <key>MinimumOSVersion</key>
    <string>12.0</string>
</dict>
</plist>
See XML format requirements above.
Edit the project's .gdextension file to include support for iOS.
This file will probably be at godot/{YourCrate}.gdextension.
The format will be similar to the following:
[libraries]
...
ios.release = "res://../rust/target/release/lib{YourCrate}.ios.framework"
Code Signing and Notarizing (macOS only)
This step is only needed if you want to share the library. If you are building the whole game, you will sign everything and don't need to sign the library. You can skip to Godot Build step.
In order to code-sign and notarize your app, you will first need to gather some information from your enrolled Apple Developer account. We will create corresponding environment variables and use a script to sign, so it's easier to run. Here are the environment variables needed:
APPLE_CERT_BASE64APPLE_CERT_PASSWORDAPPLE_DEV_IDAPPLE_DEV_TEAM_IDAPPLE_DEV_PASSWORDAPPLE_DEV_APP_ID
Firstly, make sure to enroll your Apple ID to the Developer Program:
- Create an Apple ID if you don't have one already.
- Use your Apple ID to register in the Apple Developer Program by going to developer.apple.com.
- Accept all agreements from the Apple Developer Page.
APPLE_DEV_ID - Apple ID
Your email used for your Apple ID.
APPLE_DEV_ID = email@provider.com
APPLE_DEV_TEAM_ID - Apple Team ID
Go to developer.apple.com. Go to account.
Go to membership details. Copy Team ID.
APPLE_DEV_TEAM_ID = 1ABCD23EFG
APPLE_DEV_PASSWORD - Apple App-Specific Password
Create Apple App-Specific Password. Copy the password.
APPLE_DEV_PASSWORD = abcd-abcd-abcd-abcd
APPLE_CERT_BASE64, APPLE_CERT_PASSWORD and APPLE_DEV_APP_ID
Go to developer.apple.com. Go to account.
Go to certificates.
Click on + at Certificates tab. Create Developer ID Application. Click Continue.
Leave profile type as is. Create a certificate signing request from a Mac. You can use your own name and email address. Save the file to disk.
You will get a file called CertificateSigningRequest.certSigningRequest. Upload it to the Developer ID Application request. Click Continue.
Download the certificate. You will get a file developerID_application.cer.
On a Mac, right click and select open. Add it to the login keychain. In the Keychain Access app that opened, log into Keychain tab, go to Keys, sort by date modified, and expand your key (the key should have the name you entered at Common Name). Right click the expanded certificate, get info, and copy the text at Details -> Subject Name -> Common Name. For example:
APPLE_DEV_APP_ID = Developer ID Application: Common Name (1ABCD23EFG)
Then, select the certificate, right click and click export. At file format select p12. When exporting, set a password for the certificate.
This will be the value of APPLE_CERT_PASSWORD. You will get a Certificates.p12 file.
For example:
APPLE_CERT_PASSWORD = <password_set_when_exporting_p12>
Then you need to make a base64 file out of it, by running:
base64 -i Certificates.p12 -o Certificates.base64
Copy the contents of the generated file, e.g.:
APPLE_CERT_BASE64 = ...(A long text file)
After these secrets are obtained, all that remains is to set them as environment variables. Afterwards you can use the following script for signing ci-sign-macos.ps1. In order to run this script you will need to install powershell on your Mac.
ci-sign-macos.ps1 target/release/{YourCrate}.framework
The user is responsible for the security and up-to-dateness of the script.
Godot export
After building the libraries, you can now distribute them as they are, or build the whole game using Godot. For that, follow Godot's How to export guide:
实用案例
自定义 resources
使用 godot-rust,您可以定义自定义的 Resource 类,这些类随后可以供终端用户使用。
编辑器插件
EditorPlugin 类型在编辑器和运行时加载,并能够访问编辑器和场景树。该类型的功能与用 GDScript 编写的典型 EditorPlugin 类相同,但关键在于它可以访问 整个 Rust 生态系统。
引擎单例
引擎单例是一个始终全局可用的类实例(遵循单例模式)。然而,它无法通过任何可靠的方式访问 SceneTree。
ResourceFormatSaver 和 ResourceFormatLoader
提供自定义的逻辑来保存和加载您的 Resource 派生类。
自定义图标
为您的类添加自定义图标实际上是非常简单的!
自定义 resources
自定义 Resource 类型可以暴露给终端用户,在他们的开发过程中使用。Resource 类型能够存储可以在编辑器 GUI 中轻松编辑的数据。例如,您可以创建一个自定义的 AudioStream 类型,用来处理一种新颖且有趣的音频文件类型。
注册 Resource
这个工作流与 Hello World example类似:
#![allow(unused)]
fn main() {
#[derive(GodotClass)]
#[class(init, base=Resource)]
struct ResourceType {
    base: Base<Resource>,
}
}
上述resource没有导出任何变量。虽然并非所有resource都需要导出变量,但大多数resource都需要。
如果你的自定义resource有需要在编辑器中运行的生命周期方法(例如 ready()、process() 等),你应该使用 #[class(tool)] 注解该类。
#![allow(unused)]
fn main() {
#[derive(GodotClass)]
#[class(tool, init, base=Resource)]
struct ResourceType {
    base: Base<Resource>,
}

#[godot_api]
impl IResource for ResourceType {
    // String representation of the object.
    fn to_string(&self) -> GString { ... }

    // Called when the object receives a Godot notification.
    fn on_notification(&mut self, what: ObjectNotification) { ... }

    // Called whenever get() is called or Godot gets the value of a property.
    fn get_property(&self, property: StringName) -> Option<Variant> { ... }

    // Called whenever Godot set() is called or Godot sets the value of a property.
    fn set_property(&mut self, property: StringName, value: Variant) -> bool { ... }

    // Called whenever Godot get_property_list() is called,
    // the returned vector here is appended to the existing list of properties.
    fn get_property_list(&mut self) -> Vec<PropertyInfo> { ... }

    // Called whenever Godot retrieves value of property. Allows to customize existing properties.
    // Every property info goes through this method, except properties added with get_property_list().
    fn validate_property(&self, property: &mut PropertyInfo) { ... }

    // Called by Godot to tell if a property has a custom revert or not.
    fn property_get_revert(&self, property: StringName) -> Option<Variant> { ... }

    fn setup_local_to_scene(&mut self) { ... }
}
}
与在 GDScript 中定义自定义resources类似,重要的是将这个类标记为“工具类”,这样它才可以在编辑器中使用。
关于如何注册函数、属性等系统,可以在 注册 Rust 符号 部分找到详细描述。
编辑器插件
使用 EditorPlugin 类型非常类似于 在 GDScript 中编写插件 的过程。
与 GDScript 插件不同,godot-rust 插件会自动注册,并且无法在项目设置的插件面板中启用/禁用。
在 GDScript 中编写的插件如果存在代码错误会自动禁用,但由于 Rust 是一种编译语言,您无法引入编译时错误。
创建 EditorPlugin
#![allow(unused)]
fn main() {
#[derive(GodotClass)]
#[class(tool, init, base=EditorPlugin)]
struct MyEditorPlugin {
    base: Base<EditorPlugin>,
}

#[godot_api]
impl IEditorPlugin for MyEditorPlugin {
    fn enter_tree(&mut self) {
    // 在这里执行典型的插件操作。
    }

    fn exit_tree(&mut self) {
    // 在这里执行典型的插件操作。
    }
}
}
由于这是一个 EditorPlugin,它会自动被添加到场景树的根节点。这意味着它可以在运行时访问场景树。此外,可以通过此节点安全地访问 EditorInterface 单例,这允许您直接向编辑器添加不同的 GUI 元素。如果您想实现一个复杂的 GUI,这会非常有帮助。
检查器插件
检查器面板允许您通过插件,创建自定义控件来编辑属性。
这在处理自定义数据类型和resources时非常有用,尽管您也可以使用此功能来更改内置类型的检查器控件。 您可以为特定属性、整个对象,甚至与特定数据类型关联的独立控件设计自定义控件。
更多信息,请参见 docs.godotengine.org。
Godot文档中的示例,该示例会将整数输入替换为一个按键,该按键生成一个随机值。
The example
之前(整数输入):
之后(按键):
在终端中与 Cargo.toml 相同目录下添加此依赖:
cargo add rand
创建 addon.rs 文件并在 lib.rs 中导入它:
#![allow(unused)]
fn main() {
// file: lib.rs
mod addon;
}
在文件开头添加以下导入:
#![allow(unused)]
fn main() {
use godot::classes::{
    Button, EditorInspectorPlugin, EditorPlugin, EditorProperty, IEditorInspectorPlugin,
    IEditorPlugin, IEditorProperty,
};
use godot::global;
use godot::prelude::*;
use rand::Rng;
}
Since Rust is a statically typed language, we will proceed in reverse order unlike in Godot documentation, to avoid encountering errors unnecessarily.
添加属性编辑器
To begin with, let's define the editor for properties:
#![allow(unused)]
fn main() {
#[derive(GodotClass)]
#[class(tool, init, base=EditorProperty)]
struct RandomIntEditor {
    base: Base<EditorProperty>,
    button: Option<Gd<Button>>,
}
}
After that, we need to add an implementation for the trait IEditorProperty:
#![allow(unused)]
fn main() {
#[godot_api]
impl IEditorProperty for RandomIntEditor {
    fn enter_tree(&mut self) {
        // Create button element.
        let mut button = Button::new_alloc();

        // Add handler for this button, handle_press will be define in another impl.
        button.connect("pressed", self.base().callable("handle_press"));
        button.set_text("Randomize");

        // Save pointer to the button into struct.
        self.button = Some(button.clone());
        self.base_mut().add_child(button.upcast());
    }

    fn exit_tree(&mut self) {
        // Remove element from inspector when this plugin unmount:
        if let Some(button) = self.button.take() {
            self.base_mut().remove_child(button.upcast());
        } else {
            // Log error if button disappeared before
            godot_error!("Button wasn't found in exit_tree");
        }
    }
}
}
Let's add a handler for the button:
#![allow(unused)]
fn main() {
#[godot_api]
impl RandomIntEditor {
    #[func]
    fn handle_press(&mut self) {
        // Update value by button click:
        // - Take property name, randomize number.
        // - Send property name and random number to Godot engine to update value.
        // - Update button text.
        let property_name = self.base().get_edited_property();
        let num = rand::thread_rng().gen_range(0..100);

        godot_print!("Randomize! {num} for {property_name}");

        self.base_mut()
            .emit_changed(property_name, num.to_variant());

        if let Some(mut button) = self.button.clone() {
            let text = format!("Randomize: {num}");
            button.set_text(&text);
        } else {
            // Print error of something went wrong
            godot_error!("Button wasn't found in handle_press");
        }
    }
}
}
添加检查器插件
Now we need to connect this editor to fields with an integer type.
To do this, we need to create an EditorInspectorPlugin.
#![allow(unused)]
fn main() {
#[derive(GodotClass)]
#[class(tool, init, base=EditorInspectorPlugin)]
struct RandomInspectorPlugin {
    base: Base<EditorInspectorPlugin>,
}
}
To add a property editor (which we implemented earlier), you need to implement the IEditorInspectorPlugin trait:
#![allow(unused)]
fn main() {
#[godot_api]
impl IEditorInspectorPlugin for RandomInspectorPlugin {
      fn parse_property(
        &mut self,
        _object: Gd<Object>, // object that is being inspected
        value_type: VariantType,
        name: GString,
        _hint_type: global::PropertyHint,
        _hit_string: GString,
        _flags: global::PropertyUsageFlags,
        _wide: bool,
    ) -> bool {
        if value_type == VariantType::INT {
            self.base_mut()
                .add_property_editor(name, RandomIntEditor::new_alloc().upcast());
            return true;
        }

        false
    }

    // This method says Godot that this plugin handle the object if it returns true
    fn can_handle(&self, object: Gd<Object>) -> bool {
        // This plugin handle only Node2D and object that extends it
        object.is_class("Node2D")
    }
}
}
If parse_property returns true, the editor plugin will be created and replace the current
representation; if not, it's necessary to return false.
This allows you to control where and how processing is done by this plugin.
添加编辑器插件
Only one thing left to do: define the editor plugin that will kick off all this magic!
This can be a generic EditorPlugin or a more specific InspectorEditorPlugin, depending
on what you want to achieve.
#![allow(unused)]
fn main() {
#[derive(GodotClass)]
#[class(tool, init, base=EditorPlugin)]
struct RustEditorPlugin {
    base: Base<EditorPlugin>,
    random_inspector: Gd<RandomInspectorPlugin>,
}
}
#![allow(unused)]
fn main() {
#[godot_api]
impl IEditorPlugin for RustEditorPlugin {
    fn enter_tree(&mut self) {
        // Create our inspector plugin and save it.
        let plugin = RandomInspectorPlugin::new_gd();
        self.random_inspector = plugin.clone();
        self.base_mut().add_inspector_plugin(plugin.upcast());
    }

    fn exit_tree(&mut self) {
        // Remove inspector plugin when editor plugin leaves scene tree.
        let plugin = self.random_inspector.clone();
        self.base_mut().remove_inspector_plugin(plugin.upcast());
    }
}
}
Sometimes after compilation, you may encounter errors or panic. Most likely, all you need to do is simply restart the Godot Editor.
Example error:
Initialize godot-rust (API v4.2.stable.official, runtime v4.2.2.stable.official)
ERROR: Cannot get class 'RandomInspectorPlugin'.
   at: (core/object/class_db.cpp:392)
ERROR: Cannot get class 'RandomInspectorPlugin'.
   at: (core/object/class_db.cpp:392)
用户单例
理解 单例模式 对于正确使用此系统非常重要。
“单例模式”通常被视为一种反模式,因为它违反了多种整洁、模块化代码的良好实践。然而,它也是一个可以用来解决某些设计问题的工具。因此,Godot 内部使用了单例模式,并且 godot-rust 用户也可以使用。
关于批评的更多内容,请参考 这里。
Godot 中的自定义引擎单例:
- 是
Object类型 - 始终在编辑器中运行(implied
#[class(tool)]) - 始终可供 GDScript 和 GDExtension 访问
- 必须在
InitStage::Scene步骤中进行注册和注销
Godot 在其 API 中提供了 许多 内置单例。您可以在 这里 找到完整列表。
目录
注册自定义单例
你可以使用 #[class(singleton)] 将指定类注册为单例。
#![allow(unused)]
fn main() {
#[derive(GodotClass)]
#[class(init, singleton)]
struct MySingleton {
    // 对于 `#[class(singleton)]`,默认基类是 Object,而非 RefCounted。
    base: Base<Object>,
}

// Can be accessed like any other singleton from the main thread.
let val = MySingleton::singleton().bind().foo();
}
现在你的单例已经可用(在你重新编译并重新加载后),你应该能够从 GDScript 中像这样访问它:
extends Node

func _ready() -> void:
    MySingleton.foo()
使用带有 on_main_loop_frame 的单例
自 Godot 4.5+ 起,可以使用 on_main_loop_frame 来调用用户单例:
fn global_delta() -> f64 {
    let ticks = ProjectSettings::singleton()
        .get("physics/common/physics_ticks_per_second")
        .to::<i64>();
    1.0 / (ticks as f64)
}

#[derive(GodotClass)]
#[class(init, singleton)]
struct MySingleton {
    #[init(val = global_delta())]
    delta: f64,

    #[init(val = true)]
    paused: bool,

    #[init(val = Instant::now())]
    time: Instant,

    base: Base<Object>,
}

struct MyExtension;

#[gdextension]
unsafe impl ExtensionLibrary for MyExtension {
    fn on_main_loop_frame() {
        if Engine::singleton().is_editor_hint() {
            return;
        }
        MySingleton::singleton().bind_mut().frame();
    }
}

impl MySingleton {
    pub fn frame(&mut self) {
        if self.paused {
            return;
        }

        let elapsed = self.time.elapsed().as_secs_f64();
        self.elapsed += elapsed;

        if self.elapsed >= self.delta {
            let time_scale = Engine::singleton().get_time_scale();
            self.run_simulation(self.elapsed * time_scale);
            self.elapsed = 0.0;
        }
        self.time = Instant::now();
    }
}
不使用过程宏注册自定义单例
可以通过 godot::classes::Engine 注册自定义单例。此外,实现 UserSingleton 可以通过 singleton() 访问已注册的单例实例。
用户单例应以其类名注册 —— 否则某些 Godot 组件(例如 4.4 之前的 GDScript)可能无法正确处理它们,并且在使用 T::singleton() 时编辑器可能崩溃。
引擎中每个单例类应只有一个实例,且该实例在库加载期间有效。因此,用户单例仅限于手动内存管理的类(即不继承自 RefCounted 的类)。
#[derive(GodotClass)]
#[class(init, base = Object)]
struct MySingleton {}

// 提供允许使用 MySingleton::singleton() 的 blanket 实现。
// 确保 `MySingleton` 是一个有效的单例
// (即非引用计数的 GodotClass)。
impl UserSingleton for MySingleton {}

struct MyExtension;

#[gdextension]
unsafe impl ExtensionLibrary for MyExtension {
    fn on_stage_init(stage: InitStage) {
        // 单例应在 MainLoop 启动前注册;
        // 否则 GDScriptParser 将无法识别它。
        if stage == InitStage::Scene {
            let obj = MySingleton::new_alloc();
            Engine::singleton()
                .register_singleton(
                    &MySingleton::class_id().to_string_name(),
                    &obj
                );
        }
    }

    fn on_stage_deinit(stage: InitStage) {
        if stage == InitStage::Scene {
            let obj = MySingleton::singleton();
            Engine::singleton()
                .unregister_singleton(
                    &MySingleton::class_id().to_string_name()
                );
            obj.free();
        }
    }
}
单例和 SceneTree
单例不能安全地访问场景树。在任何给定时刻,它们可能存在而没有活动的场景树。
虽然技术上可以通过一些取巧的方法访问场景树,但 强烈建议 为此目的使用自定义的 EditorPlugin。
创建一个 EditorPlugin 允许注册一个“自动加载的单例”,这个单例是一个 Node(或其派生类型),并且当游戏启动时,Godot 会自动将其加载到 SceneTree 中。
Resource 保存器和加载器
ResourceFormatSaver 和 ResourceFormatLoader 允许你使用自定义过程序列化和反序列化你派生自 Rust 的Resource类,并且定义新的已识别文件扩展名。
如果你有包含 纯 Rust 状态 的资源,这通常非常有用。
在这个上下文中,“纯”是指你的结构体成员中没有任何 #[var] 或类似的注解,即 Godot 不知道它们。这在你使用 Rust 库时很容易发生。
以下示例为你提供了一个可以复制粘贴的起点。对于高级用例,请参考这些类的 Godot 文档。
首先,你需要在库的入口点 InitLevel::Scene 中调用提供的函数。这可以确保正确初始化和清理你的加载器/保存器。
#![allow(unused)]
fn main() {
// 以下导入需要在接下来的代码示例中使用。
use godot::classes::{
    Engine, IResourceFormatLoader, IResourceFormatSaver, ResourceFormatLoader,
    ResourceFormatSaver, ResourceLoader, ResourceSaver,
};
use godot::prelude::*;

#[gdextension]
unsafe impl ExtensionLibrary for MyGDExtension {
    // 在扩展加载时注册单例。
    fn on_level_init(level: InitLevel) {
        if level == InitLevel::Scene {
            Engine::singleton().register_singleton(
                "MyAssetSingleton",
                &MyAssetSingleton::new_alloc(),
            );
        }
    }

    // 在扩展退出时注销单例。
    fn on_level_init(level: InitLevel) {
        if level == InitLevel::Scene {
            Engine::singleton().unregister_singleton("MyAssetSingleton");
            my_singleton.free();
        }
    }
}
}
定义单例来追踪你的加载器和保存器。
#![allow(unused)]

fn main() {
// 定义单例,包含所有加载器/保存器作为成员,
// 用于保持对象引用在后续销毁。
#[derive(GodotClass)]
#[class(base=Object, tool)]
struct MyAssetSingleton {
    base: Base<Object>,
    loader: Gd<MyAssetLoader>,
    saver: Gd<MyAssetSaver>,
}

#[godot_api]
impl IObject for MyAssetSingleton {
    fn init(base: Base<Object>) -> Self {
        let saver = MyAssetSaver::new_gd();
        let loader = MyAssetLoader::new_gd();

        // 在 Godot 中注册加载器和保存器。
        //
        // 如果你希望默认扩展名是由加载器定义的,
        // 请将 `at_front` 参数设置为 true。否则,你也可以删除该构建器。
        // Godot 目前没有提供完全禁用内置加载器的方法。
        // 警告:如果你有 _纯 Rust 状态_,内置加载器将无法正常工作。

        ResourceSaver::singleton().add_resource_format_saver_ex(&saver)
            .at_front(false)
            .done();
        ResourceLoader::singleton().add_resource_format_loader(&loader);

        Self { base, loader, saver }
    }
}
}
目前在 Godot 中,at_front 的顺序可能不会按预期工作。更多信息,请查看 PR godot#101543 或文档讨论 #65。
一个最简的保存器代码,定义了所有必需的虚方法:
#![allow(unused)]
fn main() {
#[derive(GodotClass)]
#[class(base=ResourceFormatSaver, init, tool)]
struct MyAssetSaver {
    base: Base<ResourceFormatSaver>,
}

#[godot_api]
impl IResourceFormatSaver for MyAssetSaver {
    // 如果你想要自定义扩展名(例如:resource.myextension),
    // 则覆盖此方法。
    fn get_recognized_extensions(
        &self,
        res: Option<Gd<Resource>>
    ) -> PackedStringArray {
        let mut array = PackedStringArray::new();

        // 尽管 Godot 文档说明你不需要进行此检查,
        // 但实际上这是必要的。
        if Self::is_recognized_resource(res) {
            // 也可以为每个保存器添加多个扩展名。
            array.push("myextension");
        }

        array
    }

    // 所有该保存器应处理的资源类型都必须返回 true。
    fn is_recognized_resource(res: Option<Gd<Resource>>) -> bool {
        // 每个保存器也可以添加多个资源类型。
        res.expect("Godot called this without an input resource?")
            .is_class("MyResourceType")
    }


    // 定义实际保存resource的逻辑。
    fn save(
        &mut self,
        // 当前正在保存的resource。
        resource: Option<Gd<Resource>>,
        // resource将保存到的路径。
        path: GString,
        // 用于保存的flags(见下面的链接)。
        flags: u32,
    ) -> godot::global::Error {
        // 在此处添加保存逻辑,使用 `GFile` API(见下方链接)。

        godot::global::Error::OK
    }
}
}
这是 SaverFlags(Godot, Rust)和GFile 的文档链接。
一个最简的加载器代码,定义了所有必需的虚方法:
#![allow(unused)]
fn main() {
#[derive(GodotClass)]
#[class(init, tool, base=ResourceFormatLoader)]
struct MyAssetLoader {
    base: Base<ResourceFormatLoader>,
}

#[godot_api]
impl IResourceFormatLoader for MyAssetLoader {
    // 应该在此处添加,你希望的加载器重定向的所有文件扩展名。
    fn get_recognized_extensions(&self) -> PackedStringArray {
        let mut arr = PackedStringArray::new();
        arr.push("myextension");
        arr
    }

    // 该加载器处理的所有resource类型。
    fn handles_type(&self, ty: StringName) -> bool {
        ty == "MyResourceType".into()
    }

    // 应该返回你的 resource的字符串化名称。
    fn get_resource_type(&self, path: GString) -> GString {
        // 在 Godot 中,扩展名参数总是带有 `.`,所以不要忘记这一点 ;)
        if path.get_extension().to_lower() == ".myextension".into() {
            "MyResourceType".into()
        } else {
            // 如果不处理给定的resource,此函数必须返回一个空字符串。
            GString::new()
        }
    }

    // 实际加载和解析你的数据。
    fn load(
        &self,
        // 应该打开的加载资源的路径。
        path: GString,
        // 如果资源是导入步骤的一部分,你可以通过此参数访问原始文件。
        // 否则这个路径等同于普通路径。
        original_path: GString,
        // 如果资源是通过 `load_threaded_request()` 加载的,此参数为 true。
        // Godot 中的内部实现也忽略此参数。
        _use_sub_threads: bool,
        // 如果你希望提供自定义缓存,则此参数为 `CacheMode` 枚举。
        // 你可以查看 `ResourceLoader` 文档来了解该枚举的值。
        // 调用默认的 `load()` 方法时,`cache_mode` 为 `CacheMode::REUSE`。
        cache_mode: i32,
    ) -> Variant {
        // TODO: 在此处添加保存逻辑,使用 `GFile` API(见下方链接)。

        // 如果加载操作失败并且你希望处理错误,
        // 可以返回 `godot::global::Error` 并将其转换为 `Variant`。
    }
}
}
链接到 CacheMode (Godot, Rust) 和 GFile 文档。
自定义节点图标
默认情况下,所有自定义类型在编辑器 UI 中都会使用 Node 图标——例如,在场景树中或选择创建节点时。
虽然这种方式可以使用,但您可能希望为节点类型添加自定义图标,特别是如果您计划将扩展分发给其他人。
所有图标必须通过其类名在 .gdextension 文件中进行注册。为此,您可以添加一个新的 icon 部分。类名是键,SVG 文件的路径是值。
[icons]

MyClass = "res://addons/your_extension/filename.svg"
自定义图标的格式
Godot 文档中有一页专门介绍了创建自定义图标的工具和资源。概括来说:
- 使用 SVG 格式。
- 宽高比为正方形,16x16 单位是参考尺寸。
- 参考 Godot 图标颜色映射。
- 使用浅色模式的颜色——Godot 仅支持从浅色到深色的颜色转换,不支持深色到浅色的转换。
用户 QueenOfSquiggles 在她的个人博客上写了这篇文章的替代版本 on her personal blog,其中包括浅色和深色主题颜色的预览。
关于如何使用她的参考页面的详细信息,请见 here。
生态系统(Ecosystem)
本章列出了扩展 godot-rust 额外功能的第三方项目:工具、库、集成、应用等。 这些项目按类型和各自的领域进行分组(尽管这种分类并不总是完全明确)。
如果你想添加一个项目,请阅读贡献指南!
另外,我们计划为游戏项目单独创建一个列表,并会在一个独立的页面上展示。 使用 godot-rust 制作的游戏在[单独页面]上提供。(games.md).
目录
第三方项目列表
Rust 库
| Project | Further links | Activity |
|---|---|---|
| 🌀 Async | ||
| gdext-coroutines Integrate Rust coroutines with Godot's async/await. | crates.io, Discord |  |
| godot-tokio Create Tokio runtime for use with godot-rust. | crates.io, Discord |  |
| ___________________________________________________ | ||
| 🏗️ Project workflow | ||
| godot_rust_tools Tools and utilities for godot-rust development. | Asset Library, Discord |  |
| gd-rehearse Unit tests for godot-rust code. | Discord |  |
| gd-props Resource serialization using serde. | Discord |  |
| gdext-generation Auto-generate the .gdextension file. | Discord |  |
| godot-rust-cli CLI scripts for Godot with Rust. | Discord |  |
| gdext-cli A CLI tool to generate godot-rust projects and scripts. |  | |
| ___________________________________________________ | ||
| 📜 Scripting | ||
| godot-rust-script Allows Rust scripts to be added to nodes. |  | |
| ___________________________________________________ | ||
| 🎮 Game development | ||
| SpireTween Alternative tweening library for Godot 4.2+. | Discord |  |
| GridForge Generic abstraction for grid maps. | Discord |  |
Editor plugins
| Project | Further links | Activity |
|---|---|---|
| 📐 User interface | ||
| Godot-Tour UI tours/tutorials for editor and in-game. | Discord |  |
| Godot-VSCode VSCode running inside the Godot game engine. | Discord |  |
| ___________________________________________________ | ||
| 🎨 Graphics | ||
| Godot Trail 3D Adds a Trail3D node to Godot. | Discord |  |
| ___________________________________________________ | ||
| 🧲 Physics | ||
| Godot Rapier Physics Rapier 2D + 3D integration for Godot. | Discord |  |
| Godot Rapier 3D GDExtension that enables Rapier physics with Godot. | Discord |  |
| ___________________________________________________ | ||
| 🧙♂️ Storytelling | ||
| nobodywho Interact with local LLMs for interactive storytelling. | Discord |  |
| ___________________________________________________ | ||
| 🏗️ Project workflow | ||
| godot-sandbox Secure modding support for C++, Rust and others. |  | |
| Termdot Terminal built for Godot, enhance your workflow. | Discord |  |
| Stag Toolkit Procedural terrain and real-time simulations. | Island Builder |  |
| ___________________________________________________ | ||
| 🌐 Localization | ||
| Fluent Translation Translation using Mozilla's Fluent (FTL). | Asset Library |  |
Applications
| Project | Further links | Activity |
|---|---|---|
| 🎛️ Software platforms | ||
| Godot Boy Game boy emulator in Godot, written in Rust. | Discord |  |
| GDScript Transpiler Reimplements parts of GDScript in Rust. | Discord |  |
| godot_rust_mapgen Procedural 3D map generator. | Discord |  |
| ___________________________________________________ | ||
| 🛸 Tech demos | ||
| Godot boids Addon for Godot that adds 2D/3D boids (flocking). | Discord | ??? |
Contributing
If you have a project that might fit this list, great! You don't have to be the author -- if you've come across something that will make other people's lives easier, please share it!
To keep this list useful for visitors, there are a few acceptance criteria:
- The project must be related to godot-rust (not only Rust or only Godot). It should use Godot 4.
- There's already something tangible with at least minimal docs/examples.
- This could be a usable library on GitHub, a working demo, etc. No need for a crate release or very polished presentation; the idea is that the project is accessible for newcomers.
- To discuss ideas and WIP prototypes, feel free to start a discussion in
#showcaseon Discord!
- The author should be willing to maintain the project for a while.
- GDExtension has a very good track record with binary compatibility, and godot-rust supports extensions down to Godot 4.1. So if you integrate via extensions (e.g. as an editor plugin), your project tends to be more future-proof than with source code.
- That said, we don't have major breaking changes very often.
- If the project is intended for distribution and usage, make sure it comes with a license (e.g. an open-source one for software, or Creative Commons for artworks).
Once that's sorted, please open a pull request directly to the book repository. If you're not sure about the criteria or have other questions, don't hesitate to ask on Discord or the book issue tracker.
Every single project enriches the space around Godot and Rust, and lets more and more people enjoy game development. Thanks a lot to every contributor!
Games
Godot is primarily a game engine, and Rust has a reputation of coming with frustrating interesting engineering challenges when
used for game development. Yet, users keep putting godot-rust's pragmatic approach to the test and push the project to its limits,
for which we are very thankful!
This page lists some godot-rust games built by the community. This is an early draft, the list will be curated over time. Depending on the number of entries, it may be necessary to remove/archive older or less active entries, or split it into multiple pages.
Table of contents
In active development
Games with regular updates on social media or devlogs. If they are abandoned, they may be removed from this section or archived.
Law of Entropy
Steam | Discord | by Stag Math

Allyon: Battlecry
Steam | YouTube | Discord | by Clementine Games

Voxel game
YouTube | BlueSky | Discord | by Ayrton
Commercially released games
Finished games, available on platforms like Steam, Google Play, Apple Store, etc.
Solitaire Klondike Classic
Google Play | Apple Store | Discord | by IsCool Entertainment

Graphwar II
Steam | Google Play | Apple Store | Website | Discord | by Catacorp
Educational
Games and simulations from which you can learn, either through the game mechanics or by them being open-source.
Musical constellations
GitHub (+ Downloads) | YouTube | Discord | by Bauxite

Gleba
Itch.io | Devlog | Discord | by Calandiel

Sonic Maker
GitHub | Discord | by iride lombardi

Web-playable
For people with only a few minutes to spare. Run godot-rust directly inside the browser.
These games are developed using Godot's HTML5 Export.
Iced Heist
Itch.io | by Carrot Games | 🥇 1st place in Winter Game Jam 2025

Stickyban
Itch.io | Discord | by FlowVix

Block comprehension
Itch.io | Discord | by Art4Aged
Aces' Nim
Contributing to gdext
This chapter provides deeper information for people who are interested in contributing to the library. In case you are simply using gdext, you can skip this chapter.
If you haven't already, please read the Contributing guidelines in the repository first. The rest of this chapter explains developer tools and workflows in more detail. Check out the respective subchapters.
Philosophy
Different gamedev projects have different goals, which determines how APIs are built and how they support various use cases.
Understanding the vision behind godot-rust allows users to:
- decide whether the library is the right choice for them
- comprehend design decisions that have influenced the library's status quo
- contribute in ways that align with the project.
Mission statement
If the idea behind the godot-rust project had to be summarized in a single word, it would be:
godot-rust offers an ergonomic, safe and efficient way to access Godot functionality from Rust.
It focuses on a productive workflow for the development of games and interactive applications.
In our case, pragmatism means that progress is driven by solutions to real-world problems, rather than theoretical purity. Engineering comes with trade-offs, and godot-rust is rather atypical for a Rust project. As such, we may sometimes deviate from Rust best practices that may apply in a clean-room setting, but fall apart when exposed to the interaction with a C++ game engine.
At the end of the day, people use Godot and Rust to build games, simulations or other interactive applications. The library should be designed around this fact, and Rust should be a tool that helps us achieve this goal -- not an end in itself.
In many ways, we follow similar principles as the Godot engine.
Scope
godot-rust is primarily a binding to the Godot engine. A priority is to make Godot functionality accessible for Rust developers, in ways that exploit the strengths of the language, while minimizing the friction.
Since we are not building our own game engine, features need to be related to Godot. We aim to build a robust core for everyday workflows, while avoiding overly niche features. Integrations with other parts of the gamedev ecosystem (e.g. ECS, asset pipelines, GUI) are out of scope and best implemented as extensions.
API design principles
We envision the following core principles as a guideline for API design:
-
Solution-oriented approach
Every feature must solve a concrete problem that users or developers face.- We do not build solutions in search of problems. "Idiomatic Rust", "others also do it" or "it would be nice" are not good justifications :)
- Priority is higher if more people are affected by a problem, or if the problem impacts a daily workflow more severely. In particular, this means that we can't spend much time on rarely used niche APIs, while there are game-breaking bugs in the core functionality.
- We should always keep the big picture in mind. Rust makes it easy to get lost in irrelevant details. What matters is how a certain change helps end users.
-
Simplicity
Prefer self-explanatory, straightforward APIs.- Avoid abstractions that don't add value to the user. Do not over-engineer prematurely just because it's possible; follow YAGNI and avoid premature optimization.
- Examples to avoid: traits that are not used polymorphically, type-state pattern, many generic parameters, layers of wrapper types/functions that simply delegate logic.
- Sometimes, runtime errors are better than compile-time errors. Most users are building a game, where fast iteration is key.
Use
Option/Resultwhen errors are recoverable, and panics when the user must fix their code. See also Ergonomics and panics.
-
Maintainability
Every line of code added must be maintained, potentially indefinitely.- Consider that it may not be you working with it in the future, but another contributor or maintainer, maybe a year from now.
- Try to see the bigger picture -- how important is a specific feature in the overall library? How much detail is necessary? Balance the amount of code with its real-world impact for users.
- Document non-trivial thought processes and design choices as inline
//comments. - Document behavior, invariants and limitations in
///doc comments.
-
Consistency
As a user, having a uniform experience when using different parts of the library is important. This reduces the cognitive load of learning and using the library, requires less doc lookup and makes users more efficient.- Look at existing code and try to understand its patterns and conventions.
- Before doing larger refactorings or changes of existing systems, get an understanding of the underlying design choices and discuss your plans.
See these as guidelines, not hard rules. If you are unsure, please don't hesitate to ask questions and discuss different ideas :)
We highly appreciate if contributors propose a rough design before spending large effort on implementation. This aligns ideas early and saves time on approaches that may not work.
Dev tools and testing
The library comes with a handful of tools and tricks to ease development. This page goes into different aspects of the contributing experience.
Local development
The script check.sh in the project root can be used to mimic a minimal version of CI locally.
It's useful to run this before you commit, push or create a pull request:
./check.sh
At the time of writing, this will run formatting, clippy, unit tests and integration tests. More checks may be added in the future.
Run ./check.sh --help to see all available options.
If you like, you can set this as a pre-commit hook in your local clone of the repository:
ln -sf check.sh .git/hooks/pre-commit
API Docs
Besides published docs, API documentation can also be generated locally using ./check.sh doc.
Use dok instead of doc to open the page in the browser.
Unit tests
Because most of godot-rust interacts with the Godot engine, which is not available from the test executable, unit tests
(using cargo test and the #[test] attribute) are pretty limited in scope. They are primarily used for Rust-only logic.
Unit tests also include doctests, which are Rust code snippets embedded in the documentation.
As additional flags might be needed, the preferred way to run unit tests is through the check.sh script:
./check.sh test
Integration tests
The itest directory contains a suite of integration tests. It is split into two directories:
rust, containing the Rust code for the GDExtension library, and godot with the Godot project and GDScript tests.
Similar to #[test], the function annotated by #[itest] contains one integration test. There are multiple syntax variations:
#![allow(unused)]
fn main() {
// Use a Godot API and verify the results using assertions.
#[itest]
fn variant_nil() {
    let variant = Variant::nil();
    assert!(variant.is_nil());
}

// TestContext parameter gives access to a node in the scene tree.
#[itest]
fn do_sth_with_the_tree(ctx: &TestContext) {
    let tree: Gd<Node> = ctx.scene_tree.share();

    // If you don't need the scene, you can also construct free-standing nodes:
    let node: Gd<Node3D> = Node3D::new_alloc();
    // ...
    node.free(); // don't forget to free everything created by new_alloc().
}

// Skip a test that's not yet ready.
#[itest(skip)]
fn not_executed() {
    // ...
}

// Focus on a one or a few tests.
// As soon as there is at least one #[itest(focus)], only focused tests are run.
#[itest(focus)]
fn i_need_to_debug_this() {
    // ...
}
}
You can run the integration tests like this:
./check.sh itest
Just like when compiling the crate, the GODOT4_BIN environment variable can be used to supply the path and filename of your Godot executable.
Otherwise, a binary named godot4 in your PATH is used.
Formatting
rustfmt is used to format code. check.sh only warns about formatting issues, but does not fix them. To do that, run:
cargo fmt
Clippy
clippy is used for additional lint warnings not implemented in rustc. This, too, is best run through check.sh:
./check.sh clippy
Continuous Integration
If you want to have the full CI experience, you can experiment as much as you like on your own fork of the repository, before submitting a pull request.
Manually trigger a CI run
For one-off CI runs you can manually trigger it by enabling Actions in the project settings of your fork,
then going to the Actions tab in the project, selecting the Full CI workflow,
clicking on Run Workflow and selecting the branch you're working on:

Trigger CI on push
If you're working on a bigger feature, you might not want to have to trigger CI manually every time.
For this, navigate to the file .github/workflows/full-ci.yml and change the following lines:
on:
  push:
    branches:
      - staging
      - trying
to:
on:
  push:
This runs the entire CI pipeline to run on every push. You can then see the results in the Actions tab in your repository.
Don't forget to undo this before opening a PR! You may want to keep it in a separate commit named "UNDO" or similar.
Build configurations
real type
Certain types in Godot use either a single or double-precision float internally, such as Vector2.
When working with these types, we use the real type instead of choosing either f32 or f64.
As a result, our code is portable between Godot binaries compiled with precision=single and precision=double.
To run the testing suite with double-precision enabled you may add --double to a check.sh invocation:
./check.sh --double
Code and API conventions
Bikeshed auto-painting
In general, we try to automate as much as possible during CI. This ensures a consistent code style and avoids unnecessary work during pull request reviews.
In particular, we use the following tools:
- rustfmt for code formatting (config options).
- clippy for lints and style warnings (list of lints).
- Clang's AddressSanitizer and LeakSanitizer for memory safety.
- Various specialized tools:
- skywalking-eyes to enforce license headers.
- cargo-deny and cargo-machete for dependency verification.
In addition, we have unit tests (#[test]), doctests and Godot integration tests (#[itest]).
See Dev tools for more information.
Technicalities
This section lists specific style conventions that have caused some confusion in the past. Following them is nice for consistency, but it's not the top priority of this project. Hopefully, we can automate some of them over time.
Formatting
rustfmt is the authority on formatting decisions. If there are good reasons to deviate from it, e.g. data-driven tables in tests,
use #[rustfmt::skip]. rustfmt does not work very well with macro invocations, but such code should still follow rustfmt's
formatting choices where possible.
Line width is 120-145 characters (mostly relevant for comments).
We use separators starting with // --- to visually divide sections of related code.
Code organization
-
Anything that is not intended to be accessible by the user, but must be
pubfor technical reasons, should be marked as#[doc(hidden)].- This does not constitute part of the public API.
-
We do not use the
preludeinside the project, except in examples and doctests. -
Inside
implblocks, we roughly try to follow the order:- Type aliases in traits (
type) - Constants (
const) - Constructors and associated functions
- Public methods
- Private methods (
pub(crate), private,#[doc(hidden)])
- Type aliases in traits (
-
Inside files, there is no strict order yet, except
useandmodat the top. Prefer to declare public-facing symbols before private ones. -
Use flat import statements. If multiple paths have different prefixes, put them on separate lines. Avoid
self.#![allow(unused)] fn main() { // Good: use crate::module; use crate::module::{Type, function}; use crate::module::nested::{Trait, some_macro}; // Bad: use crate::module::{self, Type, function, nested::{Trait, some_macro}}; }
Types
-
Avoid tuple-enums
enum E { Var(u32, u32) }and tuple-structsstruct S(u32, u32)with more than 1 field. Use named fields instead. -
Derive order is
#[derive(GdextTrait, ExternTrait, Default, Copy, Clone, Eq, PartialEq, Ord, PartialOrd, Hash, Debug)].GdextTraitis a custom derive defined by godot-rust itself (in any of the crates).ExternTraitis a custom derive by a third-party crate, e.g.nanoserde.- The standard traits follow order construction, comparison, hashing, debug display.
More expressive ones (
Copy,Eq) precede their implied counterparts (Clone,PartialEq).
Functions
-
Getters don't have a
get_prefix. -
Use
selfinstead of&selfforCopytypes, unless they are really big (such asTransform3D). -
For
Copytypes, avoid in-place mutationvector.normalize().
Instead, usevector = vector.normalized(). The past tense indicates a copy. -
Annotate with
#[must_use]when ignoring the return value is likely an error.
Example: builder APIs.
Attributes
Concerns both #[proc_macro_attribute] and the attributes attached to a #[proc_macro_derive].
-
Attributes always have the same syntax:
#[attr(key = "value", key2, key_three = 20)]attris the outer name grouping different key-value pairs in parentheses.
A symbol can have multiple attributes, but they cannot share the same name.key = valueis a key-value pair. justkeyis a key-value pair without a value.- Keys are always
snake_caseidentifiers. - Values are typically strings or numbers, but can be more complex expressions.
- Multiple key-value pairs are separated by commas. Trailing commas are allowed.
- Keys are always
-
In particular, avoid these forms:
#[attr = "value"](top-level assignment)#[attr("value")](no key -- note that#[attr(key)]is allowed)#[attr(key(value))]#[attr(key = value, key = value)](repeated keys)
The reason for this choice is that each attribute maps nicely to a map, where values can have different types.
This allows for a recognizable and consistent syntax across all proc-macro APIs. Implementation-wise, this pattern is
directly supported by the KvParser type in godot-rust, which makes it easy to parse and interpret attributes.
Migration guides
请查看侧边栏
Migrating to v0.2
This chapter will guide you through the changes from godot-rust version 0.1 to 0.2. See also our November dev update for a feature overview, and our changelog for a detailed list of modifications. Breaking changes are marked as such in the changelog, and you can navigate to the respective PRs to get in-depth information.
Godot version support
With godot-rust 0.2, Godot 4.3 is supported out of the box.
Godot 4.0 is no longer supported. We're the last binding to abandon it, after 1.5 years. 4.0 offers no compatibility with today's GDExtension API, not even among patch versions, so using it at this point is not recommended.
Argument passing
The biggest breaking change in 0.2 is the way arguments are passed to Godot APIs. What used to be pass-by-value everywhere, has now more nuance, while making calling code more concise.
The following table goes into different kinds of arguments and corresponding call expressions.
| Argument type | Parameter type (v0.1 ⇾ v0.2) | v0.1 call | v0.2 call |
|---|---|---|---|
i32 (Copy) | i32 | func(i) | func(i) |
GString | GString ⇾ impl AsArg<GString> | func(s)func(s.clone()) | func(&s) |
&str | " | func("str".into()) | func("str") |
String | " | func(s.into()) | func(&s) |
StringNameNodePath | " | func(s.into()) | func(s.arg()) |
Gd<Node> | Gd<Node> ⇾ impl AsObjectArg<Node> | func(g.clone()) | func(&g) |
Gd<Node2D> | " | func(g.clone().upcast()) | func(&g) |
Most of them are straightforward, noteworthy is maybe arg() as a way to convert between the 3 Godot string types.
This conversion is done explicitly, because it's much less obvious than conversion from String/&str but can have significant
performance implications due to allocations, re-encoding and synchronization overhead. It also makes you more aware of the string
type in use.
Removed APIs
See also #808. Noteworthy changes:
- Renamed crate feature
custom-godot⇾api-custom. - Godot enums now use
SHOUT_CASEenumerators.PascalCasealiases have been around for some time, but not anymore. GString::chars_checked()andGString::chars_unchecked()have been removed. There's no more need for unsafety; useGString::chars()instead.- Several collection methods have been migrated, e.g.
Dictionary::try_get()⇾get(),Packed*Array::set()⇾[]. - Removed ancient pre-0.1 modules
godot::engine,godot::log. - The
#[base]attribute is no longer allowed.
Miscellaneous
- Some use cases now require a
Base<T>field that wasn't previously needed, e.g.OnReady<T>. - Virtual functions that are semantically required by Godot are now also required in the
I*interface trait in Rust. That is, you must override them in yourimplblock. - There are new validations around
Exportand#[class(tool)], which no longer accept previously compiling (but broken) code.
Migrating to v0.3
This chapter will guide you through the changes from godot-rust version 0.2 to 0.3. See also our May dev update for a feature overview, and our changelog for a detailed list of modifications. Breaking changes are marked as such in the changelog, and you can navigate to the respective PRs to get in-depth information.
To reduce the friction, we recommend first updating to the latest patch release of the current minor version, before switching to the new minor version. Many changes are announced early in the form of deprecation warnings, which contain instructions on how to switch to newer APIs.
You can update your Cargo.toml to the latest patch release by running:
cargo update -p godot
Once you have addressed all deprecation warnings, you can update to the new minor version:
cargo upgrade -p godot
Geometric APIs
Several geometric APIs have seen slight updates in terms of naming and semantics.
Aabb,Rect2,Rect2i(#1001)has_point->contains_pointhas_area->has_surfaceintersection->intersectintersect_ray: added in addition tointersects_ray, returning intersection point
Basis+Quaternion(#1035)to_euler->get_euler+get_euler_withto_quat->get_quaternionfrom_quat->from_quaternionscale->get_scalenew_looking_at->looking_at
The main idea behind those changes:
- Use
intersectfor methods returning the intersection, andintersectsfor boolean checks. - Use
containsfor containment checks, andhasfor checking the presence of a property. - Use
get_in situations where only a part is extracted (e.g.get_eulerinstead ofto_euler, because Basis has non-rotation components). - Be closer to Godot terminology.
Signals
While v0.3 brings large-scale changes to signals, they are almost fully backwards compatible.
The main breaking change is that declaring #[signal] now requires the class to have a Base<T> field.
If you don't need the new type-safe signal API, you can opt out with #[godot_api(no_typed_signals)] on your impl block.
Relatedly, the ConnectFlags enum has been reclassified as a bitfield rather than regular enum. This enables | operations, among others.
Final classes
Godot prevents certain classes from being inherited outside the engine, for example FileAccess or IP. This used to cause runtime errors
whose messages weren't always clear.
godot-rust v0.3 properly declares such classes as "final", which has the following implications:
- Rust classes can no longer inherit from them (doing so results in a descriptive compile error).
- The associated interface trait (e.g.
IFileAccess,IIp) no longer exists, since you can neither construct a base nor implement virtual methods. In total, 118I*traits have been removed. - API Docs clearly state which classes are final, and elaborates the relation between an interface trait and its base interfaces.
Rename of unsafe virtual methods
Some virtual methods declare raw pointers in their parameters or return types, for example:
#![allow(unused)]
fn main() {
trait IAudioStreamPlayback {
    unsafe fn mix(&mut self, buffer: *mut AudioFrame,
                  rate_scale: f32, frames: i32) -> i32;
}
}
In the future, we would like to transition these to safe methods. To enable a gradual migration period with coexisting safe and unsafe
variants, we renamed all such methods now, by appending the _rawptr suffix:
#![allow(unused)]
fn main() {
trait IAudioStreamPlayback {
    unsafe fn mix_rawptr(&mut self, buffer: *mut AudioFrame,
                         rate_scale: f32, frames: i32) -> i32;
}
}
Details can be seen in pull request #1174.
Entry point
In case you use #[gdextension(entry_point = ...)], the key has now been renamed to #[gdextension(entry_symbol = ...)]. This is consistent
with the key name in the .gdextension file.
Migrating to v0.4
This guide covers deprecations and breaking changes when upgrading from godot-rust 0.3 to 0.4.
Table of contents
Godot version support
#1292: godot-rust v0.4 drops support for Godot 4.1.
The library now supports Godot versions 4.2 through 4.5, including the latest 4.5 release.
See also Compatibility and stability.
Overhauls to core APIs
Argument passing redesign
#1285, #1308, #1310, #1314: So far, AsArg and ToGodot traits have had very similar roles, namely converting
Rust types to Godot-compatible types. However, they had only limited interop. For example, it wasn't easily possible to pass user-defined enums to
emit() of signals.
ToGodot::Pass and automatic AsArg impls
The ToGodot trait has been simplified, replacing the associated type ToVia<'v> with Pass, which usually has one of two values.
AsArg is then auto-implemented for types that support ToGodot, in the following way:
Pass = ByValue: what you typically want. This implementsAsArg<T>for owned typesT, e.g. you can passi64directly to Godot.Pass = ByReffor specifically optimized types. This implementsAsArg<T>for references&T, e.g. you can pass&GStringto Godot without cloning. As a user, you typically need to convert to a custom type anyway, soByValueis often easier.
If you follow those, you should never need to implement AsArg yourself. ToGodot is sufficient, and can often be derived.
Before (0.3):
#![allow(unused)]
fn main() {
impl ToGodot for MyString {
    type ToVia<'v> = Self::Via;

    fn to_godot(&self) -> Self::ToVia<'_> {
        GString::from(self)
    }
}
}
After (0.4):
#![allow(unused)]
fn main() {
use godot::meta;

impl ToGodot for MyString {
    type Pass = meta::ByValue;

    // Returns a new GString here, since we have to create one anyway.
    fn to_godot(&self) -> Self::Via {
        GString::from(self)
    }
}

impl ToGodot for MyCachedString {
    type Pass = meta::ByRef;

    // Returns &GString here, since we store a reference.
    fn to_godot(&self) -> &Self::Via {
        &self.cached_gstring
    }
}
}
Return type changes
For reference-counted types (GString, Array, Dictionary, Variant...), to_godot() now returns references.
A value can be obtained by calling to_godot_owned().
Before (0.3):
#![allow(unused)]
fn main() {
let a: GString = my_value.to_godot();
}
After (0.4):
#![allow(unused)]
fn main() {
let a: &GString = my_value.to_godot();
let b: GString = my_value.to_godot_owned();
}
Object argument traits
The specialized AsObjectArg<T> trait has been consolidated into the more general AsArg<Gd<T>> trait, unifying the type system.
It is also capable of expressing optional arguments through AsArg<Option<Gd<T>>>.
Before (0.3):
#![allow(unused)]
fn main() {
#[signal]
fn my_signal(some_node: Gd<Node>);
let node = Node::new_alloc();
let derived = Node2D::new_alloc();

// Argument had to be upcast.
sig.emit(&derived.upcast());

// The type could be inferred, but arguments had to be implicitly upcast.
let _array = array![&node, &derived.upcast()];
}
After (0.4):
#![allow(unused)]
fn main() {
fn my_signal(some_node: Gd<Node>);
let node = Node::new_alloc();
let derived = Node2D::new_alloc();

// Will be implicitly upcast.
sig.emit(&derived);

// Type must be specified, but arguments will be implicitly upcast.
let _array: Array<Gd<Node>> = array![&node, &derived];
}
Callable return types
#1332, #1344, #1346: Callable constructor from_local_fn() is phased out in favor of from_fn(), which supports any
return type implementing ToGodot, eliminating the need for manual Variant conversion and wrapping inside Result.
The Err variant didn't add much purpose but required a lot of boilerplate, and errors can still be supported through panics or RustCallable
customization.
Before (0.3):
#![allow(unused)]
fn main() {
let callable = Callable::from_local_fn("answer", |args| {
    Ok(42.to_variant())
});

let callable = Callable::from_local_fn("unit", |args| {
    do_sth(args); // Some side effect, no return value.
    Ok(Variant::nil())
});
}
After (0.4):
#![allow(unused)]
fn main() {
let callable = Callable::from_fn("answer", |args| 42);

let callable = Callable::from_fn("unit", |args| {
    do_sth(args);
});
}
Singleton trait
#1325: Singleton access has been moved to a dedicated Singleton trait, enabling generic programming while maintaining
backward compatibility with existing singleton() methods.
In the future, we may look into other options to provide singletons, especially once we support them for user classes, too.
Before (0.3):
#![allow(unused)]
fn main() {
let input = Input::singleton();
let engine = Engine::singleton();
}
After (0.4):
If you already include the prelude, no code changes should be necessary:
#![allow(unused)]
fn main() {
use godot::prelude::Singleton;

let input = Input::singleton(); // Still works
let engine = Engine::singleton(); // Still works

// Now supports generic access:
fn summon_the_one<T: Singleton>() -> Gd<T> {
    T::singleton()
}
}
Removed conversions
#1286, #1316: By-value From conversions between string types have been removed to clarify that no buffer optimization occurs during conversion.
You can still use From for references.
Before (0.3):
#![allow(unused)]
fn main() {
let gstring = GString::from("hello");
let sname = StringName::from(gstring); // or .into()
}
After (0.4):
#![allow(unused)]
fn main() {
let gstring = GString::from("hello");
let sname = StringName::from(&gstring);
}
The From<&'static CStr> implementation for StringName has been removed, since Godot no longer offers a performance benefit,
and static storage duration may very easily cause memory leaks.
Furthermore, impl From<VariantArray> for Packed*Array has been removed. This was unsound; VariantArray can contain arbitrary types.
Renames
- Struct
ClassName->ClassId, which represents the idea of lightweight IDs better. - Method
apply_deferred()->run_deferred()andrun_deferred_gd(), accepting both&mut TandGd<T>parameters. - Method
Base::to_gd()->Base::to_init_gd(), for proper access duringinit. - Method
Callable::from_local_fn()->Callable::from_fn()(see above). - Assoc fn
Callable::from_local_static()->Callable::from_class_static(). - Trait
ToSignalObject->ObjectToOwned. - Trait
WithDeferredCall-> merged intoWithBaseField.
Registration changes
#[export(range)] limits and type validation
#1320: #[export(range = ...)] attribute traditionally required float literals, even for integer fields. The values were also not validated
against the field type, allowing out-of-bounds values.
Furthermore, reasonable range bounds are now inferred for all integer types.
Before (0.3):
#![allow(unused)]
fn main() {
#[export(range = (1.0, 500.0))]  // Float was required, no bound checks.
int_field: i8,

#[export]  // Default: full i64 range, allowing invalid values in editor.
another_field: i8,
}
After (0.4):
#![allow(unused)]
fn main() {
#[export(range = (1, 127))]  // Must be i8-compatible literals, within bounds.
int_field: i8,

#[export]  // Default: infer range from i8 as (-128, 127).
another_field: i8,
}
This change improves reliability, but may require updates to existing export declarations.
Export range for radians
#1320: The radians option was deprecated in Godot itself, so the attribute was updated to use radians_as_degrees, which follows Godot's current
convention. Using the old radians will lead to a descriptive error.
Before (0.3):
#![allow(unused)]
fn main() {
#[export(range = (radians))]
angle: f32,
}
After (0.4):
#![allow(unused)]
fn main() {
#[export(range = (radians_as_degrees))]
angle: f32,
}
Editor class validation
#1272: Classes with names starting with "Editor" must now be explicitly marked with the internal attribute to prevent accidental exposure in
exported builds. Godot has a special and undocumented rule to make those internal, which led to confusion.
Before (0.3):
#![allow(unused)]
fn main() {
#[derive(GodotClass)]
#[class(base=EditorPlugin)]
struct EditorMyPlugin {
    base: Base<EditorPlugin>,
}
}
After (0.4):
#![allow(unused)]
fn main() {
#[derive(GodotClass)]
#[class(base=EditorPlugin, internal)]
struct EditorMyPlugin {
    base: Base<EditorPlugin>,
}
}
Engine APIs
EngineEnum + EngineBitfield introspection
#1232: Since some enums in Godot contain duplicates, there isn't a unique name for an enum variant (which is just an integer internally).
Thus, EngineEnum::godot_name() sometimes returned incorrect names. The new API provides all_constants()
for a full introspection, and values() for just distinct, useful values (e.g. when you need a drop-down list).
EngineBitfield also has all_constants() now, but no values().
Before (0.3):
#![allow(unused)]
fn main() {
let name = MyEnum::Variant1.godot_name();
}
After (0.4):
#![allow(unused)]
fn main() {
let constants = MyEnum::all_constants();
// Use constants map to find names.
}
Array and string indexing with negative values
#1300: Operations that support negative indexing (arrays, strings, etc.) now use SignedRange instead of accepting raw integer
parameters.
This provides better type safety for range operations that can include negative indices.
Before (0.3):
#![allow(unused)]
fn main() {
let slice = array.slice(start, end); // Raw integers
}
After (0.4):
#![allow(unused)]
fn main() {
use godot::meta::wrapped;

let a = array.slice(wrapped(..-2));  // from 0 to len-2
let b = array.slice(wrapped(1..-2)); // from 1 to len-2
}
Where possible and we consider it likely that the user named symbols in their own code, we provide deprecated aliases for the v0.4 cycle, to ease the transition and provide helpful warnings.
迁移到 v0.5
本文档涵盖了从 godot-rust 0.4 升级到 0.5 时的弃用和破坏性变更。
为了减少迁移难度,我们建议首先更新到上一个次要版本的最新补丁版本 v0.4.5。 许多变更会提前以弃用警告的形式通知,其中包含了如何切换到新 API 的说明。
您可以通过运行以下命令将 Cargo.toml 更新到最新的补丁版本:
cargo update -p godot
处理完所有弃用警告后,您可以更新到新的次要版本:
cargo upgrade -p godot
目录
Godot 版本
#1484: godot-rust v0.5 增加了 API 级别 4.6,这现在是新的默认级别。
这并不意味着您必须更新您的 Godot 版本——只需提供 Cargo features 来使用较旧的 API 级别,例如 api-4-5。
#1505: API 级别 features 现在仅限于次要版本。如果您之前使用了补丁级别的 features,如 api-4-3-1,您需要将它们更改为相应的次要版本,例如 api-4-3。
Rust 2024 版本
#1500: godot-rust v0.5 使用了 Rust 2024 版本。
最低支持的 Rust 版本(MSRV)现在是 1.94。
引擎 API 中的必需对象
#1383, #1493: GDExtension 4.6 为函数参数和返回值提供了非空("required")类型信息。这意味着许多 Rust API 现在可以更加类型安全,在不应为空值的情况下,您的代码将无需处理 Option。
如果 Godot 保证对象非空,而您使用了 Option<Gd>,则需要将其改为 Gd。
之前 (0.4):
#![allow(unused)]
fn main() {
let maybe_child: Option<Gd<Node>> = ...;
node.add_child(&maybe_child);

let tree = node.get_tree().unwrap();
let tween = node.create_tween().unwrap();
}
之后 (0.5):
#![allow(unused)]
fn main() {
// Option 不再能编译。
let definitely_child: Gd<Node> = ...; // 非空
node.add_child(&definitely_child);

let tree = node.get_tree(); // 如果不在树中则 panic;否则使用 get_tree_or_null()。
let tween = node.create_tween();
}
属性 API
Var trait 重新设计
#1454, #1458, #1466, #1469: Var trait 已被重新设计以支持 #[var(pub)],后者会生成基于克隆语义的类型化 Rust getter/setter。trait API 变更如下:
之前 (0.4):
#![allow(unused)]
fn main() {
pub trait Var: GodotConvert {
    fn get_property(&self) -> Self::Via;
    fn set_property(&mut self, value: Self::Via);
    fn var_hint() -> PropertyHintInfo { ... }
}
}
之后 (0.5):
#![allow(unused)]
fn main() {
pub trait Var: GodotConvert {
    type PubType;
    fn var_get(field: &Self) -> Self::Via;
    fn var_set(field: &mut Self, value: Self::Via);
    fn var_pub_get(field: &Self) -> Self::PubType;
    fn var_pub_set(field: &mut Self, value: Self::PubType);
}
}
如果您有手动的 Var 实现,需要更新它们。
然而,对于大多数情况,您可以使用新的 SimpleVar 标记 trait:已经支持 ToGodot + FromGodot + Clone 的类型可以通过 blanket impl 获得自动的 Var 实现。
之前 (0.4):
#![allow(unused)]
fn main() {
impl Var for MyType {
    fn get_property(&self) -> Self::Via {
        self.to_godot_owned()
    }
    fn set_property(&mut self, value: Self::Via) {
        *self = FromGodot::from_godot(value);
    }
}
}
之后 (0.5):
#![allow(unused)]
fn main() {
// MyType: ToGodot + FromGodot + Clone.
impl SimpleVar for MyType {}
}
#[var] getter/setter 语义
#1454: #[var(get, set)] 键现在彼此独立。
| 属性 | 旧行为 (0.4) | 新行为 (0.5) |
|---|---|---|
#[var] | 生成 getter + setter | 与之前相同 |
#[var(get)] | 禁用 setter | 声明自定义 get_{field},setter 不变 |
#[var(set)] | 禁用 getter | 声明自定义 set_{field},getter 不变 |
#[var(no_get)] | 新增;之前由#[var(set)] 隐含 | 显式禁用 getter |
#[var(no_set)] | 新增;之前由#[var(get)] 隐含 | 显式禁用 setter |
#[var(get = my_fn)] | 自定义 getter 函数 | 与之前相同 |
#[var(set = my_fn)] | 自定义 setter 函数 | 与之前相同 |
之前 (0.4):
#![allow(unused)]
fn main() {
// 禁用 setter,仅 getter:
#[var(get)]
my_field: i32,

// 禁用 getter,仅 setter:
#[var(set)]
other_field: f32,
}
之后 (0.5):
#![allow(unused)]
fn main() {
// 禁用 setter,仅 getter:
#[var(no_set)]
my_field: i32,

// 禁用 getter,仅 setter:
#[var(no_get)]
other_field: f32,

// 自定义 getter,生成的 setter:
#[var(get)]
custom_get_field: i32,
}
#[var(pub)] 用于 Rust 侧的访问器
#1458, #1466: #[var] 字段的自动生成 Rust getter/setter 正在逐步淘汰。
在 v0.4 中,#[var] 字段隐式生成了公共的 Rust 访问器方法(例如 get_my_field() / set_my_field())。这些方法现在已被弃用,并将在 v0.6 中移除。
如果您依赖这些生成的 Rust 方法,请使用 #[var(pub)] 显式选择加入:
#![allow(unused)]
fn main() {
#[var(pub)]
my_field: i32,
// 生成:   fn get_my_field(&self) -> i32
//         fn set_my_field(&mut self, value: i32)
}
#[var(pub)] 访问器使用基于 Clone 的语义(通过 Var::PubType),而内部面向 Godot 的访问器继续使用 GodotConvert::Via。
自定义 #[var] 访问器的编译时类型检查
#1469: 使用 #[var(get)] 或 #[var(set)] 声明的自定义 getter 和 setter 现在会在编译时进行类型检查。
如果您的 getter 的返回类型或 setter 的参数类型与字段的 Var::PubType 不匹配,您将收到编译错误而不是运行时失败。
#1518: 此外,#[var(no_get)] 与 #[export] 结合现在是一个编译错误。从 GDScript 读取 #[var(no_get)] 字段现在会 panic 并显示有用的错误信息,而不是静默返回默认值。
常量限定的 getter
#1497: 一个启发式方法现在会将前缀为 get_、is_ 或 has_ 的 Godot 方法进行常量限定,将其接收者从 &mut self 更改为 &self。这影响了大量的引擎方法,这些方法之前被不必要地声明为可变。
一个显式的拒绝列表处理了误报情况:实际改变状态的方法仍然保持 &mut self。例如:FileAccess::get_line()(会前进光标)、StreamPeer::get_8() 等。
这是一个技术上的破坏性变更,但使用 mut 绑定的现有代码将继续编译。Clippy 可能会发出关于不必要的 mut 的警告。
之前 (0.4):
#![allow(unused)]
fn main() {
let mut api: Gd<MultiplayerApi> = ...;
let id = api.get_unique_id(); // 需要 &mut self。
}
之后 (0.5):
#![allow(unused)]
fn main() {
let api: Gd<MultiplayerApi> = ...;
let id = api.get_unique_id(); // 现在使用 &self。
}
GodotShape 替换属性 hint API
#1513, #1514, #1534: 类型向 Godot 描述自身的内部表示已被彻底修改。一个新的 GodotShape 枚举(由 GodotConvert::godot_shape() 返回)替换了几个分散的 API。
以下 trait 方法已被移除,取而代之的是统一的 GodotConvert::godot_shape():
Var::var_hint()Export::export_hint()GodotType::property_info()GodotType::property_hint_info()GodotType::godot_type_name()GodotType::class_id()Element::element_type_string()PackedElement::element_type_string()
如果您有自定义的 Var 或 Export 实现覆盖了 var_hint() 或 export_hint(),现在您需要改为实现 GodotConvert::godot_shape(),返回适当的 GodotShape 变体。
这次重构还使得集合中的枚举成为可能。引擎和用户定义的 #[derive(GodotConvert)] 枚举现在都可以用作 Array<T> 或 Dictionary<K, V> 中的元素。
#[func] 边界
#1435: #[func] 中的参数和返回类型已更新。新支持用户定义的枚举。
一些类型也受到了限制——以下类型不再实现 ToGodot/FromGodot,因此不能传递给 #[func] 或从 #[func] 返回:
u64
#1413: 不允许 u64 的主要原因是 GDScript(和 Variant)不能原生存储除 i64 以外的整数,并且很容易引入静默改变值的逻辑错误。另请参阅 API 文档中的理由。
如果您现有使用 u64 的代码,可以使用以下方式:
- 使用
i64并进行转换。 - 如果范围足够,使用任何较小的无符号整数类型。
- 使用自定义类型并覆盖
GodotConvert::godot_shape()并附带参数元数据。
原始指针和 RawPtr<P>
#1436: 引擎 API 中的原始指针(原生结构体、c_void 等)现在被包装在 RawPtr<P> 中,取代了直接的 *const T / *mut T 参数。
构造需要 unsafe,而之前则不需要——您之前可以在从未键入 unsafe 的情况下从 #[func] 返回一个指向局部变量的指针。
之前 (0.4):
#![allow(unused)]
fn main() {
#[func]
fn pass_native_struct(&self, caret_info: *const CaretInfo) -> VarDictionary {
    let info = unsafe { &*caret_info };
    // 直接使用 &CaretInfo。
}

#[func]
fn native_struct_array_ret(&self) -> *const Glyph {
    self.some_raw_ptr
}
}
除了原生结构体类型外,以下用于 ToGodot/FromGodot 的原始指针实现已被移除:
*const std::ffi::c_void*mut std::ffi::c_void*mut *const u8*mut i32*mut f64*mut u8*const u8
之后 (0.5):
#![allow(unused)]
fn main() {
use godot::meta::conv::RawPtr;

#[func]
fn pass_native_struct(&self, caret_info: RawPtr<*const CaretInfo>) -> VarDictionary {
    let caret_raw: *const CaretInfo = caret_info.ptr();
    let info = unsafe { &*caret_raw };
    // 直接使用 &CaretInfo。
}

#[func]
fn native_struct_array_ret(&self) -> RawPtr<*const Glyph> {
    // SAFETY: 调用者必须确保将指针返回给 Godot 是安全的。
    unsafe { RawPtr::new(self.some_raw_ptr) }
}
}
IObject 回调重命名
#1527: IObject trait(以及从 Object 继承的相关 I* traits)中的虚回调现在以 on_ 为前缀,以避免与 Object 上同名方法的命名冲突,并明确这些是回调。
| 旧名称 | 新名称 |
|---|---|
get_property() | on_get() |
set_property() | on_set() |
get_property_list() | on_get_property_list() |
validate_property() | on_validate_property() |
旧名称已被弃用,并将继续运行直到 v0.6。
类型化集合
类型化 Dictionary<K, V>
#1502, #1507, #1516: 字典现在对键和值类型是泛型的:Dictionary<K, V>。这镜像了类型化的 Array<T> API。
Dictionary<K, V>是类型化字典。AnyDictionary是类型擦除的字典(类似于AnyArray)。VarDictionary现在是Dictionary<Variant, Variant>的别名。- 引擎 API 现在接受
&AnyDictionary而不是&VarDictionary,因此您可以直接传递任何&Dictionary<K, V>。 - 类型化字典迭代器可用:
dict.iter_shared()返回(K, V)对。
这在很大程度上是一个向后兼容的变更,因为 VarDictionary 仍然存在,但仍有一些地方需要注意。
接受值的方法已将边界从 ToGodot 更改为 AsArg<Variant>,作为 AsArg<K>/AsArg<V> 的特例。其 ToGodot::Pass 不是 ByValue 的元素(例如对象、可调用对象)现在需要按引用传递:
之前 (0.4):
#![allow(unused)]
fn main() {
dict.set("hello", gd);
}
之后 (0.5):
#![allow(unused)]
fn main() {
dict.set("hello", &gd);
}
vdict! 宏使用 => 分隔符
#1523: vdict! 宏现在使用 => 而不是 : 来分隔键和值。这避免了与 Rust 的 token tree 解析的歧义,并且无需将复杂的键表达式包裹在括号中。这也更符合像 maplit 这样的 crate。
之前 (0.4):
#![allow(unused)]
fn main() {
let tiles = vdict! {
    (Vector2i::new(1, 2)): Tile::GRASS,
    (Vector2i::new(1, 3)): Tile::WATER,
};
}
之后 (0.5):
#![allow(unused)]
fn main() {
let tiles = vdict! {
    Vector2i::new(1, 2) => Tile::GRASS,
    Vector2i::new(1, 3) => Tile::WATER,
};
}
秉承 godot-rust 的传统,在过渡期内 : 语法继续受支持(带有弃用警告)。
iarray! 和 idict! 宏用于类型推断
#1530: godot-rust v0.5 经历了一次重大的重构,以在 Dictionary<K, V> 中维持良好的 Variant 支持。
简而言之,我们不能再依赖 K/V 是 Variant,因此我们不得不将 ToGodot 替换为更通用的 AsArg<K/V> 边界。这带来了一个代价:由于 AsArg 转换的候选更多,在无法从上下文(如函数返回类型)推导类型的情况下,类型推断会产生歧义。
#![allow(unused)]
fn main() {
let d = dict! { "key": 10 }; // 错误: "key" 可能是 GString、StringName 或 Variant。

// dict! 现在需要显式类型注解:
let d: Dictionary<GString, i32> = dict! { "key": 10 };
}
输入三个额外的标识符当然超出了可接受的范围,所以我们有一个解决方案。
新的宏 iarray! 和 idict!("inferred")可以在没有显式类型提示的情况下创建数组和字典。
它们使用有观点但无歧义的类型推断。例如,iarray!["hello"] 推断为 Array<GString>,永远不会是 Array<StringName>。目前并非所有元素类型都受支持。
现有的 array! 和 dict! 宏保持不变,仍然需要类型上下文(注解、函数参数等)。
#![allow(unused)]
fn main() {
// 不需要类型注解:
let ints = iarray![3, 1, 4];        // Array<i32>
let strs = iarray!["a", "b"];       // Array<GString>
let d = idict! { "key" => 10 };     // Dictionary<GString, i32>

// array!/dict! 在类型上下文下仍然有效:
let ints: Array<i64> = array![3, 1, 4];
}
AnyArray -- 协变的类型化/非类型化数组
#1422, #1434: 新的 AnyArray 类型提供了一个类型擦除的数组,可以存储类型化 Array<T> 或非类型化 VarArray。它是协变的:任何 &Array<T> 都可以在需要 &AnyArray 的地方使用,得益于 Deref 强制转换。
#![allow(unused)]
fn main() {
use godot::builtin::{Array, AnyArray, VarArray};

let typed: Array<i64> = array![1, 2, 3];

// Deref 强制转换:在需要 AnyArray 的地方使用类型化数组。
let any_ref: &AnyArray = &typed;
assert_eq!(any_ref.len(), 3);

// 对拥有的值进行显式向上转换。
let any: AnyArray = typed.clone().upcast_any_array();

// 向下转换回类型化数组。
let back: Array<i64> = any.try_cast_array::<i64>()
    .expect("转换回类型化数组");
}
之前接受 &VarArray 参数的引擎 API(如 Callable::callv())现在接受 &AnyArray,这意味着您可以直接传递任何 &Array<T> 而无需手动转换。
如果您之前显式构造 VarArray 以传递给此类方法,请注意 &VarArray 通过 Deref 强制转换为 &AnyArray,因此在大多数情况下应该不需要更改。
对于拥有的值(例如由虚函数返回的),您可以使用 upcast_any_array() 方法将 Array<T> 转换为 AnyArray。
核心 API 变更
内置方法的 Builder API
#1424: 内置类型(GString、Vector2、Color 等)现在支持 _ex() builder 模式来处理带默认参数的方法,这与引擎类方法已有的工作方式一致。
之前 (0.4):
#![allow(unused)] fn main() { let pi = GString::num(std::f64::consts::PI, 3); }
之后 (0.5):
#![allow(unused)] fn main() { let pi = GString::num_ex(std::f64::consts::PI).decimals(3).done(); }
非 _ex 变体仍然可用,并使用 Godot 的默认参数值。
在 v0.4 中,我们经常模拟 builder 模式——并且不一致:
- 通过要求所有参数
- 通过多个方法
- 通过我们手工制作的 builder
如果您使用了这些方法,您的代码需要更新为新的模式。
类型安全的 duplicate_node() 和 duplicate_resource()
#![allow(unused)] fn main() { let node: Gd<Node2D> = Node2D::new_alloc(); let copy: Gd<Node2D> = node.duplicate_node(); // 直接类型化。 // 用于细粒度控制的 Builder 模式: let copy = node.duplicate_node_ex() .flags(DuplicateFlags::SIGNALS | DuplicateFlags::GROUPS) .done(); let resource: Gd<Resource> = Resource::new_gd(); let copy: Gd<Resource> = resource.duplicate_resource(); // 深度复制 (Godot 4.5+): let deep = resource.duplicate_resource_ex() .deep(DeepDuplicateMode::ALL) .done(); }
旧的 Node::duplicate() 和 Resource::duplicate() 方法已被弃用,推荐使用这些新的类型安全变体。
几何 API 变更
#1447, #1461, #1463: 几种几何类型增加了新方法:
Aabb::get_endpoint()-- 返回包围盒的一个角顶点。Aabb清理:额外的方法如get_center()和get_support()(之前是support())。Rect2/Rect2i:角点构造函数和额外的实用方法。
Rect2、Rect2i 和 Aabb 上的 from_corners() 构造函数已被弃用,推荐使用 from_position_end(),它更好地描述了参数(位置 + 终点,而不是两个任意角点)。
模块重组
#1531, #1537: meta、register 和 signal 模块已被重组。如果您从这些模块导入特定项,您的导入路径可能需要更新:
| 符号 | 旧模块 (0.4) | 新模块 (0.5) |
|---|---|---|
GodotShape, GodotElementShape, Enumerator | godot::meta | godot::meta::shape |
ByValue, ByRef, ByObject, ArgPassing | godot::meta | godot::meta::conv |
ElementType | godot::meta | godot::meta::inspect |
GodotConvert (派生宏) | godot::register | godot::meta |
Export, Var (派生宏) | godot::register | godot::register::property |
TypedSignal, ConnectHandle, signal 类型 | godot::register | godot::signal |
PropertyHintInfo, PropertyInfo, MethodInfo | godot::meta | godot::register::info |
最常用的符号在 godot::prelude 中仍然可用,不受影响。
Trait 重命名:ArrayElement 和 PackedArrayElement
#1506: trait ArrayElement 和 PackedArrayElement 已分别重命名为 Element 和 PackedElement。
如果您在泛型代码中使用这些 trait 作为边界,请相应地更新名称。
其他变更
GFile::read_as_gstring_entire() 参数移除
#1494: skip_cr 参数已从 GFile::read_as_gstring_entire() 中移除,以在不同 Godot 版本之间提供统一的 API。
之前 (0.4):
#![allow(unused)] fn main() { let text = gfile.read_as_gstring_entire(true)?; }
之后 (0.5):
#![allow(unused)] fn main() { let text = gfile.read_as_gstring_entire()?; }
GString、StringName 和 NodePath:移除 .arg() 方法
GString 和 StringName 上的 .arg() 方法已被移除。它们曾用于在将参数传递给期望不同字符串类型的函数时在 Godot 字符串类型之间进行转换。其思路是提出一个更通用的 AsArg 转换方法,将来可能会保留 .arg() 名称用于此目的。
要迁移,请使用 T::from():
之前 (0.4):
#![allow(unused)] fn main() { // Node::is_in_group() 接受 impl AsArg<StringName> let group: GString = some_group_name(); node.is_in_group(group.arg()); }
之后 (0.5):
#![allow(unused)] fn main() { let group: GString = some_group_name(); node.is_in_group(&StringName::from(&group)); }
环境变量重命名
#1521: 所有环境变量现在都使用统一的 GDRUST_ 前缀。旧的名称仍然被识别,但会发出弃用警告。
| 旧名称 | 新名称 |
|---|---|
GODOT4_BIN | GDRUST_GODOT_BIN |
GODOT4_GDEXTENSION_JSON | GDRUST_GODOT_API_JSON |
GODOT_RUST_NOWARN | GDRUST_SUPPRESSED_WARNINGS |
| (v0.5 中新增) | GDRUST_MAIN_EXTENSION |
移除的弃用符号
#1459: 在 v0.4 周期中被弃用的所有符号已被移除。如果您已经在 v0.4.5 中处理了所有弃用警告,那么您应该基本可以了。下表列出了移除的符号及其替代品:
| 移除的符号 | 替代方案 |
|---|---|
VariantArray (类型别名) | VarArray |
ClassName (类型别名) | ClassId |
GodotClass::class_name() | GodotClass::class_id() |
WithBaseField::apply_deferred() | run_deferred() + run_deferred_gd() |
Gd::apply_deferred() | Gd::run_deferred() + Gd::run_deferred_gd() |
Callable::from_local_fn() | Callable::from_fn() |
Callable::from_local_static() | Callable::from_class_static() |
*::hash() (Godot 哈希值) | *::hash_u32() |
Array::bsearch_custom() | Array::functional_ops().bsearch_custom() |
ExtensionLibrary::on_level_init() | ExtensionLibrary::on_stage_init() |
ExtensionLibrary::on_level_deinit() | ExtensionLibrary::on_stage_deinit() |
ExtensionLibrary::on_main_loop_startup() | on_stage_init(InitStage::MainLoop) |
ExtensionLibrary::on_main_loop_shutdown() | on_stage_deinit(InitStage::MainLoop) |
#[class(no_init, base=EditorPlugin)] (警告) | 现在是硬编译错误;使用 #[class(init)] |